


Frequently Asked Questions
What You Will Need:
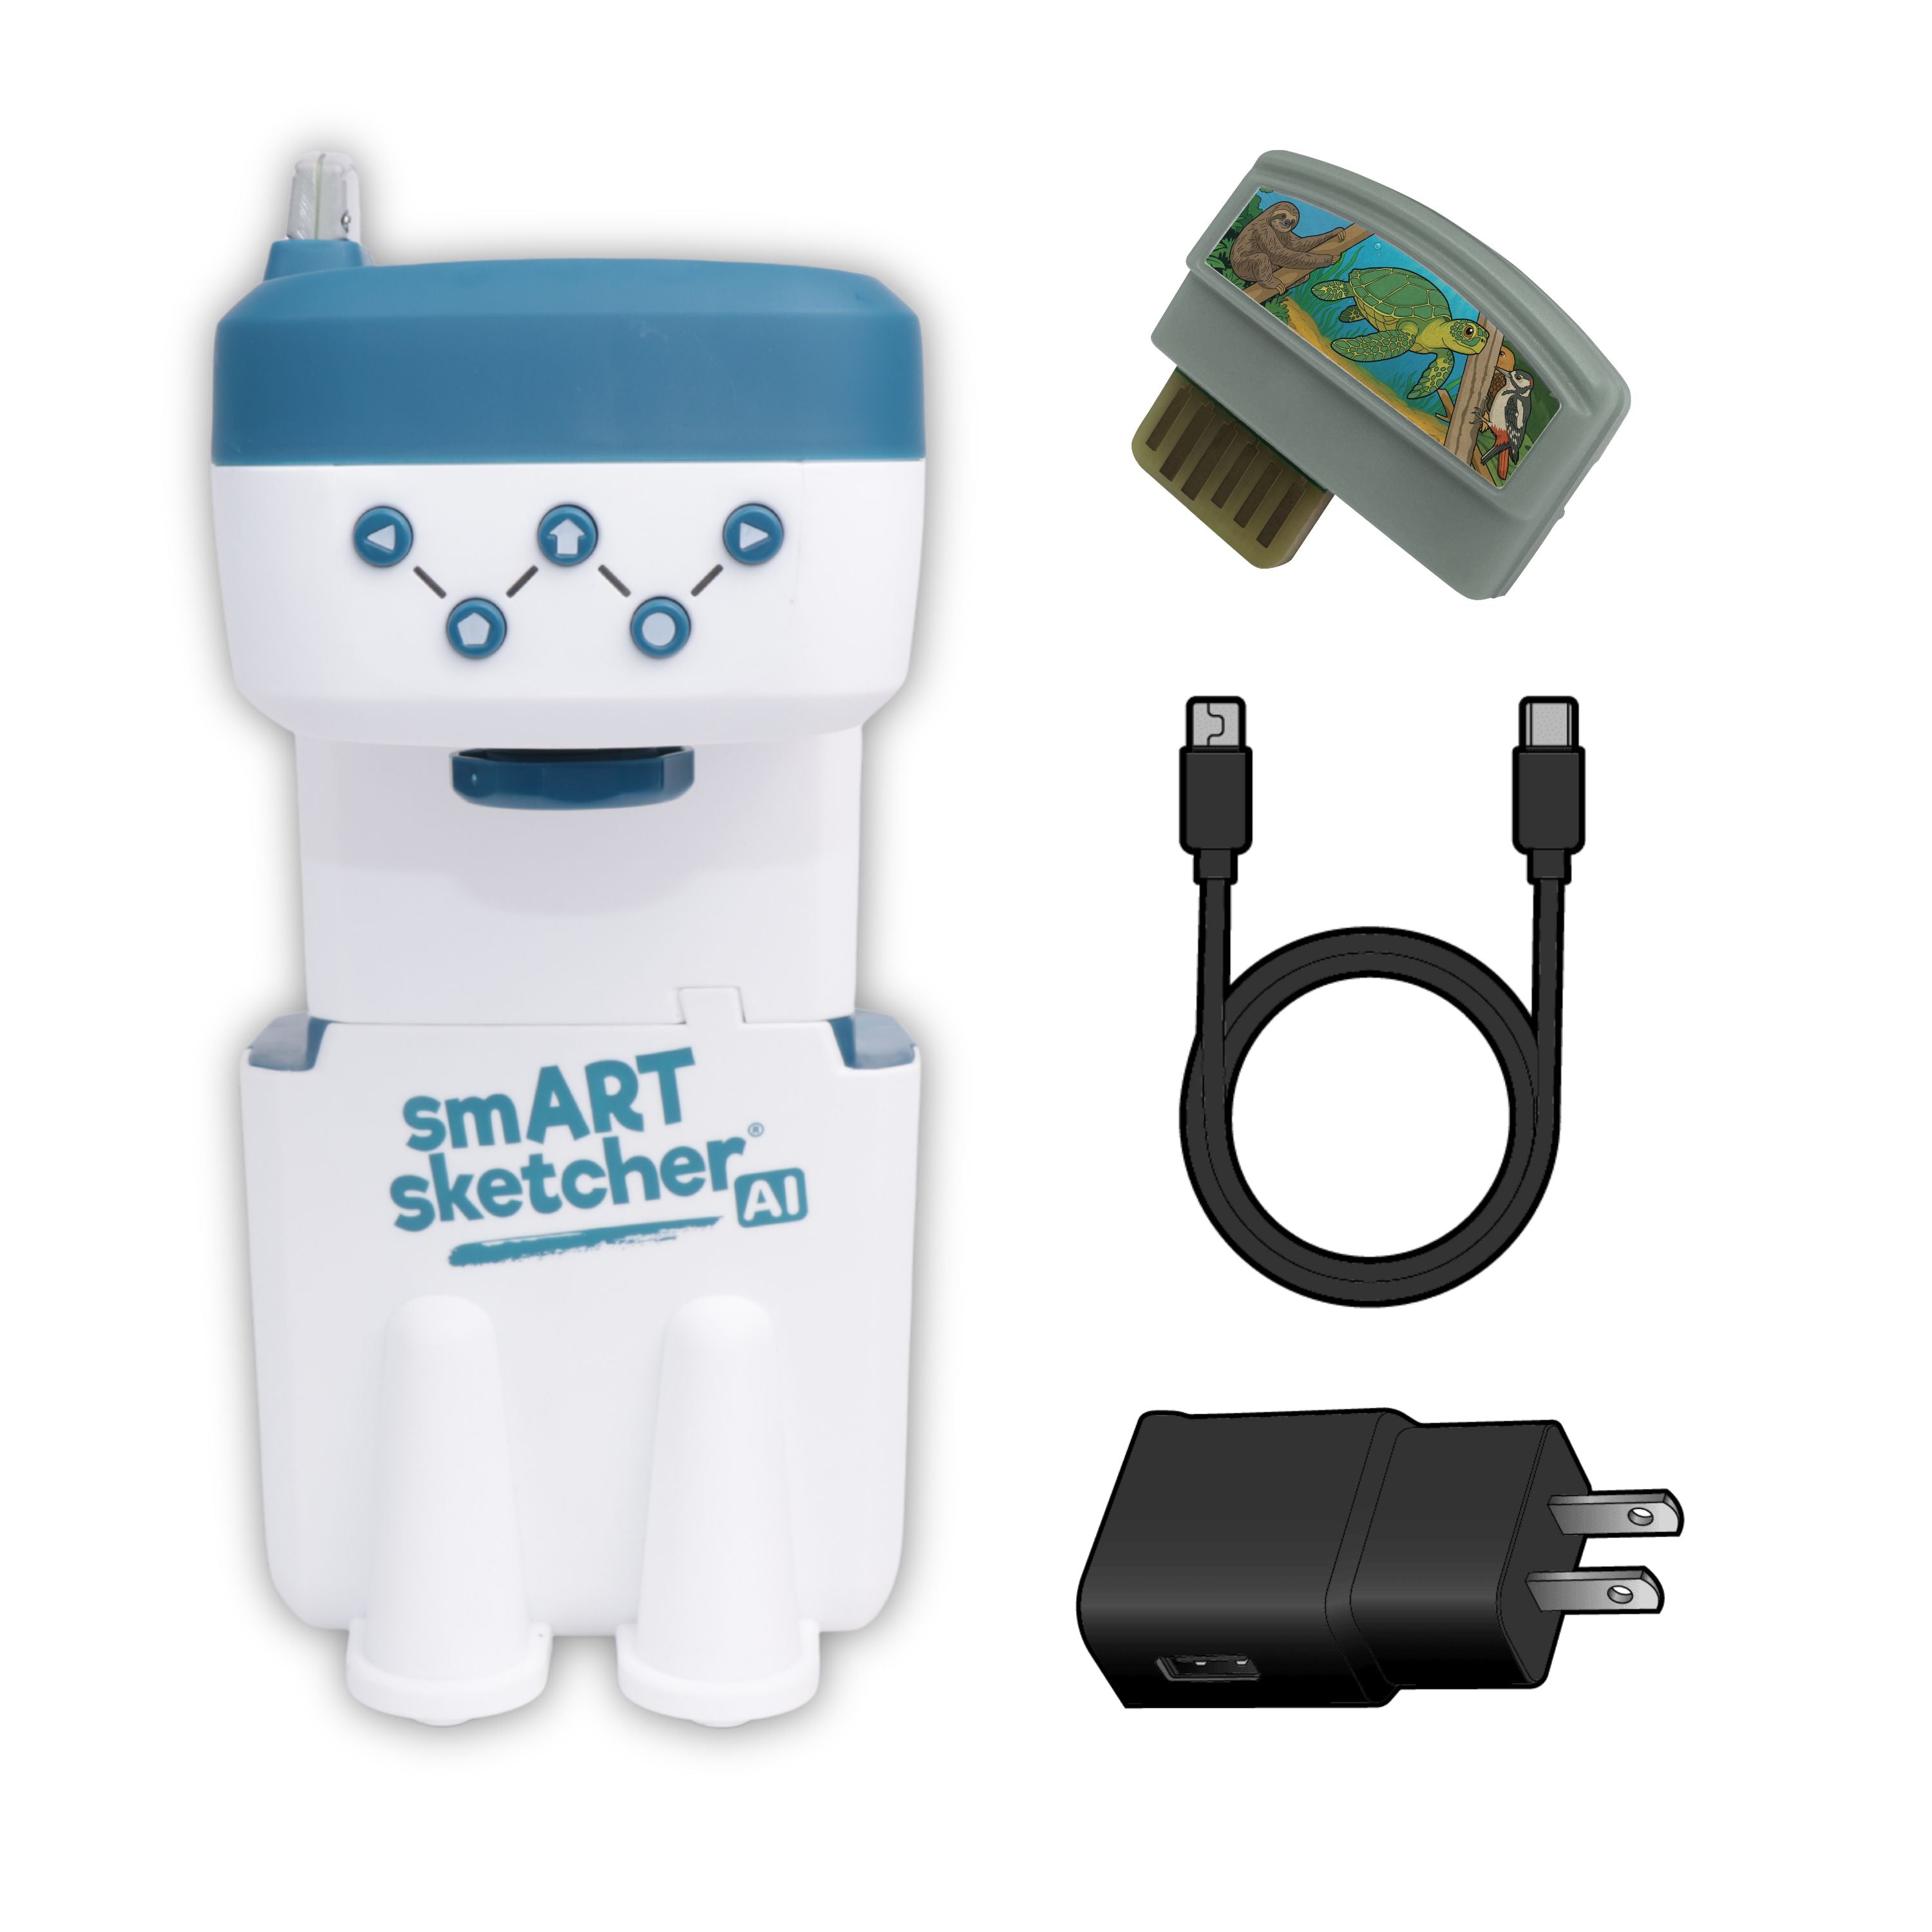
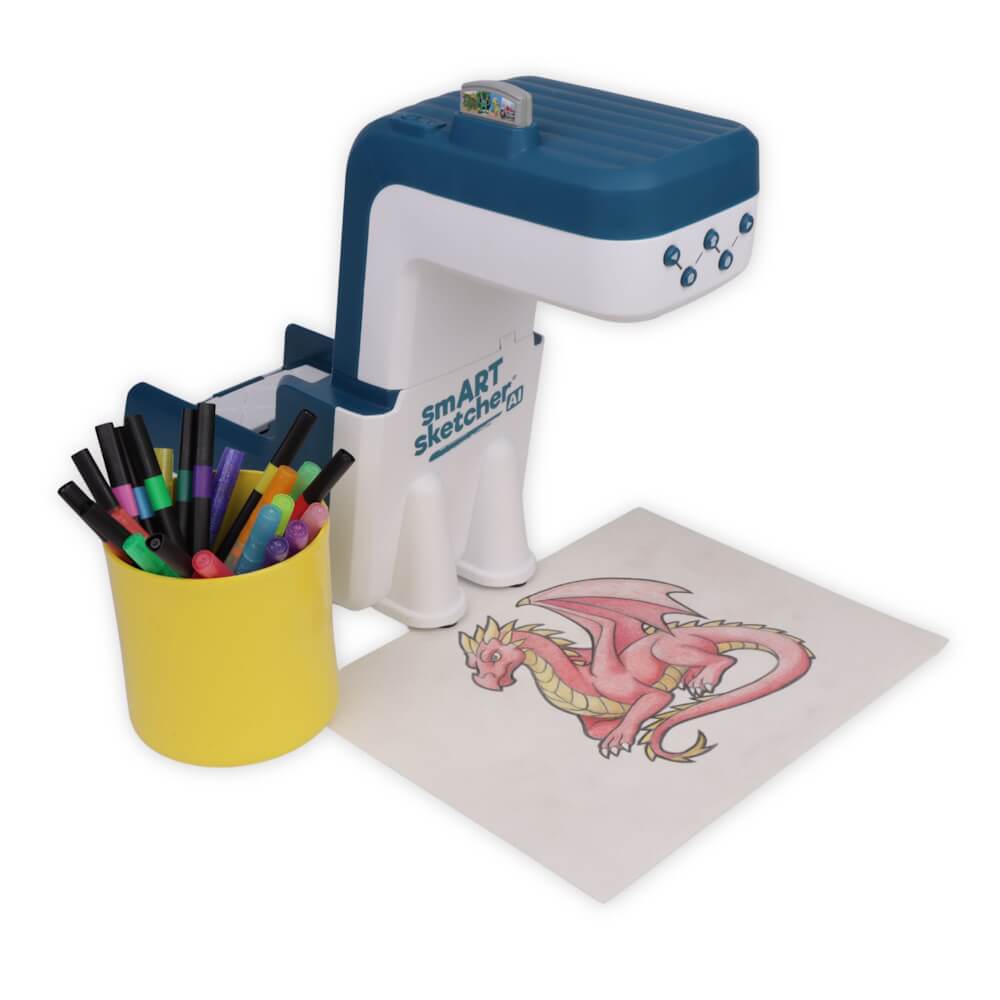
- smART sketcher® AI.
- USB-C cord (included) and a USB-C power plug (not included).
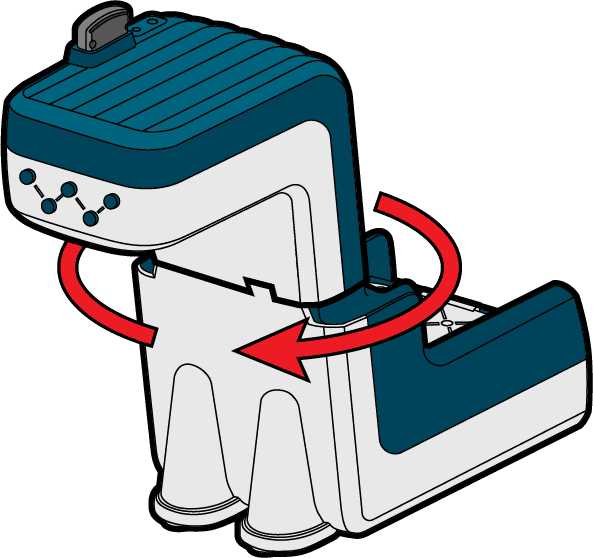
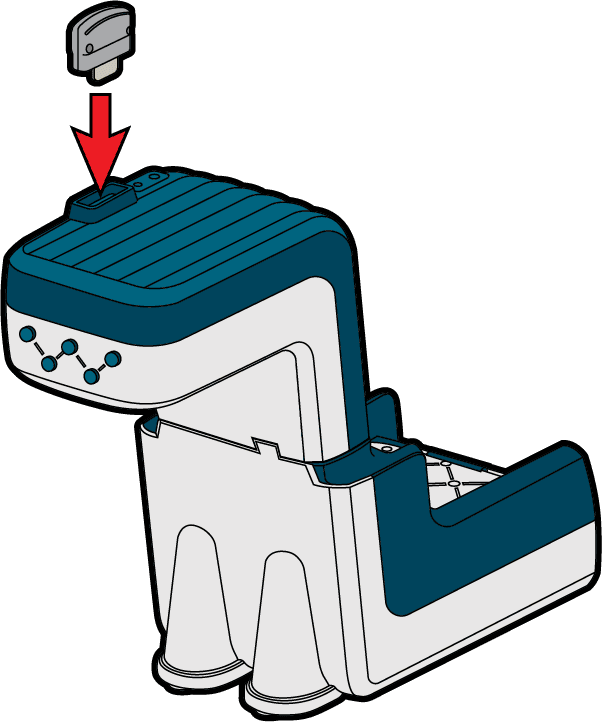
1. Separate the smART sketcher® AI head from the base unit.
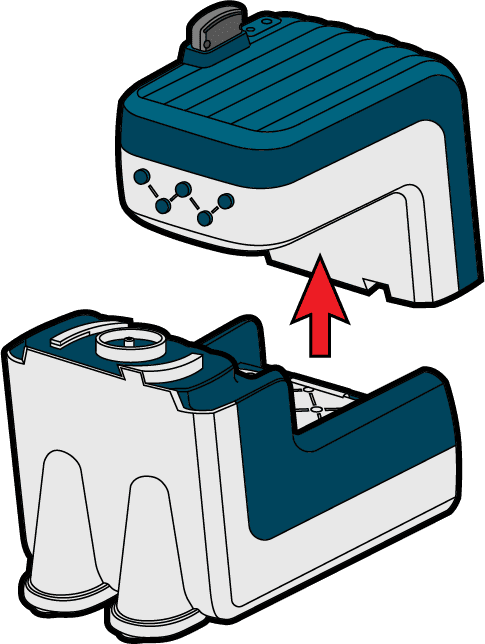
2. Place the head on the connector base according to the below image.
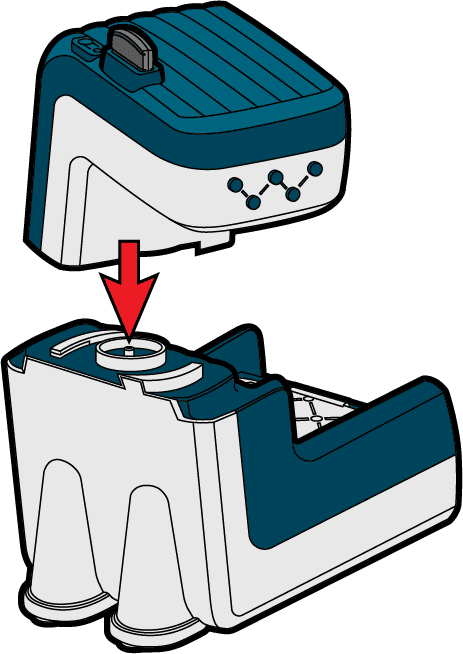
3. Rotate the head clockwise until the head is aligned with the body.
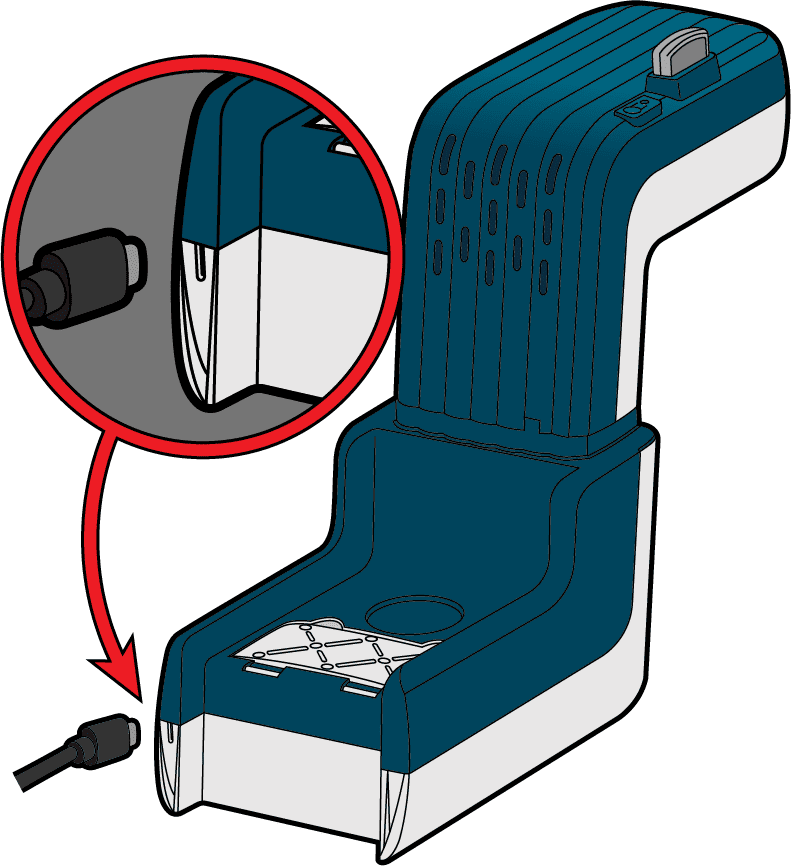
4. Plug one end of the USB-C cord into the back of the unit. Plug the other end of the USB-C cord into a USB-C power plug that you provide (Output voltage 5V DC Max, Amperage of at least 2.0A).
WARNING!
DO NOT PLUG THE USB CORD INTO A LAPTOP OR COMPUTER!
WARNING!
POWERING THE PROJECTOR WITH A POWER PLUG THAT DELIVERS A VOLTAGE OF MORE THEN 6V WILL DAMAGE THE PROJECTOR!
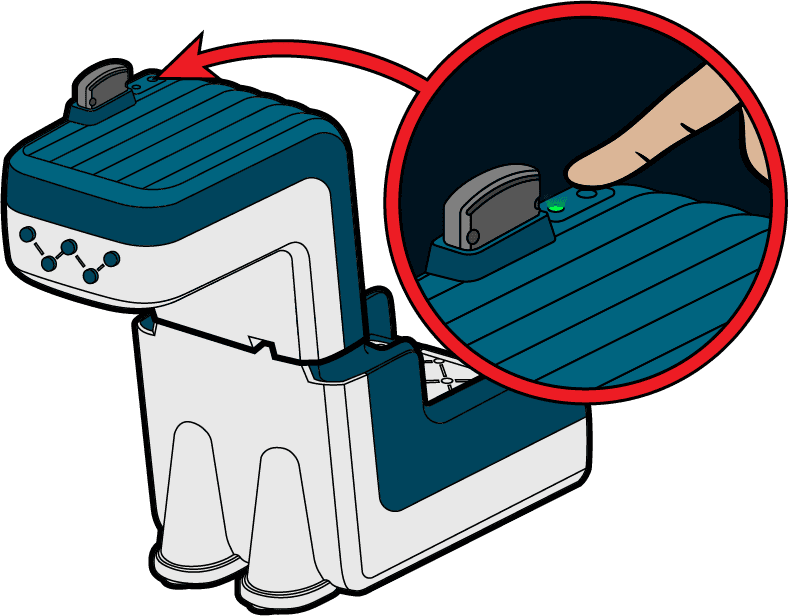
5. Press the On/Off button located on the top of the device to turn on the smART sketcher® AI.
6. Get sketching!
Once finished, press on On/Off button to turn off the smART sketcher® AI. NOTE: the smART sketcher® AI will automatically turn off after 30 minutes of no activity.
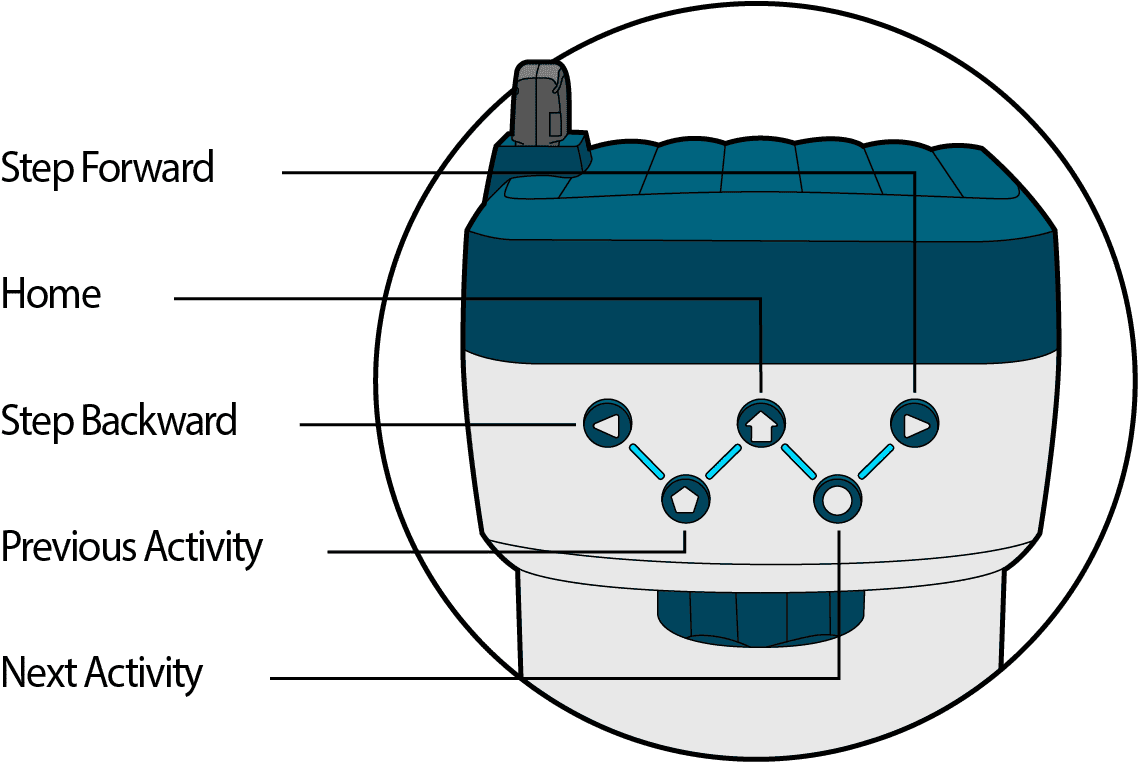
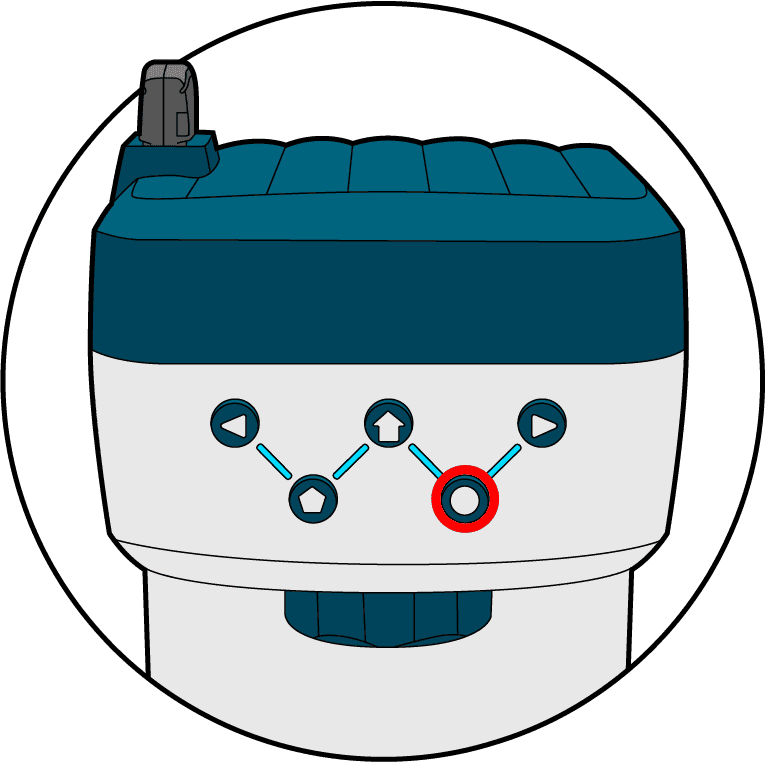
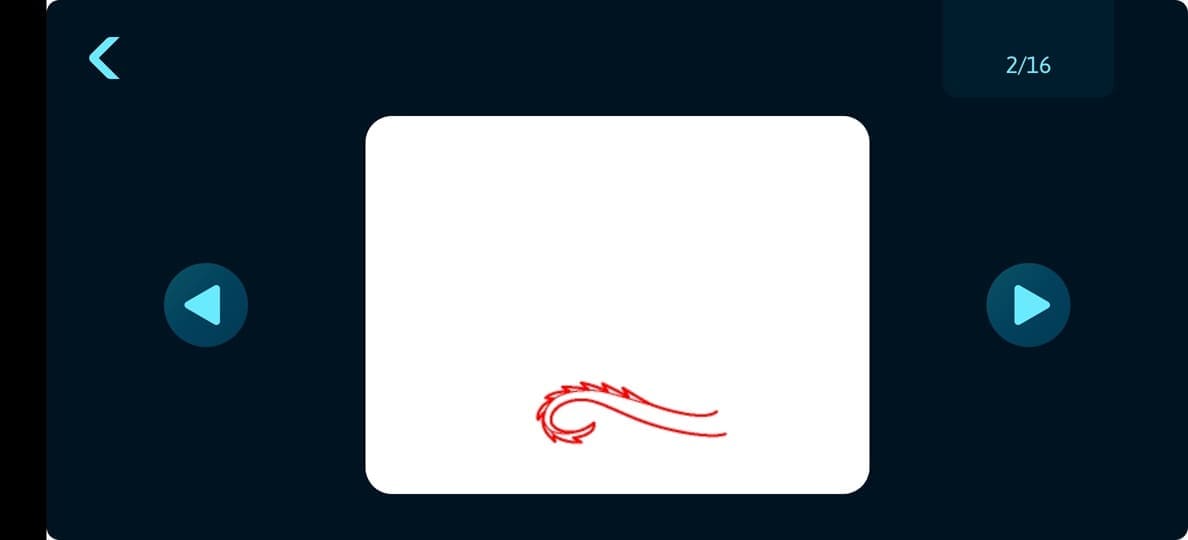
1. Press the Home button to go to the first activity on the cartridge.
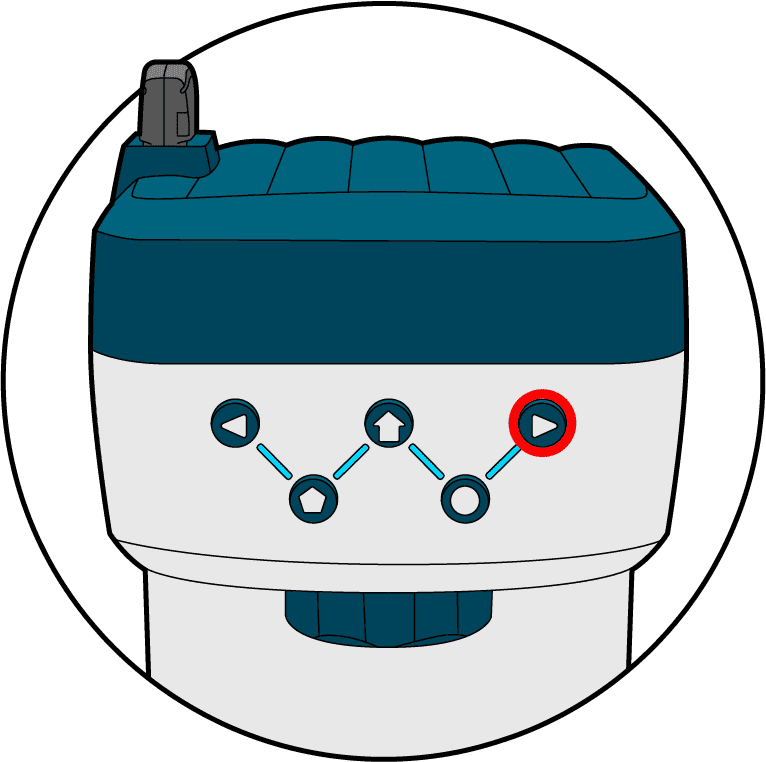
2. Press the Arrows buttons to Go Forward or Go Backward a step.
3. Press the Pentagon button to Go to the Previous activity or press the Circle button to Go to the Next activity.
How to draw using an activity cartridge
What You Will Need:
- smART sketcher® AI.
- 1 Pre-loaded activity cartridge.
- Drawing tools such as pencils, crayons and markers.
- Paper (any A4/Letter printer paper).
1. Press the On/Off button located on the top of the device to turn on the smART sketcher® AI.
2. If not already inserted, insert the content cartridge into the projector head. The first drawing on the cartridge will be projected.
3. Press the Circle button to go forward and browse through the cartridge content to select a drawing.
4. Once you have selected a drawing, press the Forward arrow button to start. Trace the projected step in red, than press the Forward arrow button to move to the next step.
5. When you’ve completed all the steps, finish drawing by adding your own details and color.
What you will need:
- smART sketcher® AI.
- A smart device running either iOS 15.0+ or Android 10.0+.
- The smART sketcher® AI App (iOS or Android). iOS app download / Android app download.
1. Turn on your smART sketcher® AI.
2. Download the smART sketcher® AI App from the relevant App store.
3. Turn on Bluetooth on your device. Note: no need to pair and/or connect your device to the smART sketcher® AI from your device Bluetooth settings menu; The App will automatically locate the smART sketcher® AI.
4. Open the smART sketcher® AI App on your device.
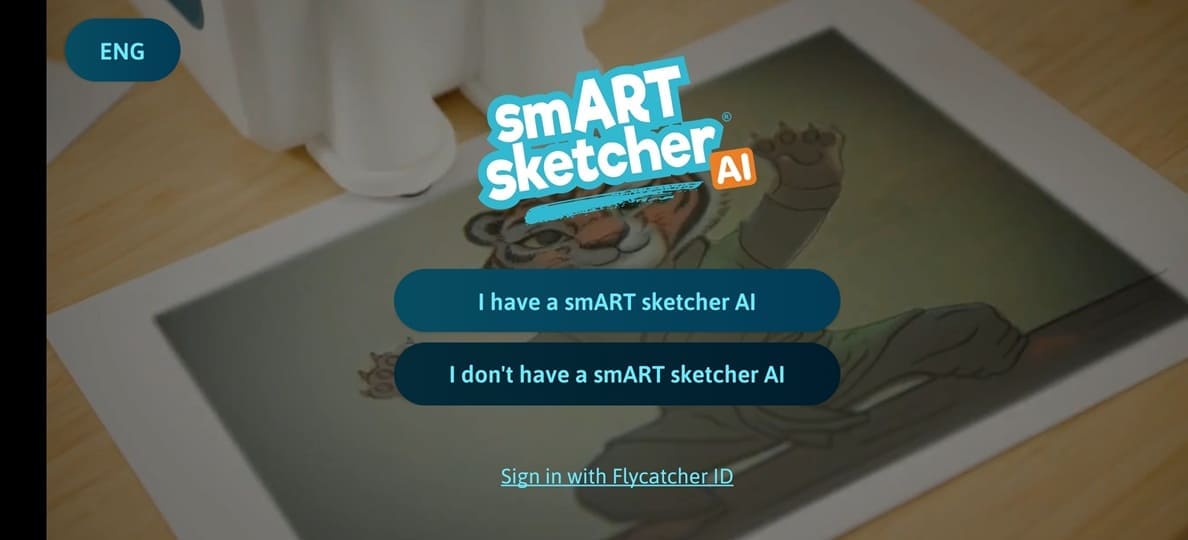
5. Tap the I have a smART sketcher AI button in the welcome screen and navigate to the Bluetooth connection screen - you might need to provide permission to enable Bluetooth connection and find nearby devices (on Android prior to Android 12, you will need to enable Location services and to provide permission for Location services; this is required in order to allow the App to connect to the smART sketcher® AI). You can see more details in the following Link.
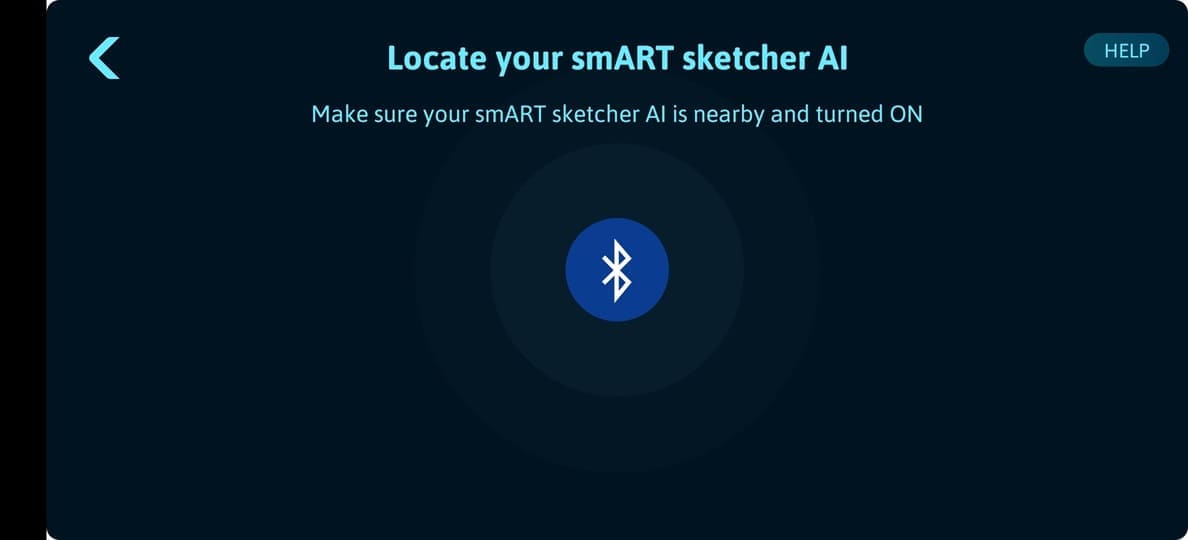
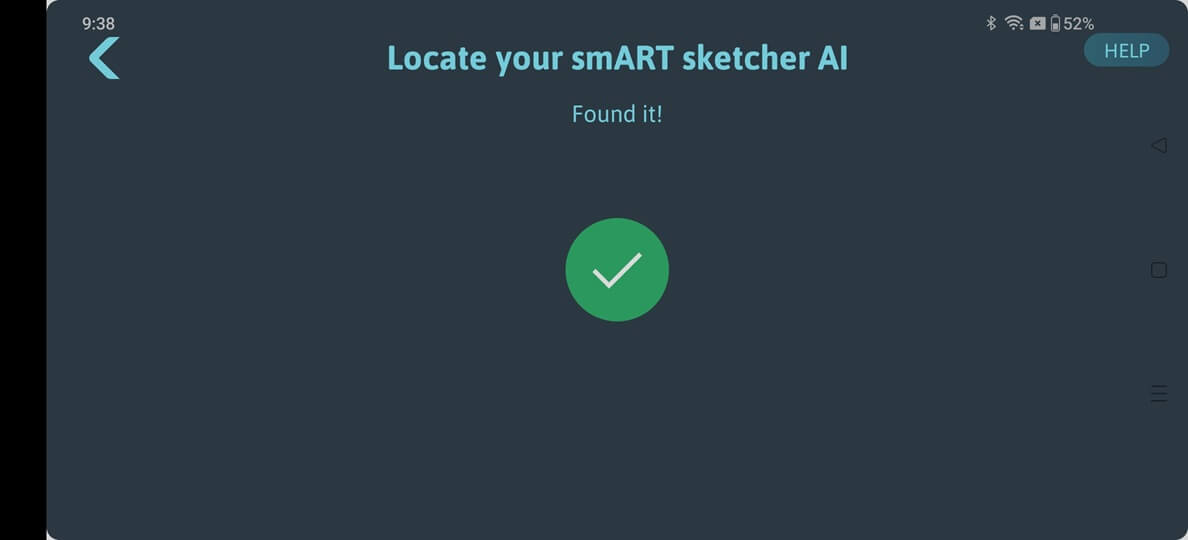
6. The App will search for a nearby smART sketcher® AI projector. If a projector is found, it will automatically connect to it.
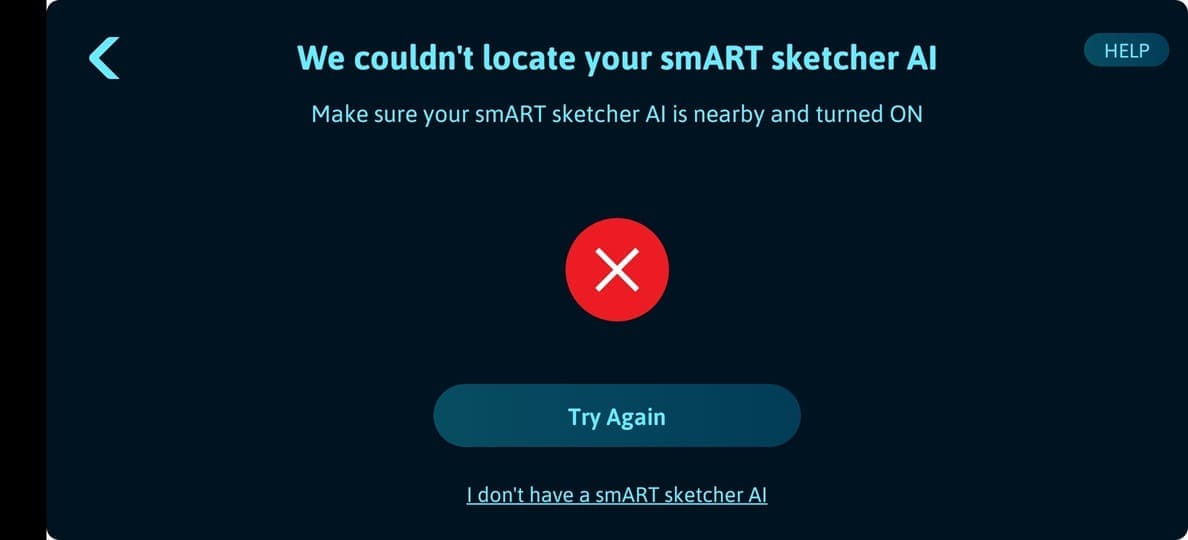
If no smART sketcher® AI device is found, you can tap the Try Again button to re-try a connection establishment.
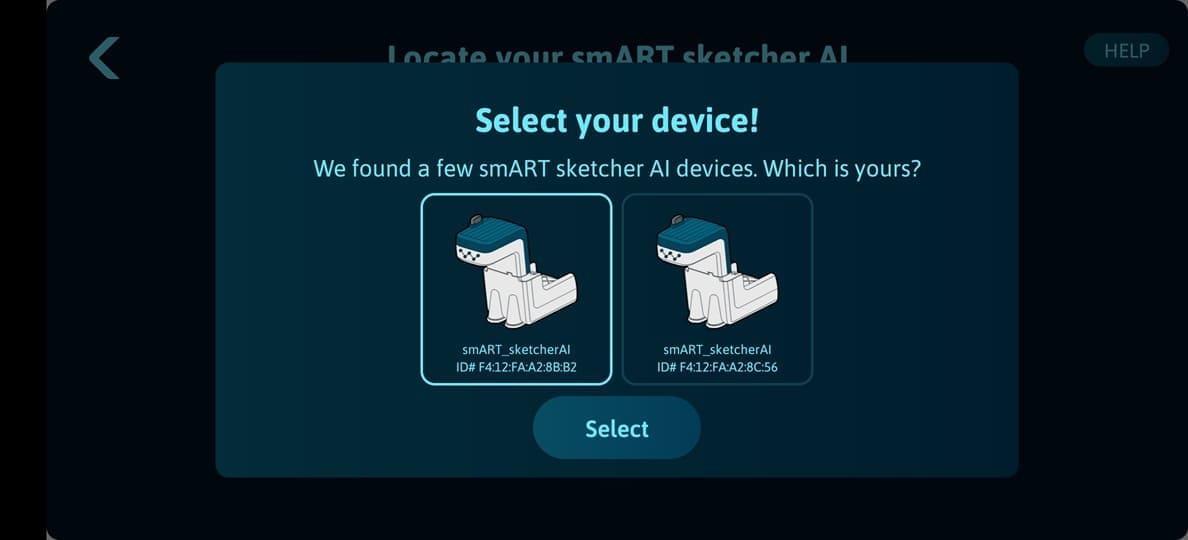
7. If multiple smART sketcher® AI projectors are nearby, the App will display a list of the detected projectors. Select the projector you want to connect to from the list.
8. Success! The App is now connected to the smART sketcher® AI via Bluetooth.
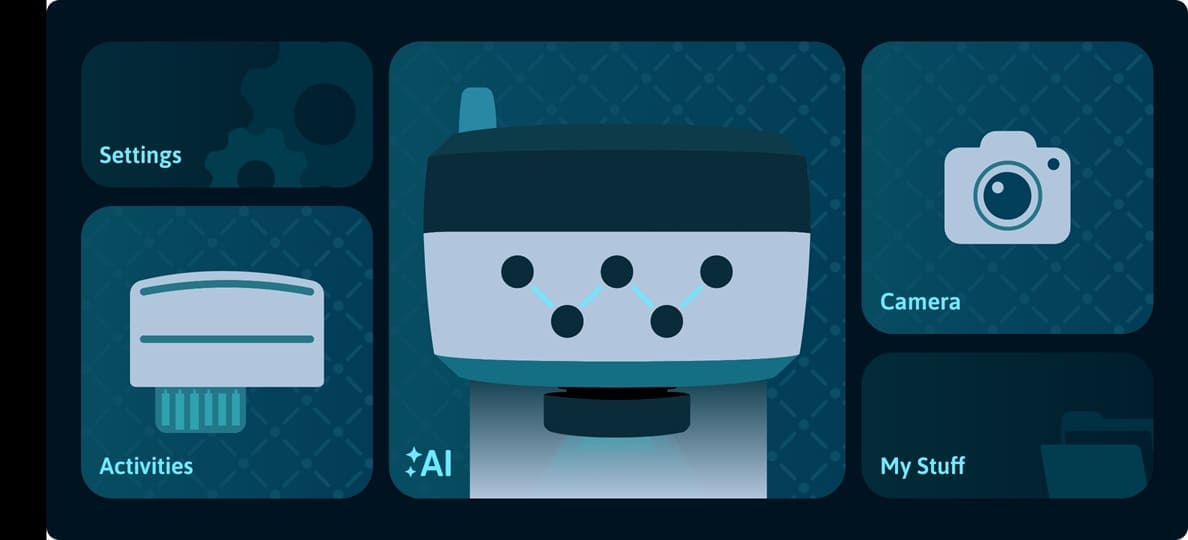
From the main screen you can now select to generate AI images by tapping the AI button, trace a step-by-step drawing from the content cartridge by tapping the Activities button or take a picture and send it to the projector for tracing by tapping the Camera button.
If the app fails to connect to the smART sketcher® AI, follow the troubleshooting steps in this Link.
How to draw using an activity cartridge and a mobile/tablet device
What You Will Need:
- smART sketcher® AI.
- 1 Pre-loaded activity cartridge.
- An Apple/Android smart device (mobile or tablet) running iOS 15+ or Android 10+.
- Drawing tools such as pencils, crayons, and markers.
- Paper (any A4/Letter printer paper).
1. Press the On/Off button located on the top of the device to turn on the smART sketcher® AI.
2. If not already inserted, insert the content cartridge into the projector head. The first drawing on the cartridge will be projected.
3. Connect your mobile device to the smART sketcher® AI via Bluetooth. (See instructions on how to connect the App for further details.)
4. On the main screen, tap the Activities button.
5. If an activity content cartridge is inserted into the smART sketcher® AI and the smART sketcher® AI successfully detected the cartridge, the App will download the activity content onto the smart device. This step occurs only once for each cartridge type used.

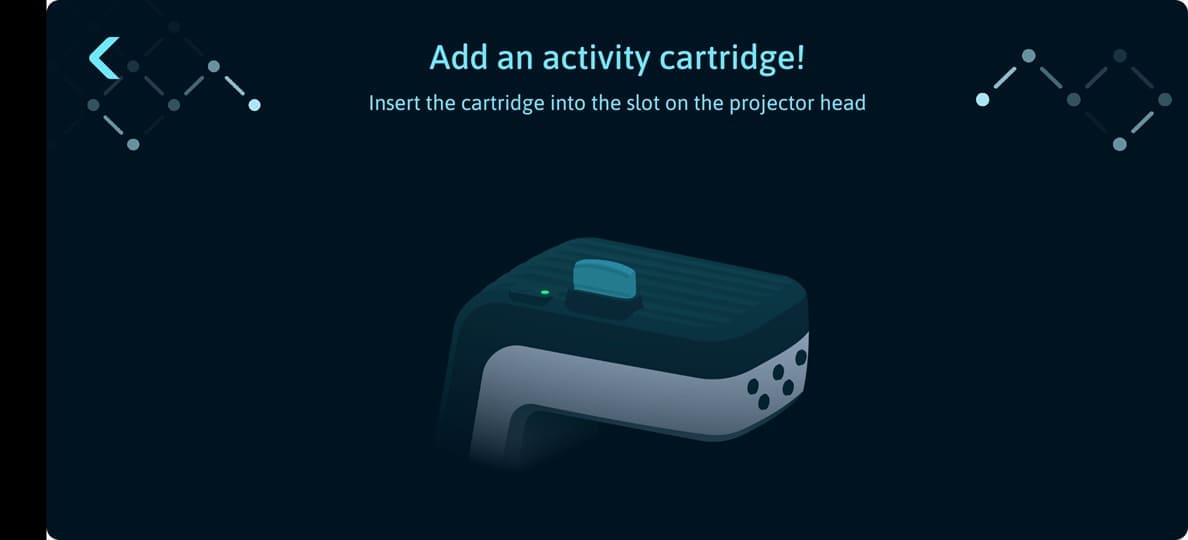
If no activity content cartridge is detected by the smART sketcher® AI you will see the Add an activity cartridge! screen.
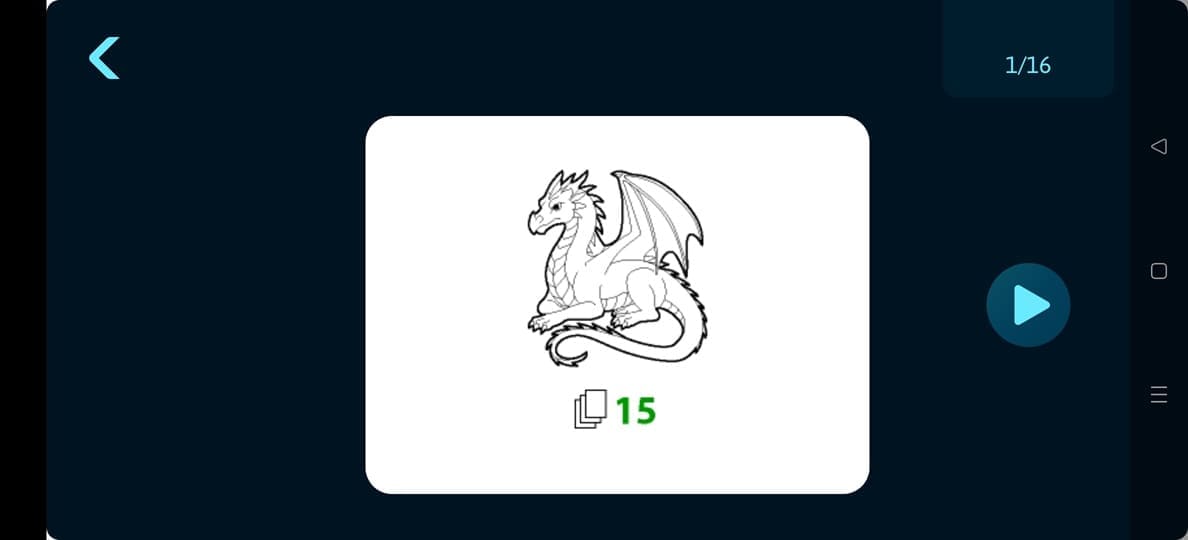
6. In the Activities screen, swipe right or left to browse all the drawings available on the activity content cartridge.

7. Select your desired drawing by pressing it, the screen will show your selected drawing and the number of steps.
8. Tap the Forward arrow button to draw the first step.
9. Keep drawing and tapping the Forward arrow button until you have completed all of the steps.
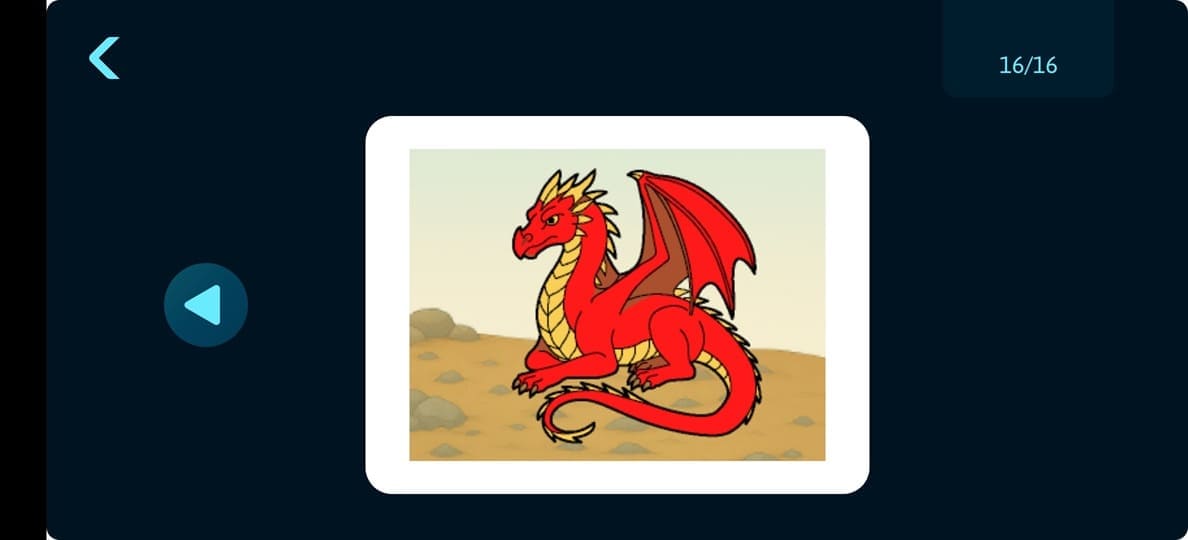
10. Great job! When your drawing is done you can add more colors and details as you want.
With the smART sketcher® AI, you can draw anything you can imagine.
1. Make sure your smART sketcher® AI is connected to the App using Bluetooth. (See instructions on how to connect the App for further details.)
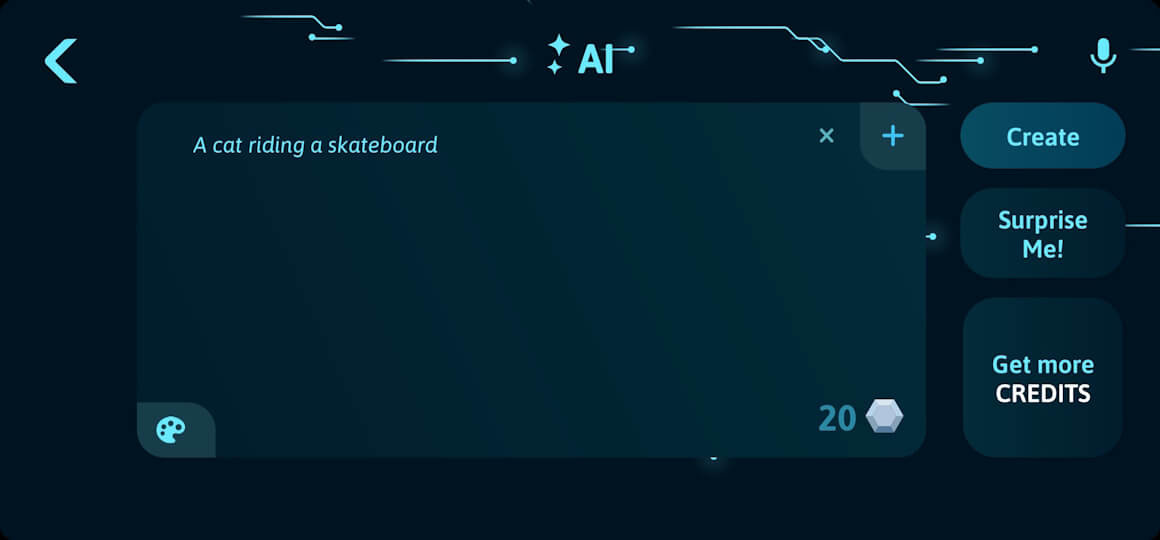
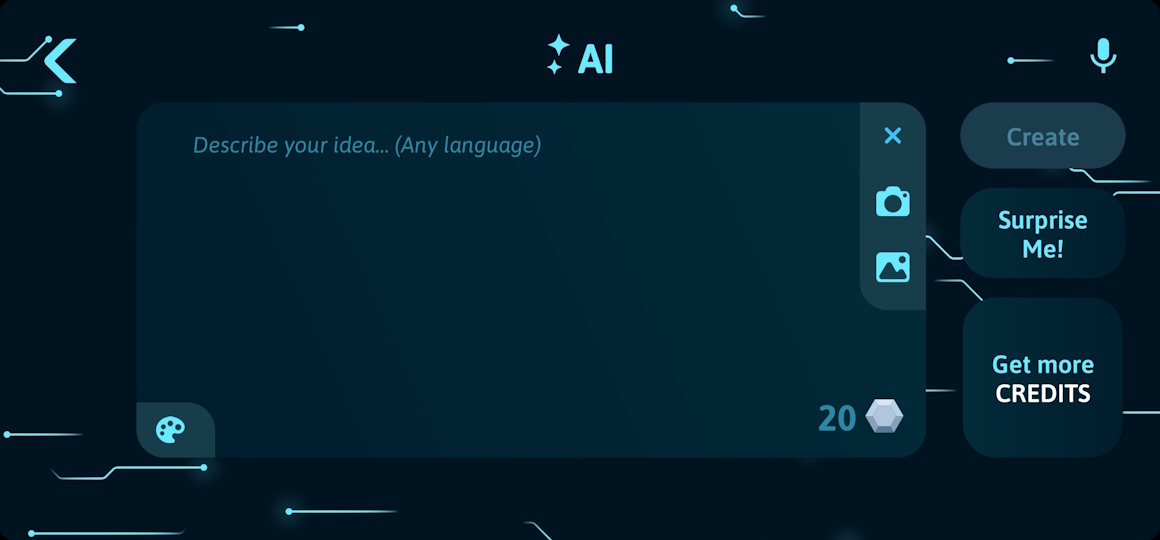
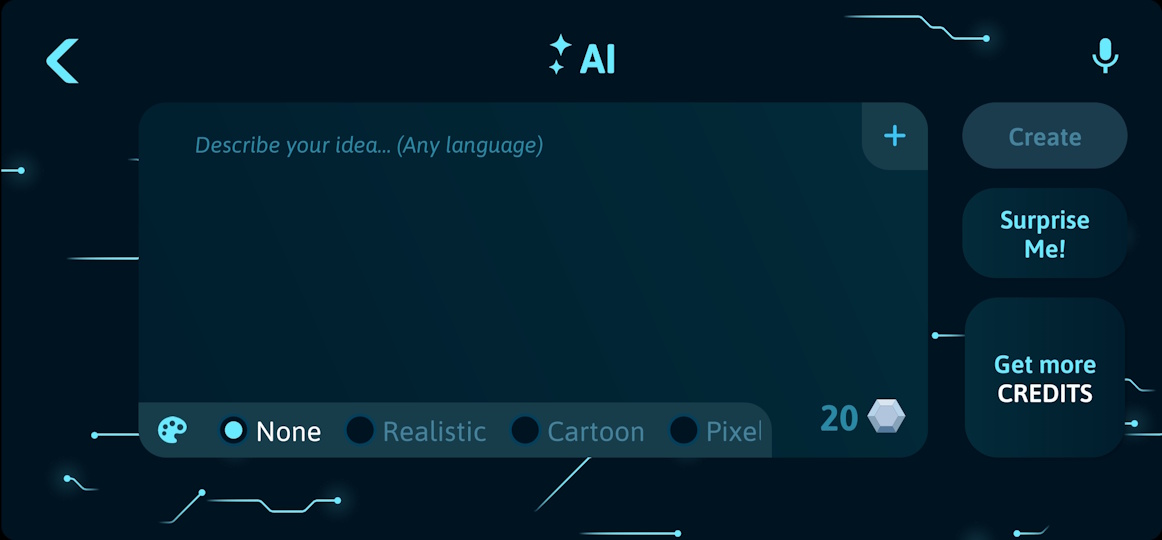
2. On the main screen, tap the AI button to launch the AI prompt screen.
3. Write your prompt in the prompt text area (Any language). You can also tap the Surprise Me! button to get random AI generated prompts for inspiration. To select the style of the generated image, tap the Colors Palette button and select one of the available image styles. If you select None, the style will be randomly decided by the AI Engine (see this Link for more image style tips).
Once ready, tap the Create button to move to the next screen.
Tip: you can also use speech to text to enter your prompt:
- Android users: tap the mic icon on the top right of the screen, select the speech to text engine and speak your prompt.
- iOS users: tap the prompt text area to show the keyboard. Tap the mic icon on the keyboard and speak your prompt.
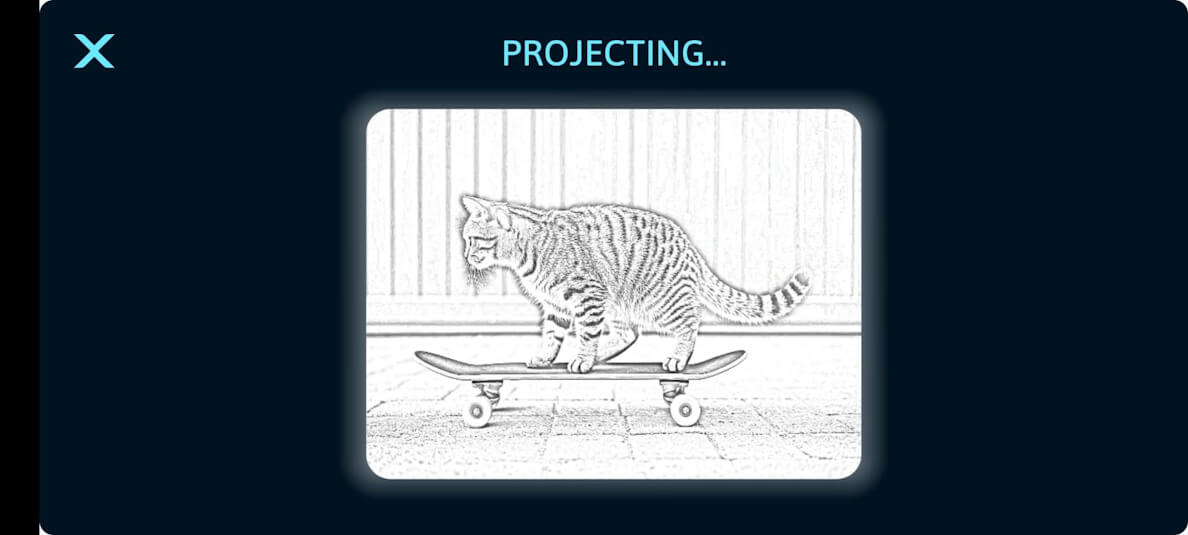
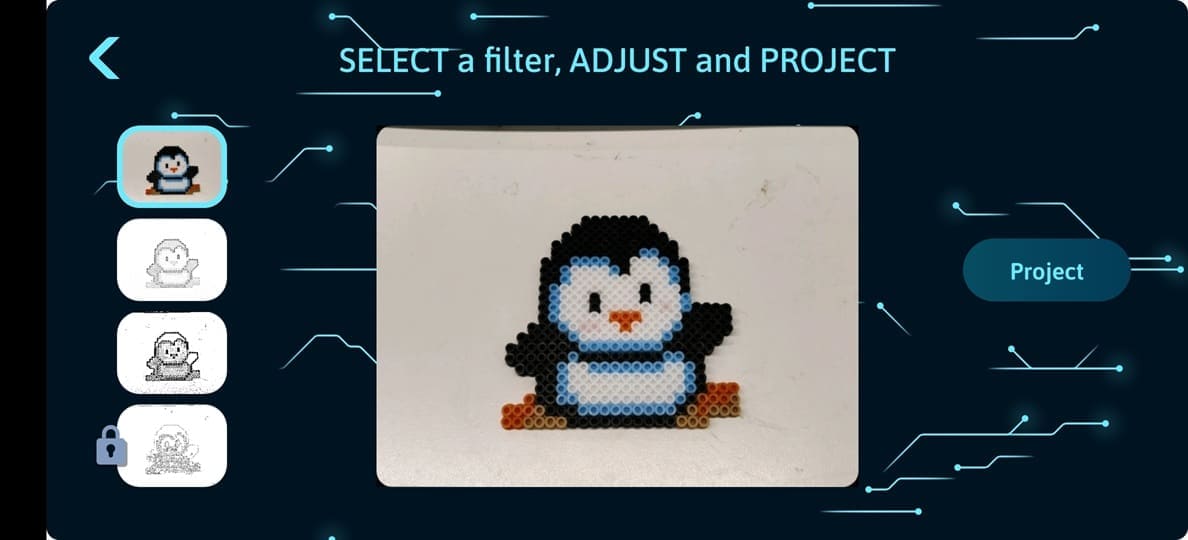
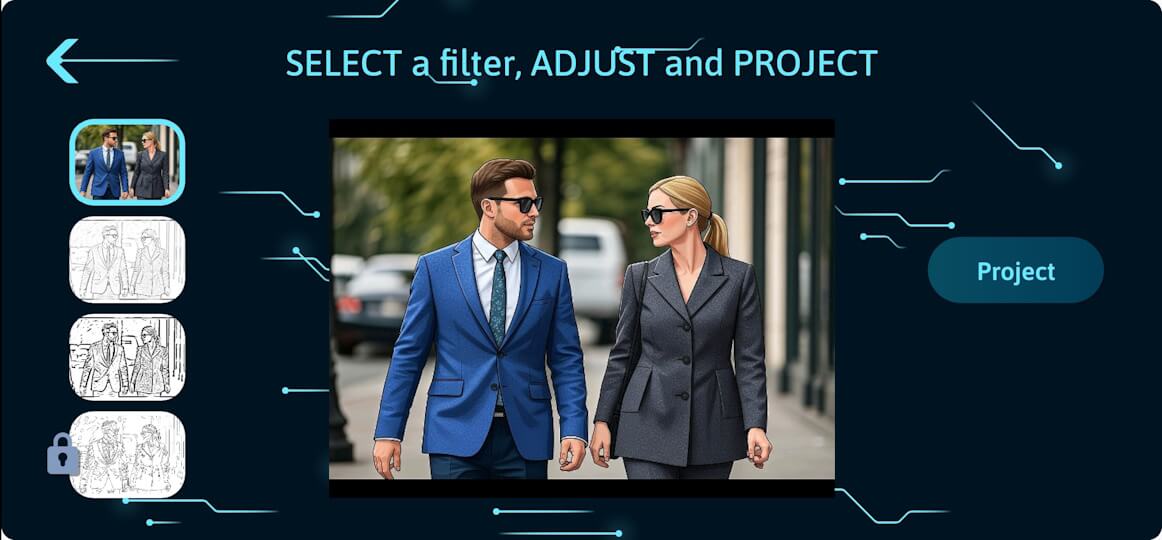
4. Your generated AI image is ready!. Select one of the four filters at the bottom of the screen (adjust the filter level by swiping the slider). Please note that the 4th filter (the one with the lock) is the step-by-step filer that is only available for users that purchase a subscription plan.
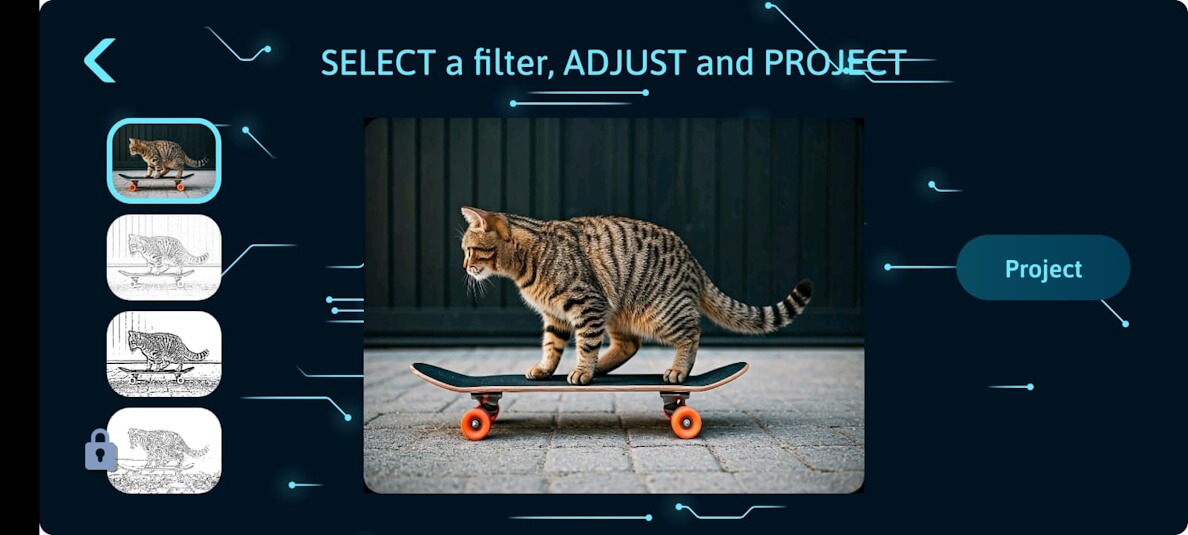
5. Press the PROJECT button to transfer the image to the smART sketcher® AI. If you selected the step-by-step filter, use the arrow button in the app to progress to the next steps.
NEW - Enhanced AI Image Generation:
You can enhance your AI Image creations by uploading your own image (from your photo gallery or directly through the in-app camera) and writing a prompt to manipulate it.
1. To upload an image from your photo gallery or in-app camera, just tap the + button in the AI Prompt screen.
![]()
2. In the now open sidebar menu, tap the Image button to open the photo gallery selection screen (you might need to grant photo gallery access to the App on the first time) or tap the Camera button to take a picture using the in-app camera.
3. Select the requested image (photo gallery) or snap a picture. Once done, the App will return to the prompt screen and will upload the image to the AI Engine.
![]()
To remove a selected image for upload, tap the small X button above the image.
NOTE #1: Standard AI Image generation "costs" 1 credit per image generation. Enhanced AI Image generation (request with image upload) "costs" 2 credits per image generation. See this Link for more details on how to get more credits. If an image generation request fails due to inappropriate prompt text or source image (violence, nudity, racism, etc.) there is no credit charge.
NOTE #2: All AI generated images are automatically stored locally on your mobile device and can be accessed via My Stuff from the main App screen.
With the smART sketcher® AI, you can draw anything you can see. Just take a picture and begin!
1. Make sure your smART sketcher® AI is connected to the App using Bluetooth. (See instructions on how to connect the App for further details.)
2. On the main screen, tap the Camera button to launch the camera preview screen.
3. Choose one of the four filters at the left side of the screen; the filter will be applied in real-time for preview (adjust the filter level by swiping the slider). Please note that the 4th filter (the one with the lock) is the step-by-step filer that is available for users that purchase a subscription plan.
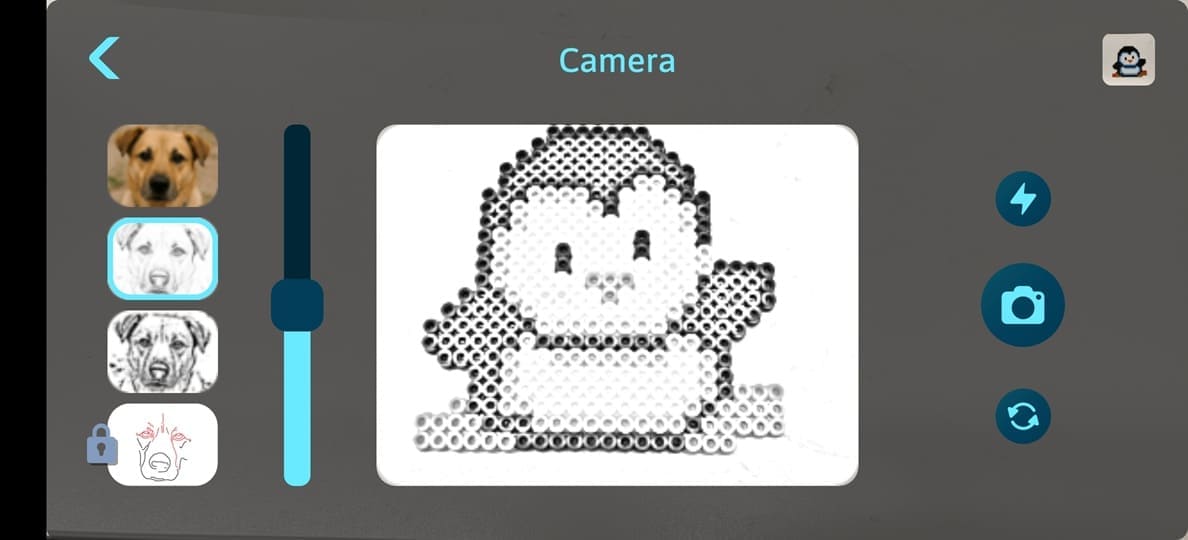
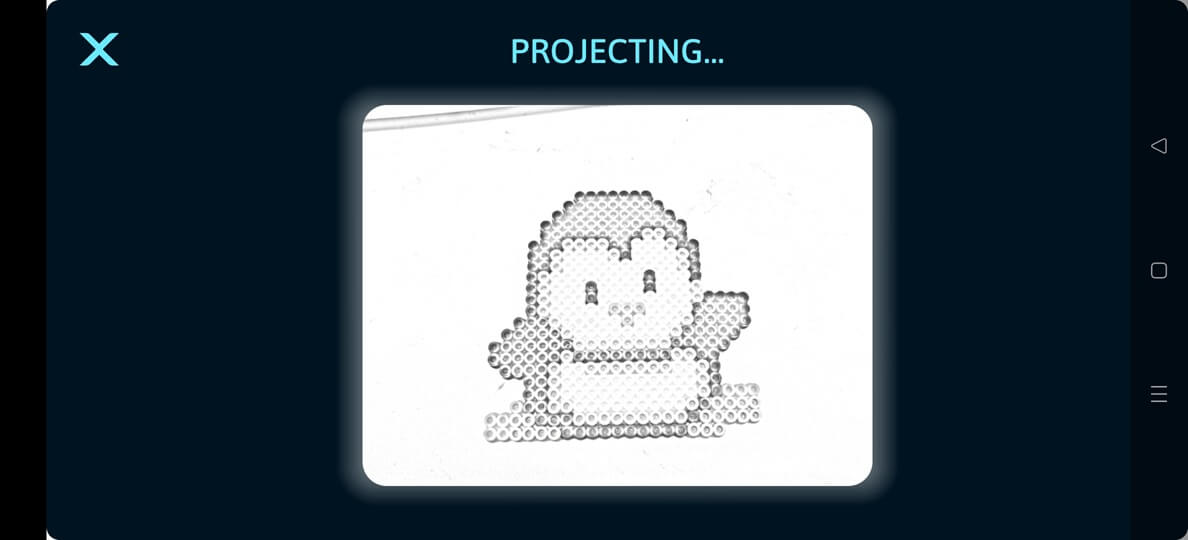
4. Press the Camera button (on the right side) to take a picture and to transfer the image to the smART sketcher® AI. If you selected the step-by-step filter, use the arrow button in the app to progress to the next step.
NOTE: any picture that you take using the in-app camera is automatically stored locally on your mobile device and can be accessed via My Stuff from the main App screen.
5. Get Sketching!
With the smART sketcher® AI, you can sketch any picture you’ve saved on your smart mobile/tablet device!
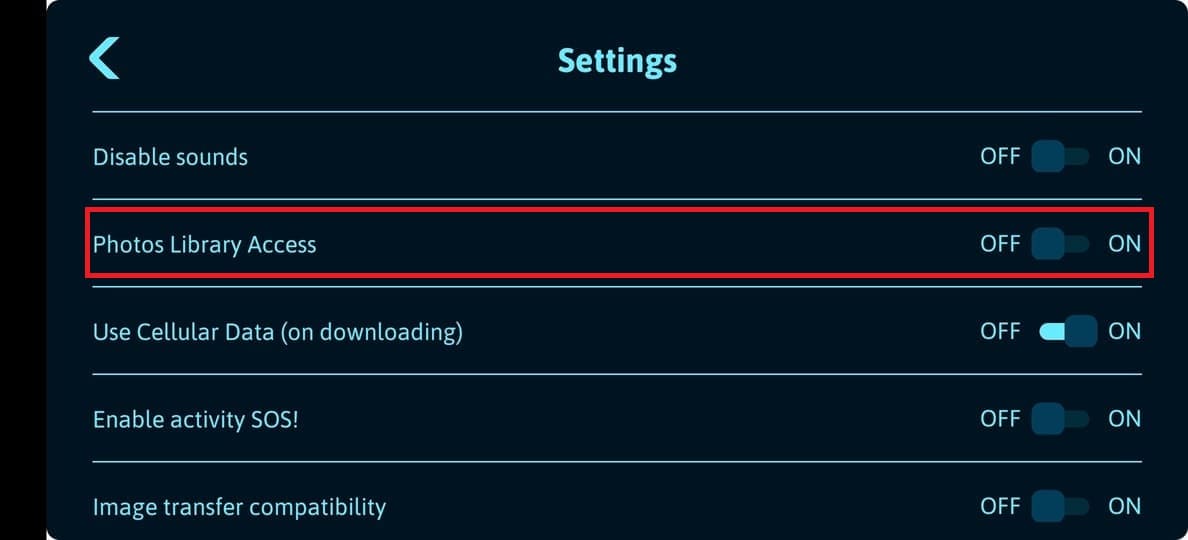
You will first need to enable Photos Library Access from the App Settings and optionally grant OS permission depending on your mobile device OS platform and version. Note that this is required only once.
Note: If you don't see all of the images that you have in your photos library on your mobile device this is because you initially allowed the smART sketcher® AI app access to Selected Photos only. If you want to be able to browse all the images in your photos library you need provide our app access to All Photos (See more details below).
1. Make sure your smART sketcher® AI is connected to the App using Bluetooth (See instructions on how to connect the App for further details).
2. In the App Settings screen (accessible by tapping the Settings button in the main screen), Enable access to your photos library.
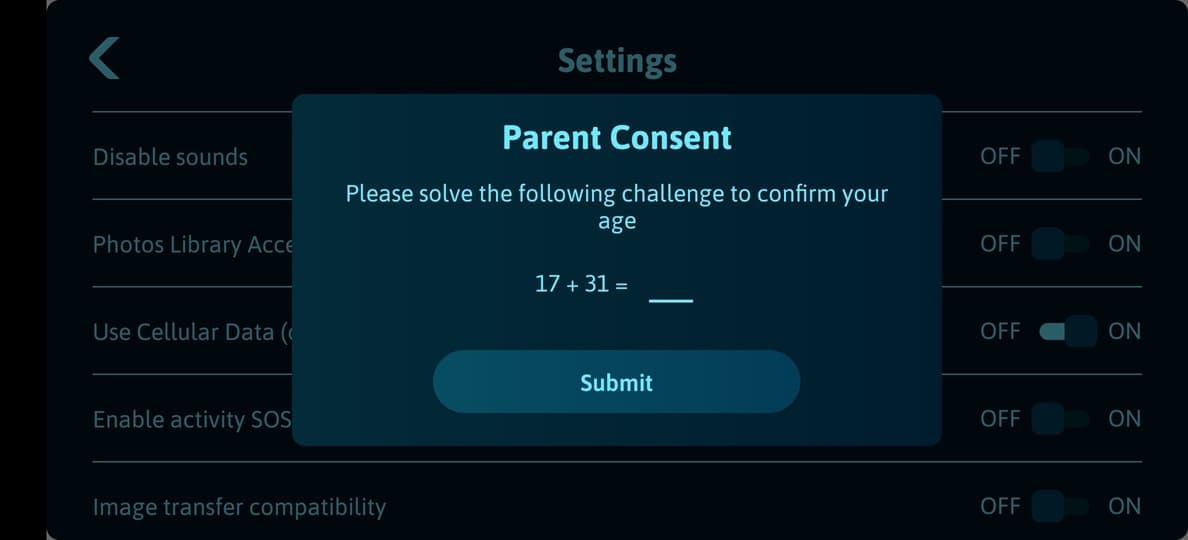
An adult may need to help with this step to verify parent consent.
3. Go back to the main screen, tap the Camera button.
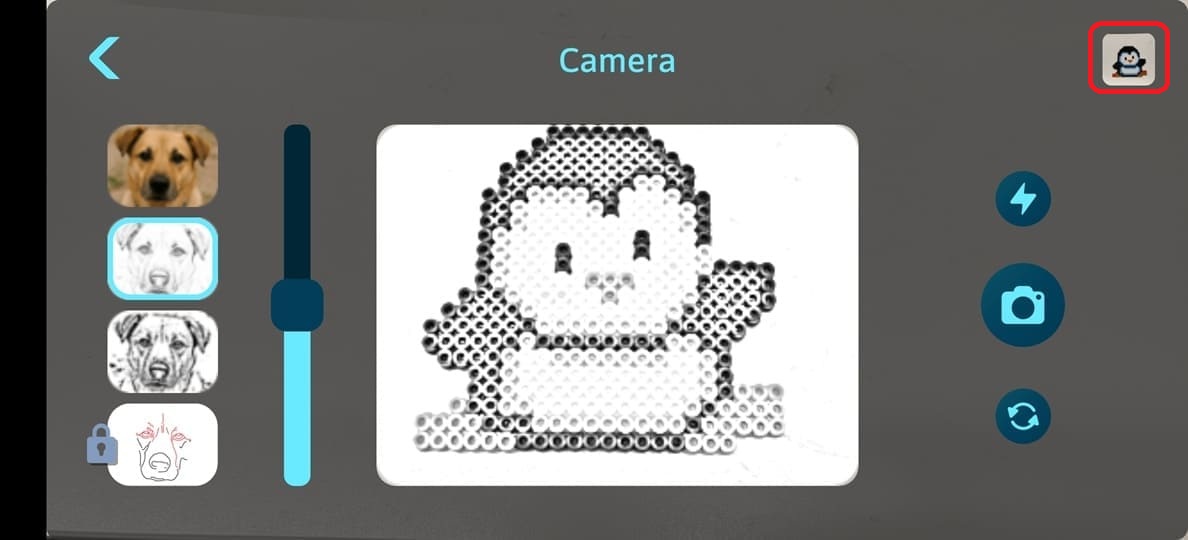
4. In the Camera preview screen, tap the photo on the top right (It’s probably the last photo you took with your device). That will give you access to your photos library.
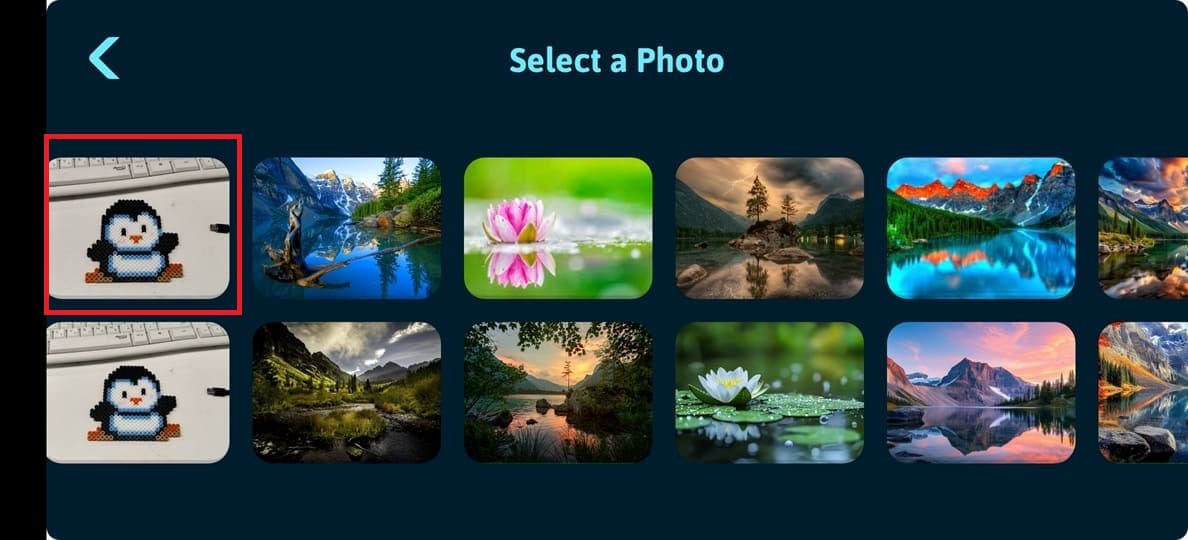
5. Choose a picture from your library. It will appear on your screen.
6. Select one of the four filters at the bottom of the screen (adjust the filter level by swiping the slider). Please note that the 4th filter (the one with the lock) is the step-by-step filer that is only available for users that purchase a subscription plan.
7. Press the PROJECT button to transfer the image to the smART sketcher® AI. If you selected the step-by-step filter, use the arrow button in the app to progress to the next step.
8. Get Sketching!
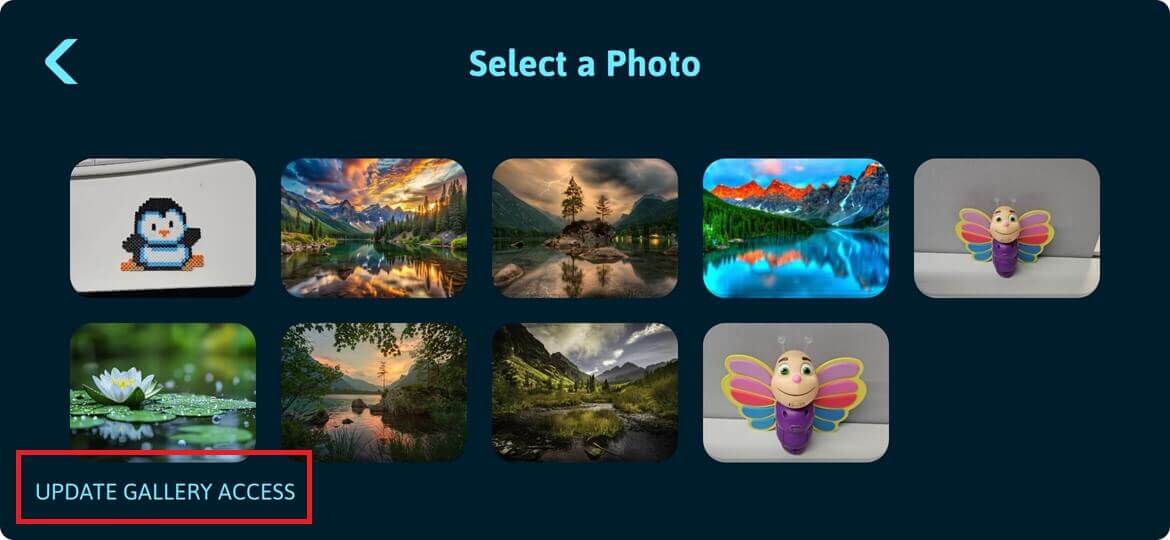
Note: If you don't see all of the images that you have on your mobile device this is because you initially allowed the smART sketcher® AI app access to Selected Photos. If you want to be able to browse all the images in your photos gallery you need provide our app access to All Photos.
In the photos gallery screen, tap the UPDATE GALLERY ACCESS link. This will invoke the OS system flow that will enable you to allow our App access to all photos (the process changes according to your mobile device OS platform).
Alternatively, you can provide full access to all images in the photos gallery directly from your mobile device settings.
- For iOS:
- Open the Settings app on your iPhone.
- Scroll down and tap on Privacy & Security.
- Tap on Photos to see a list of apps that have requested access.
- Tap on the smART sketcher® AI app to change its permission level.
- Choose between None, Limited Access, or Full Access.
- If you select Limited Access, a new screen will appear where you can select the specific photos you want to share. Tap Done when finished.
- For Android:
- Open Settings: Swipe down from the top of the screen and tap the gear icon, or find the "Settings" app in your app drawer.
- Navigate to Apps: Tap on Apps (or Apps & notifications on some devices).
- Select the app: Tap on the smART sketcher® AI app. If you don't see it, tap See all apps.
- Go to Permissions: Tap on Permissions.
- Change photo access:
- Look for a permission related to Photos or Photos and videos.
- Tap on it and choose your desired setting.
- For full access, select Allow or Always allow.
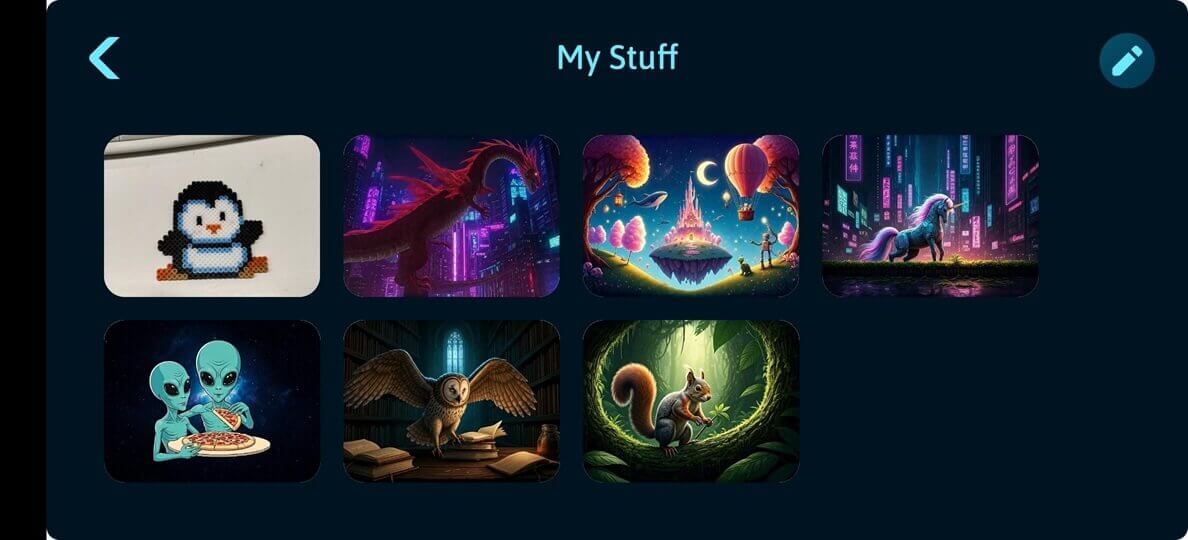
Any image that you created using the App will be found under My Stuff in the App. This includes both AI generated images and pictures taken using the in-app camera.
1. Make sure your smART sketcher® AI is connected to the App using Bluetooth. (See instructions on how to connect the App for further details.)
2. On the main screen, tap the My Stuff button to launch the My Stuff screen.
3. In My Stuff screen, swipe left or right to see all stored images. Choose an image, It will appear on your screen.
4. Select one of the four filters at the bottom of the screen (adjust the filter level by swiping the slider). Please note that the 4th filter (the one with the lock) is the step-by-step filer that is only available for users that purchase a subscription plan.
5. Press the PROJECT button to transfer the image to the smART sketcher® AI. If you selected the step-by-step filter, use the arrow button in the app to progress to the next step.
6. Get Sketching!
NOTE: AI Image generation "costs" 1 credit per image generation.
When you register to the app for the 1st time, you receive 20 free AI Image generation credits. You can get more credits by either purchasing a subscription plan or by getting a free daily credits refill.
AI Creator subscription plan
The AI Creator subscription plan is a monthly plan that gives you 100 AI Image generation credits per month while your subscription plan is active. Every time your subscription plan renews, you will get 100 AI Image generation credits (not accumulated). Subscribed users also get access to the step-by-step filter that provides a breakdown to steps for camera pictures, AI generated images and photos gallery images.
To purchase the AI Creator subscription plan:
1. Make sure your smART sketcher® AI is connected to the App using Bluetooth. (See instructions on how to connect the App for further details.)
2. On the main screen, tap the AI button to launch the AI prompt screen.
3. In the AI prompt screen, tap the Get More CREDITS button to launch the subscription purchase screen. If you are already subscribed, the Get More CREDITS button will be disabled.
![]()
4. Tap the Subscribe Now button to initiate the subscription purchase and follow the steps provided (the purchase is done directly against the Apple App store or Google Play store).

You can read more details about the subscription plan terms by tapping the small Info button inside the subscription plan option.

5. Once the purchase completes successfully, the App will return to the AI prompt screen and you will receive your credits.
Free daily credits refill
Users of the App will get 2 AI Image generation credits on a daily basis. Your balance will only replenish once it reaches zero and at least 24 hours have passed since your last refill. This is the default behavior of the App, no need to perform any action to enable the free daily credits refill.
NOTE: users subscribed to the AI Creator subscription plan will not get the free daily credits.
There’s no single formula for writing great prompts, but using specific keywords and modifiers can help you get much closer to your desired result. Prompts don’t have to be long or complicated - clarity and good description usually make the biggest difference.
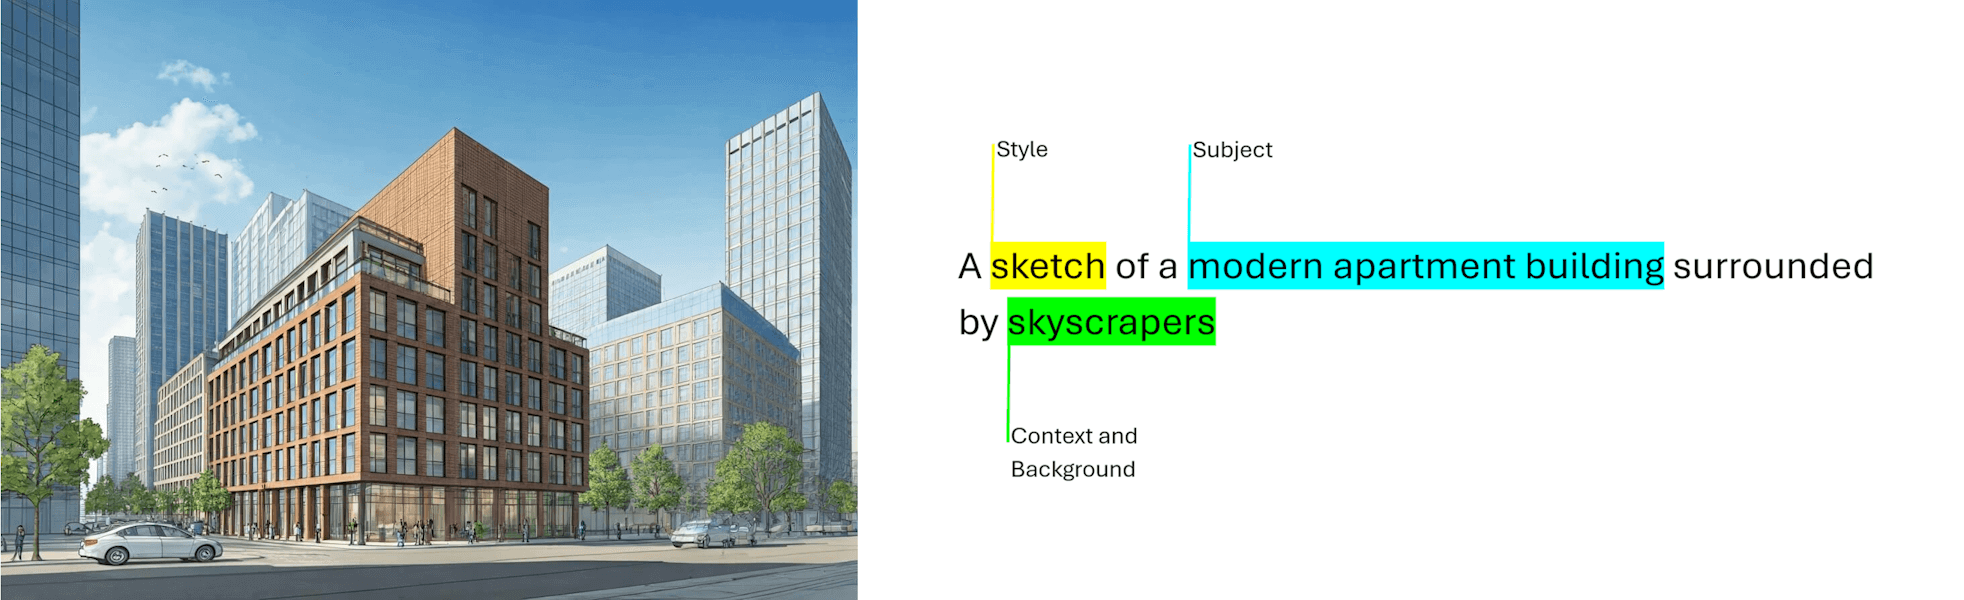
A helpful framework is to think in terms of subject, context, and style:
-
Subject: Start by defining what your image should focus on - the object, person, animal, or scene you want to depict.
-
Context and background: Next, consider where your subject exists. The background or setting can dramatically change the tone of the image. Experiment with different environments, such as a white studio backdrop, an outdoor landscape, or an indoor space.
-
Style: Lastly, specify the artistic style you want. This could be broad (like a painting, photo, or sketch) or more detailed (such as a pastel painting, 8bit pixelated image or even a Picasso style painting).
With the smART sketcher AI App, you can select the image style of the generated AI image by tapping the Color Palette button in the prompt screen.
There are currently 4 options to choose from. None, Realistic, Cartoon and Pixelated.
Below are some examples of the affect of the image style in the final generated image when using this prompt:
Prompt = An image of a rabbit flying a plane
Option #1: None
Select this option if you don't want to select a style (in this case, the AI engine will randomly select the style of the generated image) or if you want to provide your own specific style to the image (by writing the style description as part of the prompt text).
Option #2: Realistic
Select this option to generate a realistic image style.

Option #3: Cartoon
Select this option to generate a cartoonish image style.

Option #4: Pixelated
Select this option to generate a pixelated (retro 8bit game) image style.

You can enrich the output image by adding more details to the prompt:
Prompt: An image of a rabbit flying a plane. The rabbit color is white, it is holding a carrot in one hand and the plane is flying through the clouds

NOTE: The app will remember the last selected image style and will apply it when you generate a new AI Image.
IMPORTANT: AI image generation requests with inappropriate prompts or uploaded image content are not allowed. This include violence, nudity, racism, drugs, etc.
Enhanced AI Image Generation
You can enhance your AI Image creations by adding your own images. Simply upload an image from your photo gallery and write your prompt.
Image manipulation example:
Write the prompt that describes to the AI engine how to manipulate the image. In this example we asked to remove the sun glasses the man is wearing and add hats to both of them.
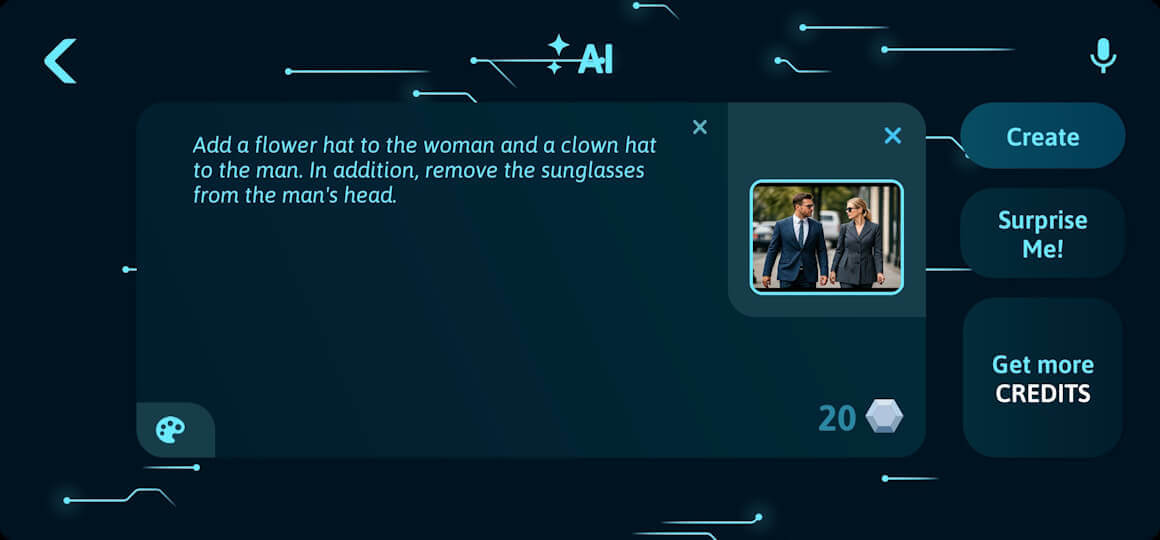
Tap the Create button to send the prompt and see the result.

Image style change example:
You can upload your own image and ask the AI Image engine to change the image style. In this example we requested to change the image style to a cartoon style.
Tap the Color Palette button and select the Cartoon image style.

Tap the Create button to send the prompt and see the result.
IMPORTANT: AI image generation requests with inappropriate prompts or uploaded image content are not allowed. This include violence, nudity, racism, drugs, etc.
The smART sketcher® AI operates using a USB-C power plug.
What you will need?
- USB-C cord (included).
- USB-C power plug (not included). USB power plug requirements: Output voltage 5V DC Max, Amperage of at least 2.0A (2000mA).

Plug one end of the USB-C cord into the back of the projector. Plug the other end of the USB-C cord into a USB-C power plug (that you provide).
WARNING!
DO NOT PLUG THE USB-C CORD INTO A LAPTOP OR COMPUTER!
WARNING!
POWERING THE PROJECTOR WITH A POWER PLUG THAT DELIVERS A VOLTAGE OF MORE THEN 6V WILL DAMAGE THE PROJECTOR!
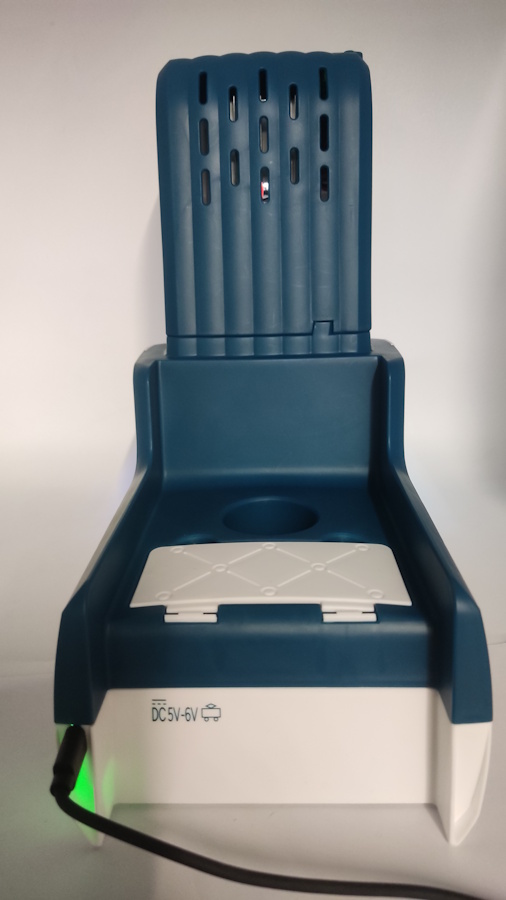
Connect one end of the USB-C cord to the USB-C connector at the back end of the smART sketcher® AI. Connect the other end to a USB-C power plug (block) and connect the power plug to a wall power outlet.
1. First check if you see a green light near the USB-C connector at the back of the smART sketcher® AI. If you don't see a green light you need to verify you are powering the smART sketcher® AI correctly. See this Link.
2. Press the On/Off button located on the top of the device to turn on the smART sketcher® AI. A green light near the On/Off button should turn on. If you don't see a green light, please check the projector head is firmly connected to the base. See this Link.
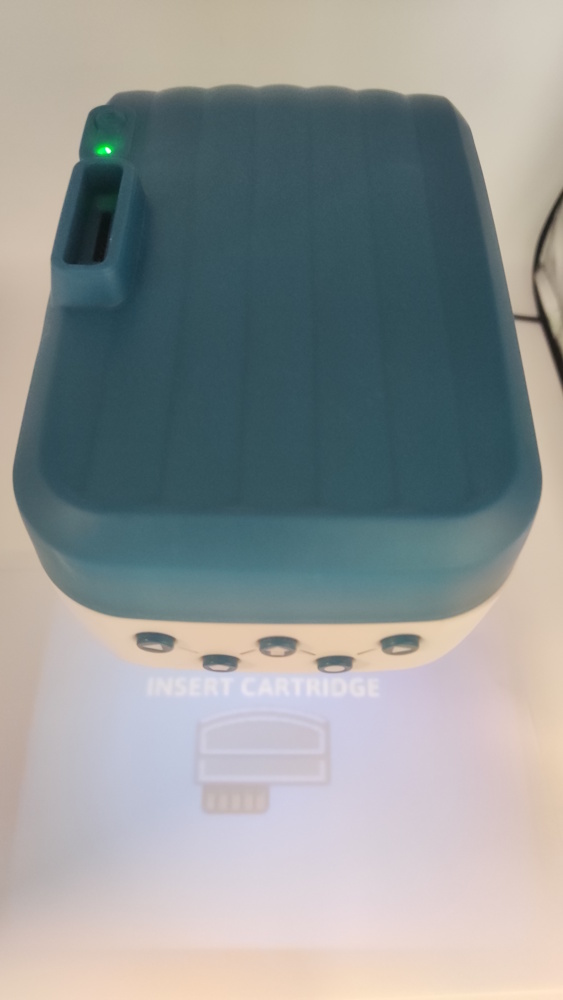
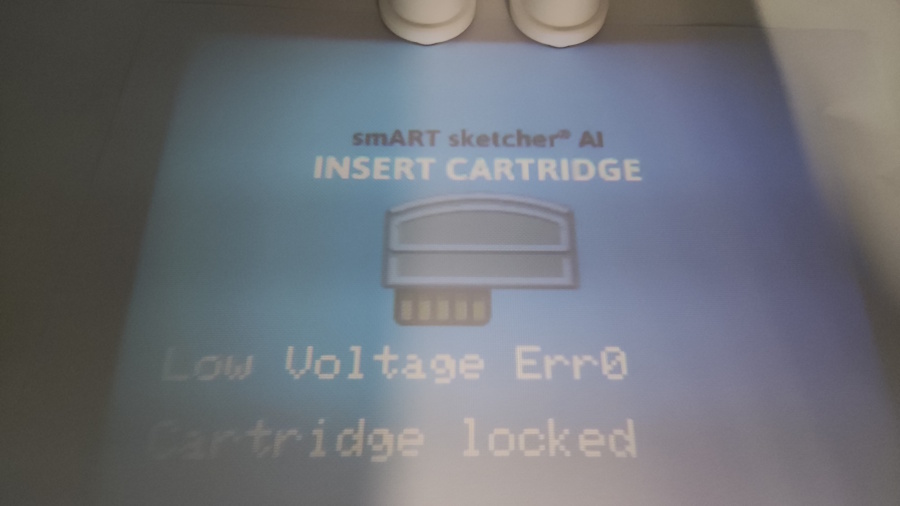
3. Once turned turned on, you should see a green light near the On/Off button and a projection. If the content cartridge is inserted, you should see the first drawing on the content cartridge. If no content cartridge is inserted, you will see an Insert Cartridge message projected.
4. If the content cartridge is inserted and you still see an Insert Cartridge message please check if you see any error message (it will appear at the bottom of the projected image).
If you see a Low Voltage error message, it means that the power plug you are using to power the smART sketcher® AI is not compatible (the voltage or amperage it delivers is too low). Make sure to use a compatible USB-C power plug.
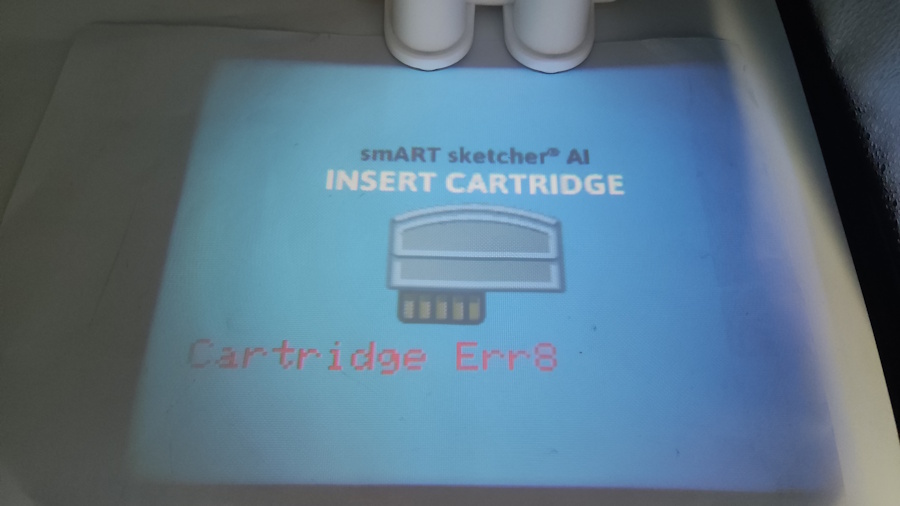
If you see a different error message, please open a support ticket for a solution (make sure to state the error message in the ticket description).
In the meantime, you can still use the smART sketcher AI app to sketch your AI Images, Camera pictures or to draw your cartridge drawings by using the activity content SOS feature.
1. If the content cartridge isn’t inserted properly, you won’t see an image (you will just see an Insert Cartridge message). Turn Off the smART sketcher® AI, insert the cartridge correctly and then turn on again the smART sketcher® AI and see if that helps.
2. If the content cartridge is inserted properly and you still see an Insert Cartridge message please check if you see any error message (it will appear at the bottom of the projected image).
If you see a Low Voltage error message, it means that the power plug you are using to power the smART sketcher® AI is not compatible (the voltage or amperage it delivers is too low). Make sure to use a compatible USB-C power plug.
If you see a different error message, please open a support ticket for a solution (make sure to state the error message in the ticket description).
In the meantime, you can still use the smART sketcher AI app to sketch your AI Images, Camera pictures or to draw your cartridge drawings by using the activity content SOS feature.
The activity content SOS is an App feature that allows you to project and draw your cartridge drawings even if there is no cartridge in the smART sketcher® AI. It’s a great way to draw if your cartridge is lost or broken.
Prerequisites:
- A mobile device/tablet with the smART sketcher® AI App installed.
- The activity content from the cartridge already downloaded on your mobile device/tablet. This happens automatically the first time you connect the App to the smART sketcher® AI and an activity content cartridge is present.
- No activity content cartridge is inserted into the smART sketcher® AI.
Limitations:
- When using activity content SOS mode, each step of the drawing is transferred to the smART sketcher® AI via Bluetooth. As a result, it takes more time to project a drawing.
- The navigation between drawings and steps is done solely through the App. Pressing the smART sketcher® AI buttons will not trigger any operation.
How to enable activity content SOS feature:
1. Turn-on your smART sketcher® AI.
2. Connect the App to the smART sketcher® AI via Bluetooth.
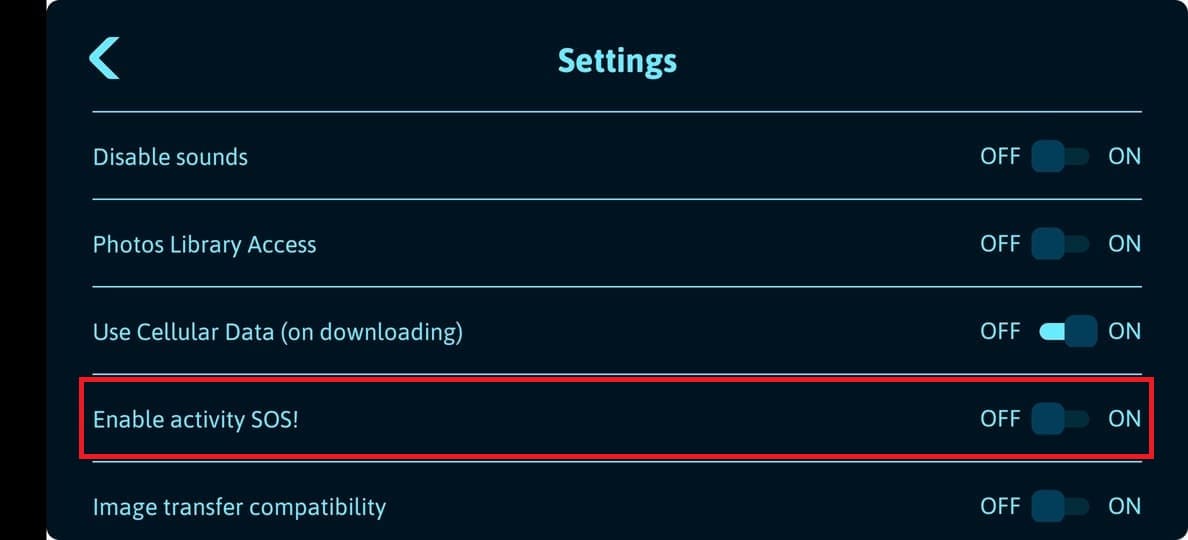
3. In the main screen, tap the Settings button to enter the Settings menu.
4. Enable the activity content SOS toggle button. After the toggle is enabled, tap the back arrow button to return to the main screen.
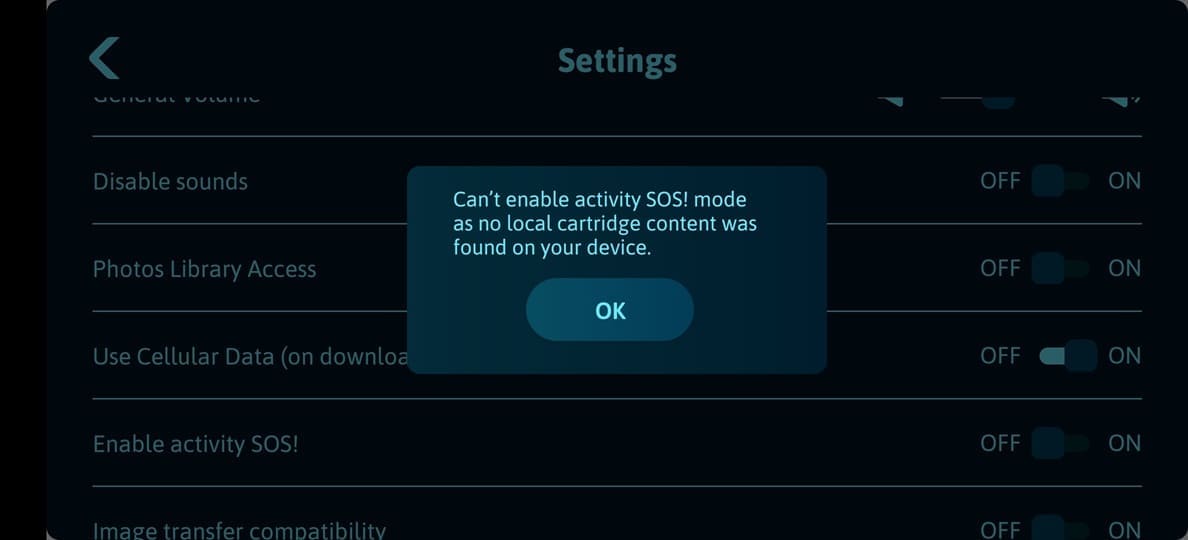
If no cartridge activity content was found on your local mobile device, the following message will be shown:
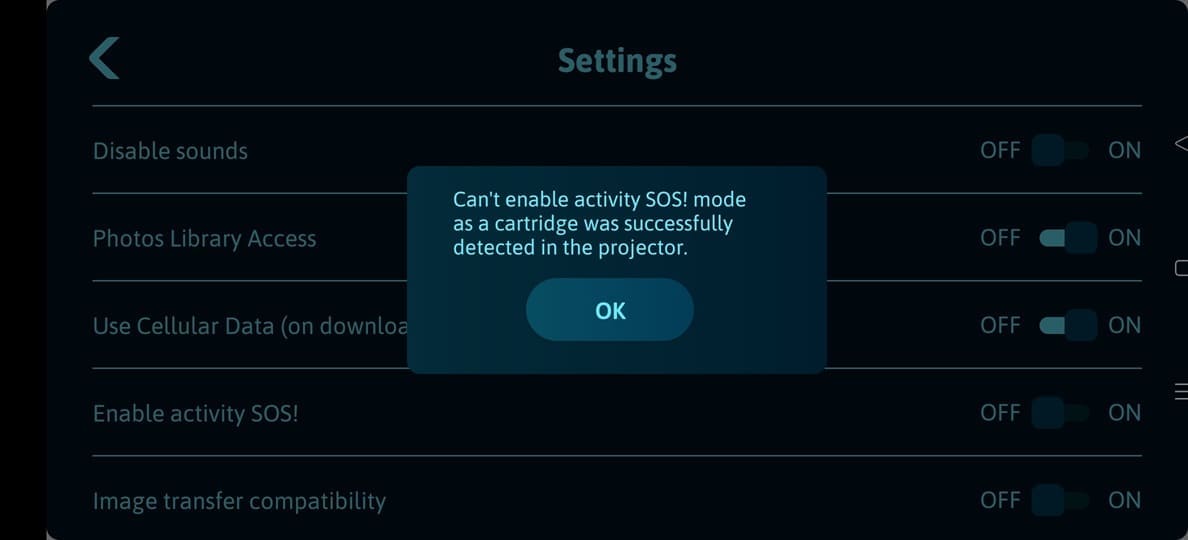
If an activity content cartridge was detected in the smART sketcher® AI, the following message will be shown. Remove the content cartridge and try again:
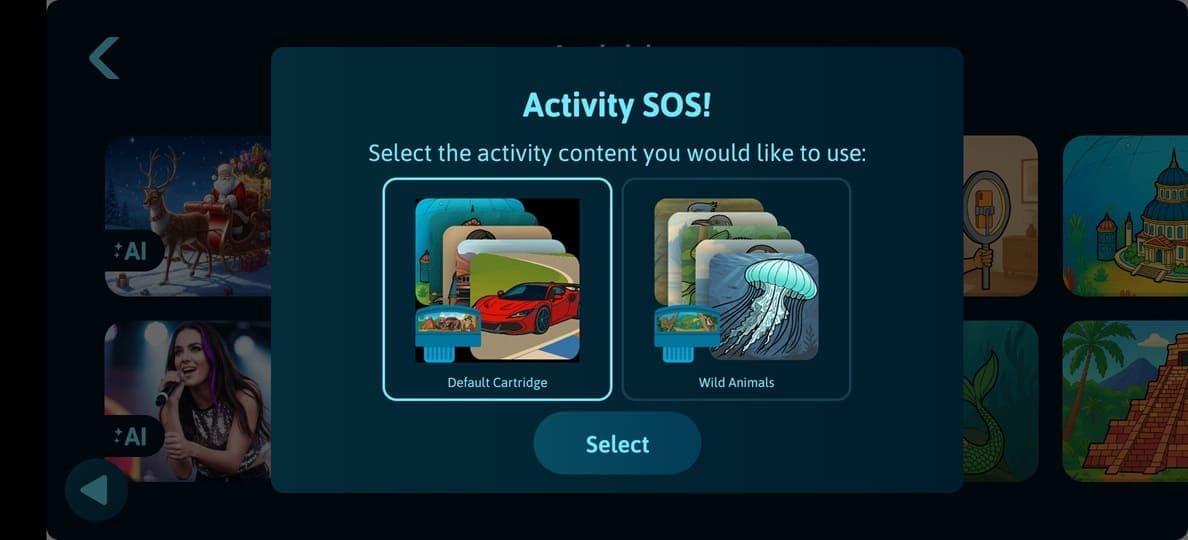
5. When you return to the main screen, tap the Activities button: if you have a single content cartridge downloaded on your mobile device, you will see the drawings of this cartridge. If you have multiple cartridges content downloaded you will be prompted to select the desired cartridge content to use.
Single cartridge content available:
Multiple cartridges content available. Select your desired cartridge content:
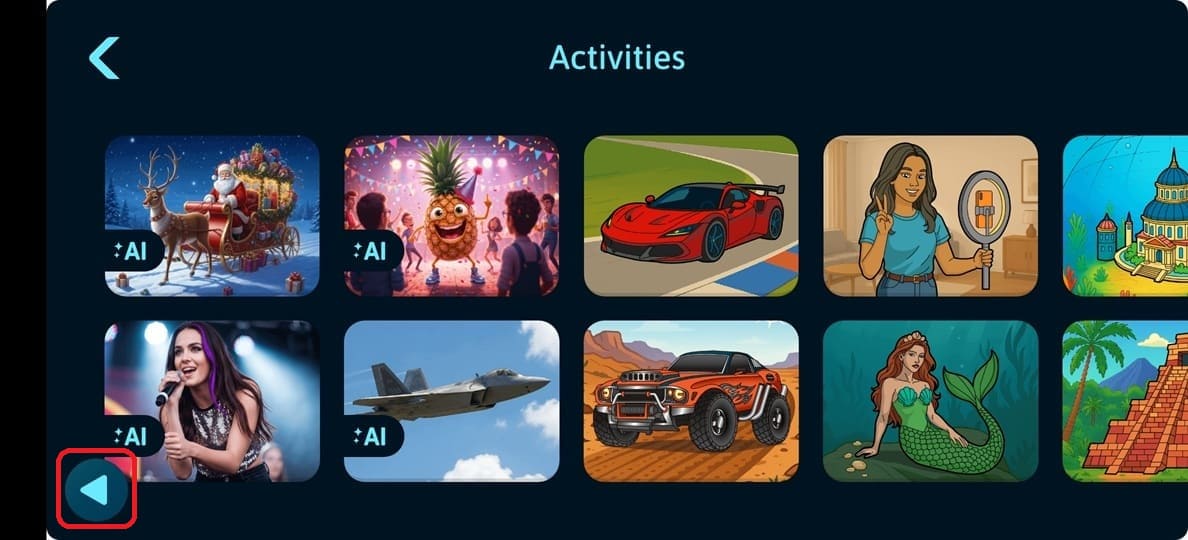
To return back to the cartridges content selection dialog, tap the back arrow button on the bottom left corner of the screen:
6. To start sketching, select a drawing as usual and follow the instructions.
IMPORTANT:
Before following the steps in the below troubleshooting guide first make sure the smART sketcher® AI is operating correctly: if the smART sketcher® AI is under-powered, or it is busy trying to read a damaged content cartridge, Bluetooth connectivity will not work.
When turned on, you should see an image projected from the smART sketcher® AI.
- If there is no activity cartridge in the smART sketcher® AI, you should see an Insert Cartridge image projected.
- If there is an activity cartridge inserted in the smART sketcher® AI, you should see a drawing projected.
In case you don't see anything projected, or in case you see an error message projected with the image (i.e. low voltage, Cartridge Err, etc.), you first need to troubleshoot your smART sketcher® AI operation and only after it is working correctly to continue with this guide. See this Link for more details.
Bluetooth connectivity troubleshooting guide:
In order to locate and connect to the smART sketcher® AI, the App requires that Bluetooth will be enabled on your mobile device/tablet. If your device fails to connect to the smART sketcher® AI follow the troubleshooting steps below. Please note that the steps are different for iOS and Android.
First, make sure that:
- Your smART sketcher® AI is turned on.
- Bluetooth is Enabled on your mobile device/tablet.
Note: no need to pair and/or connect your device to the smART sketcher® AI from your device Bluetooth settings menu; the App will automatically locate the smART sketcher® AI. Also make sure that no other mobile device is currently connected to the smART sketcher® AI (only a single mobile device can be connected at the same time).
Android troubleshooting
First time usage of the App
To use in-app Bluetooth connectivity, Android requires that the smART sketcher® AI will get permission to scan and connect to nearby devices. This is an Android OS permission and it differs according to the Android OS version.
1. Open the smART sketcher® AI app on your device.
2. Tap the I have a smART sketcher AI button in the welcome screen.
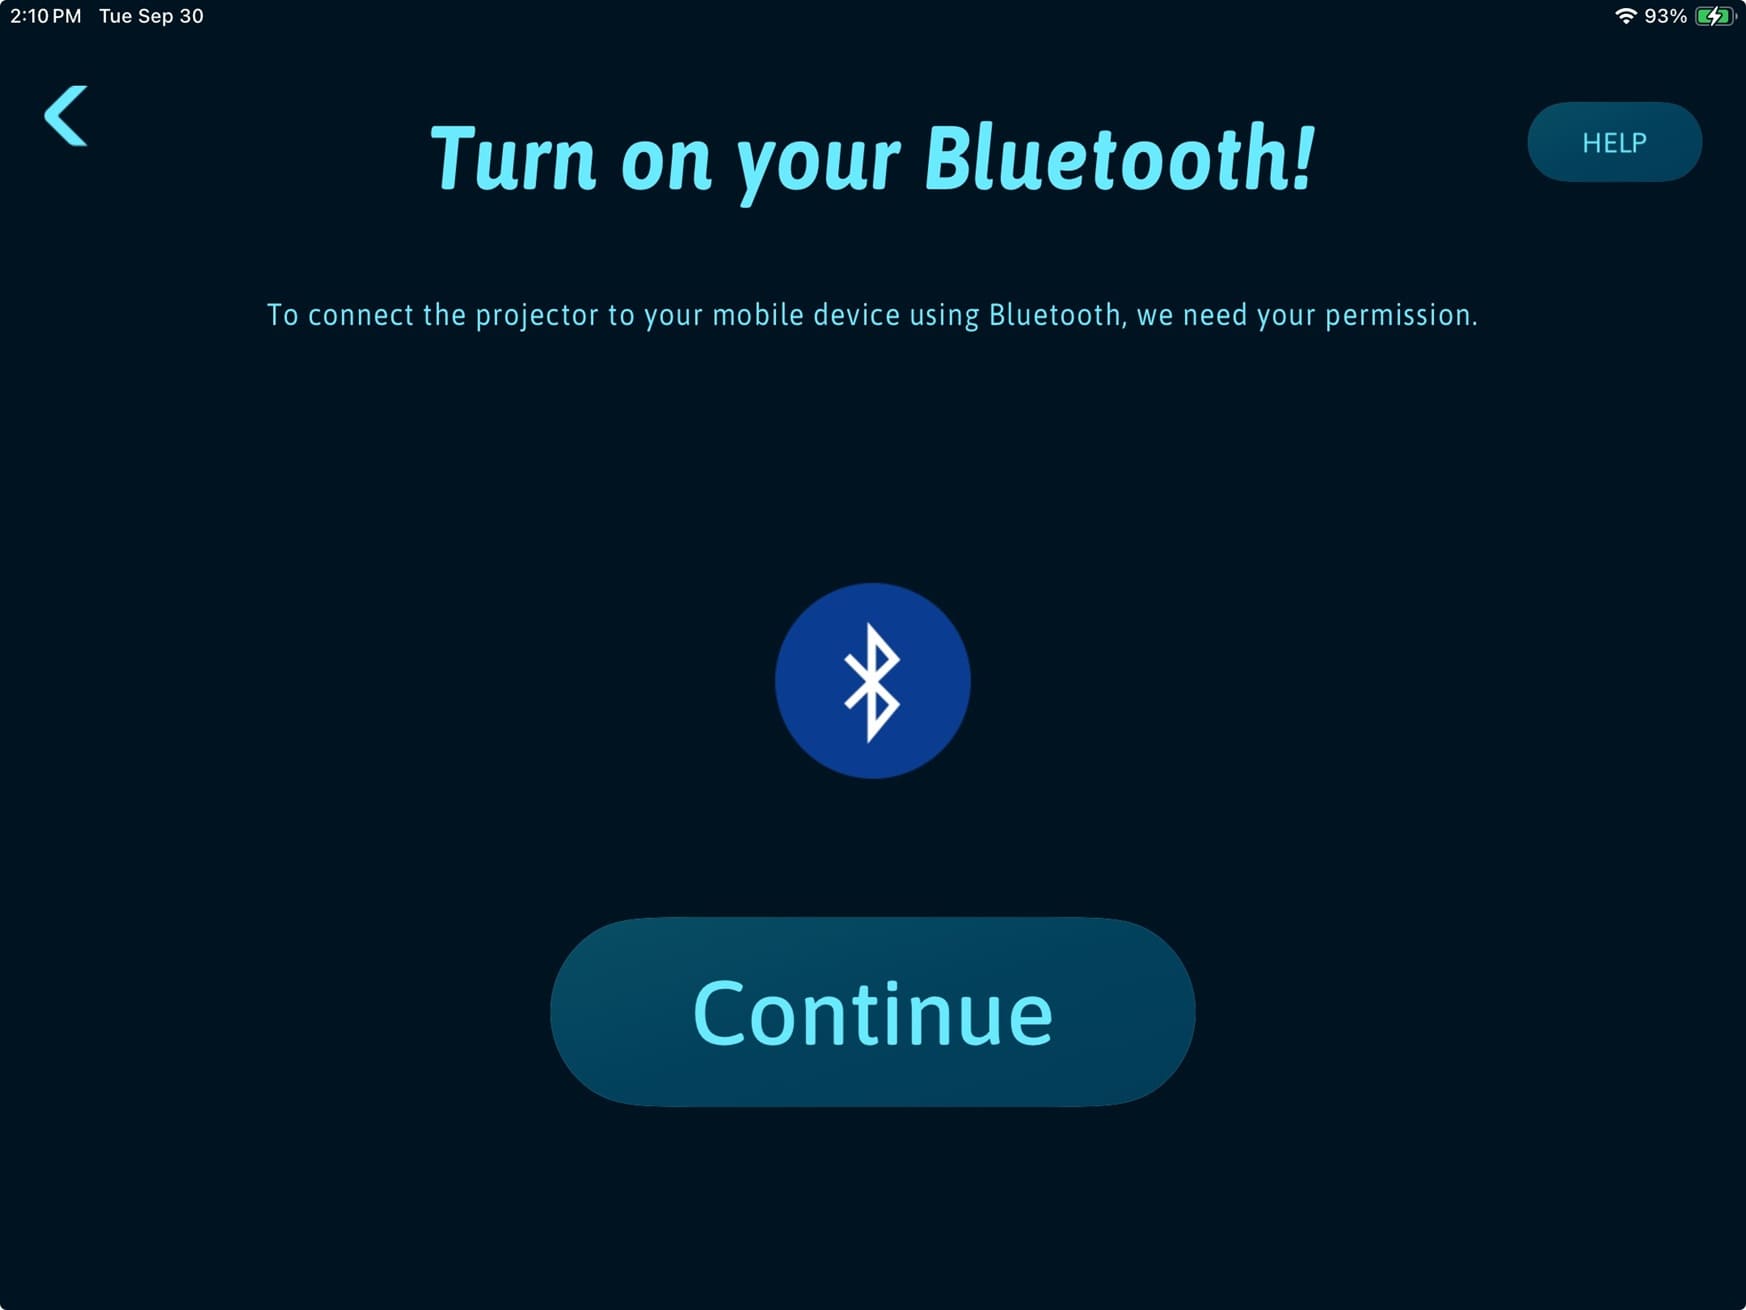
3. Tap the Continue button in the Bluetooth screen
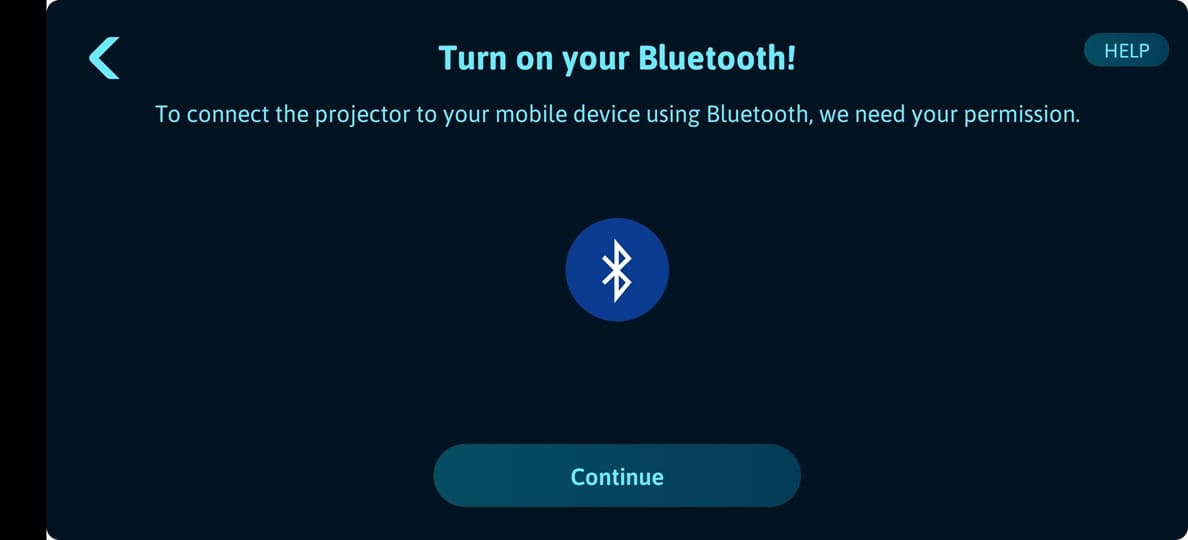
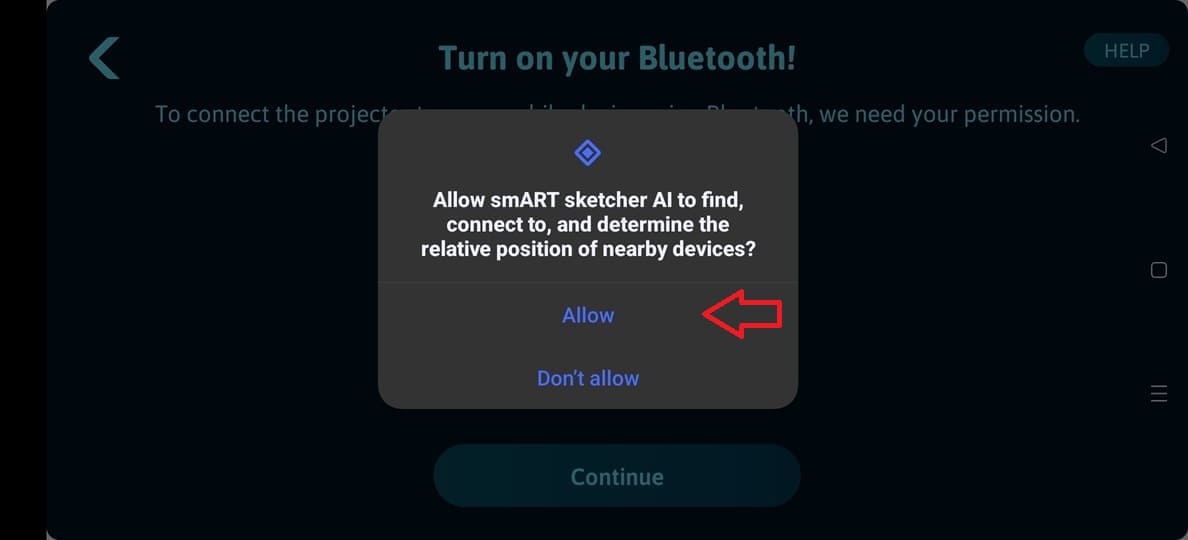
4. On Android 12 and above the Android system dialog to allow access to 'nearby devices' will appear. Tap ALLOW to authorize access to the app. Note: the message is a system message provided by the Android platform and may be a little bit different depending on your device vendor and model.
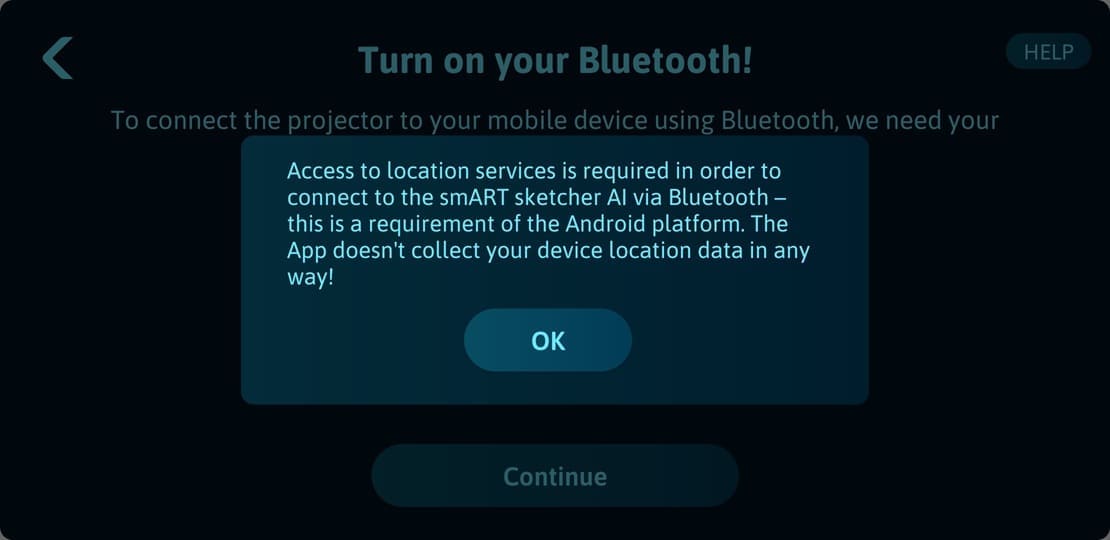
On Android 10 and Android 11 the app will automatically detect if Location services are Enabled or not. If Location services are disabled, the below message will be shown prompting the user to enable Location services. Tap the OK button to proceed.
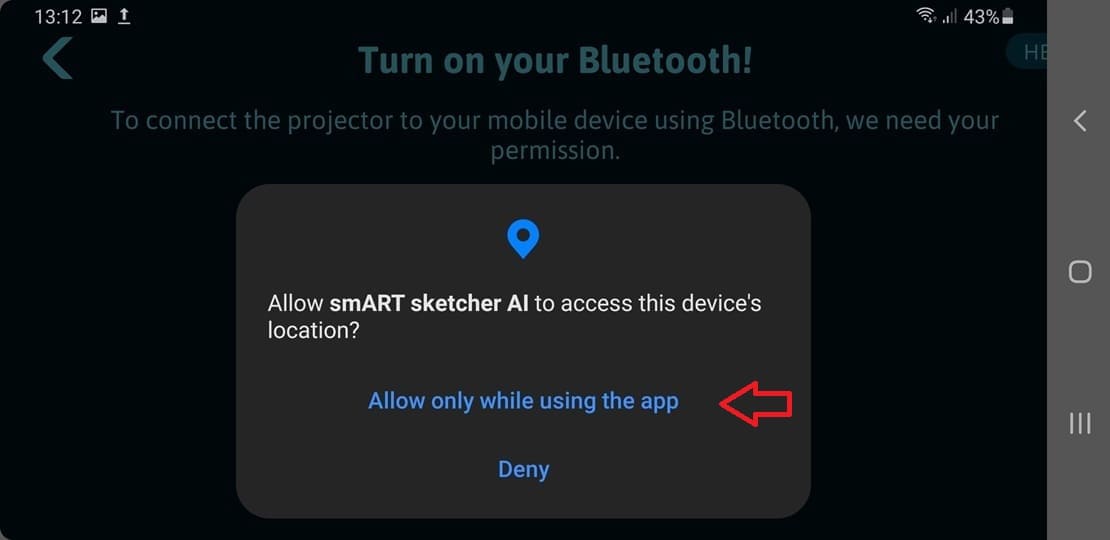
The Android system dialog to allow access to the device location will appear. Tap ALLOW to authorize access to the app. Note: the message is a system message provided by the Android platform and may be a little bit different depending on your device vendor and model.
5. Bluetooth scanning will start to detect your smART sketcher® AI.
6. Success! The App is now connected to the smART sketcher® AI via Bluetooth.
If the App failed to locate and connect to your smART sketcher® AI, wait several seconds and tap the Try Again button. If connection still fails we recommend to
- Turn off your smART sketcher® AI and then turn it back on.
- Restart your mobile device and try to connect again.
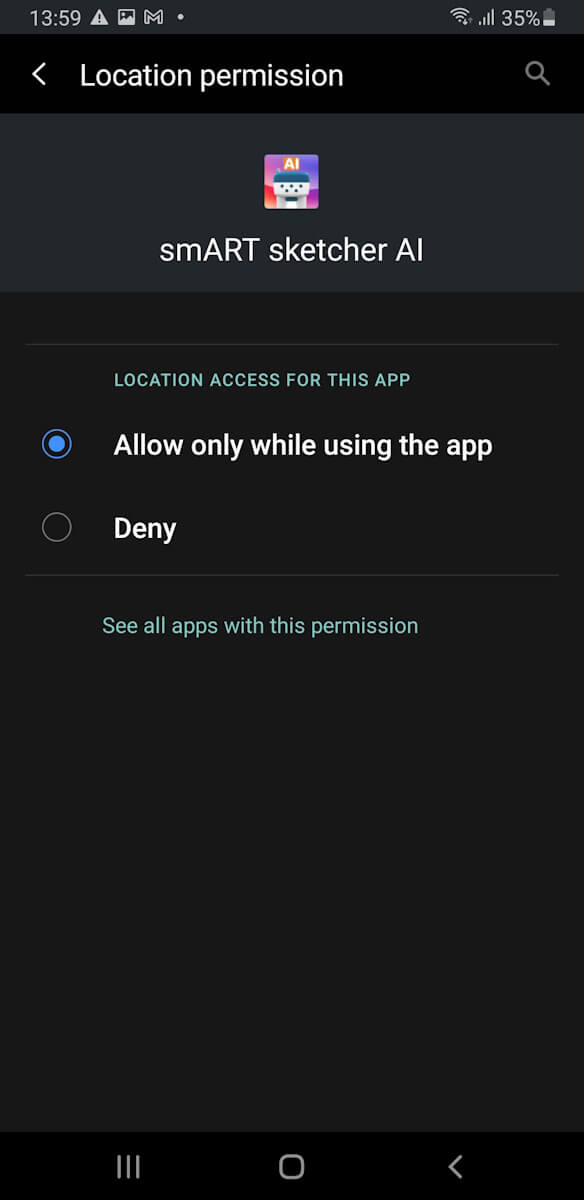
I’ve accidentally Tapped the DENY button when asked to allow access to the device location. What should i do?
1. Open your Android settings app.
2. Locate the Apps settings section and tap it.
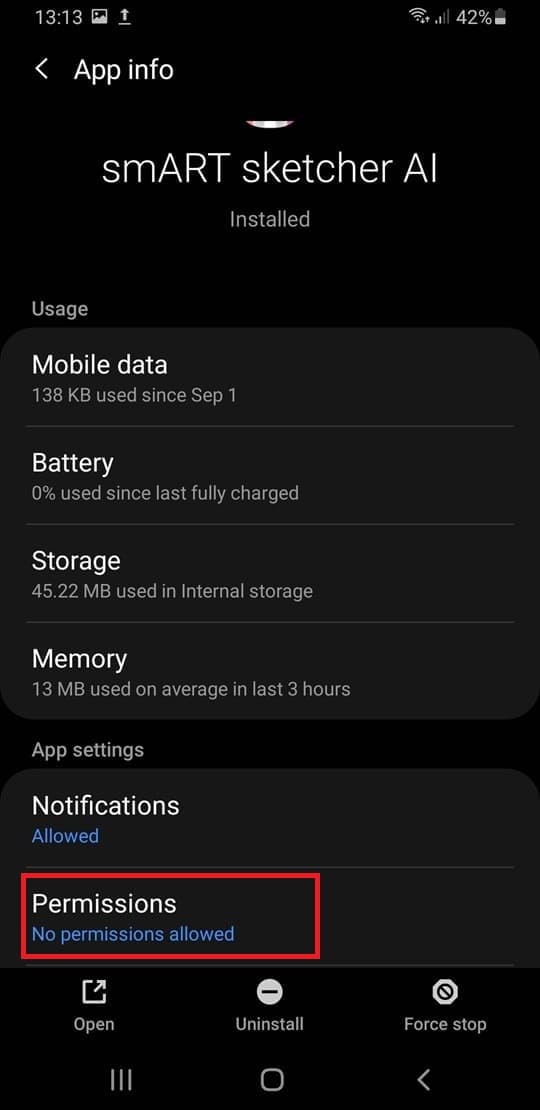
3. Tap Manage Apps and search for the smART sketcher AI app. Once found, tap on the app to see it's settings.
4. Tap the App permissions setting to view and edit permissions.
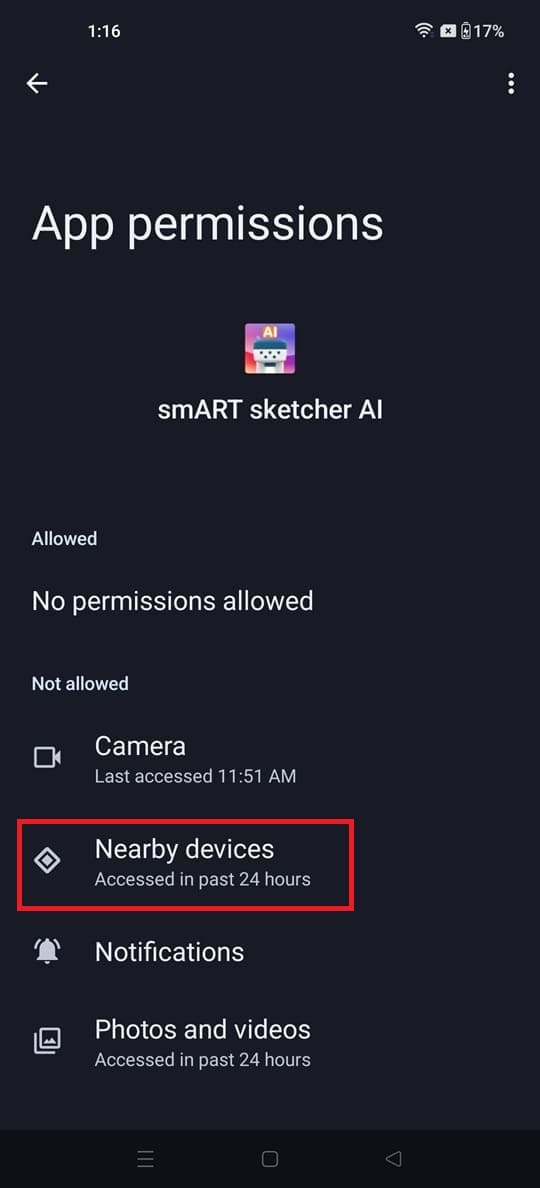
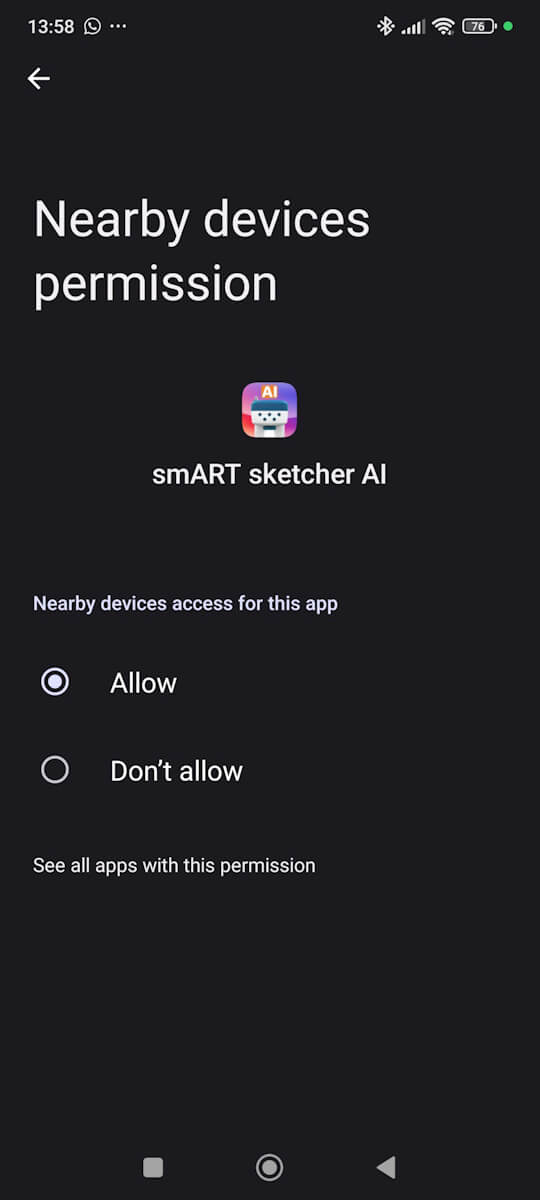
5. On Android 12 and above tap the Nearby devices option. Afterward select the Allow option.
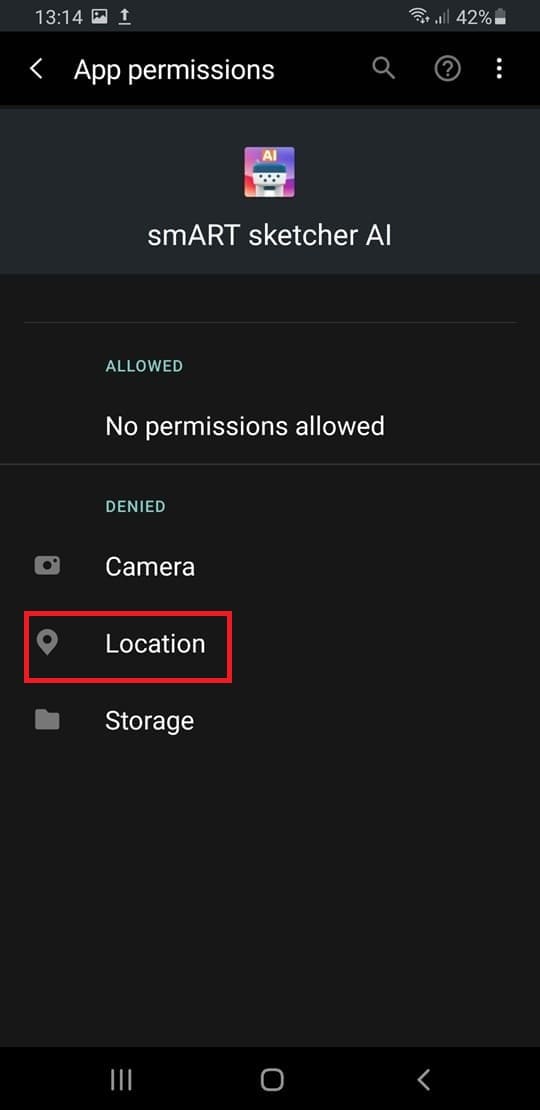
On Android 10 and Android 11 tap the Location option. Afterward select the Allow only while using the app option.
iOS troubleshooting
First time usage of the App
To use in-app Bluetooth connectivity, iOS requires that the smART sketcher® AI will get permission to find Bluetooth devices. This is a one-time step; once the permission was provided, the App will not ask for it again.
To enable in-app Bluetooth connectivity, iOS requires that:
1. Open the smART sketcher® AI app on your device.
2. Tap the I have a smART sketcher AI button in the welcome screen.
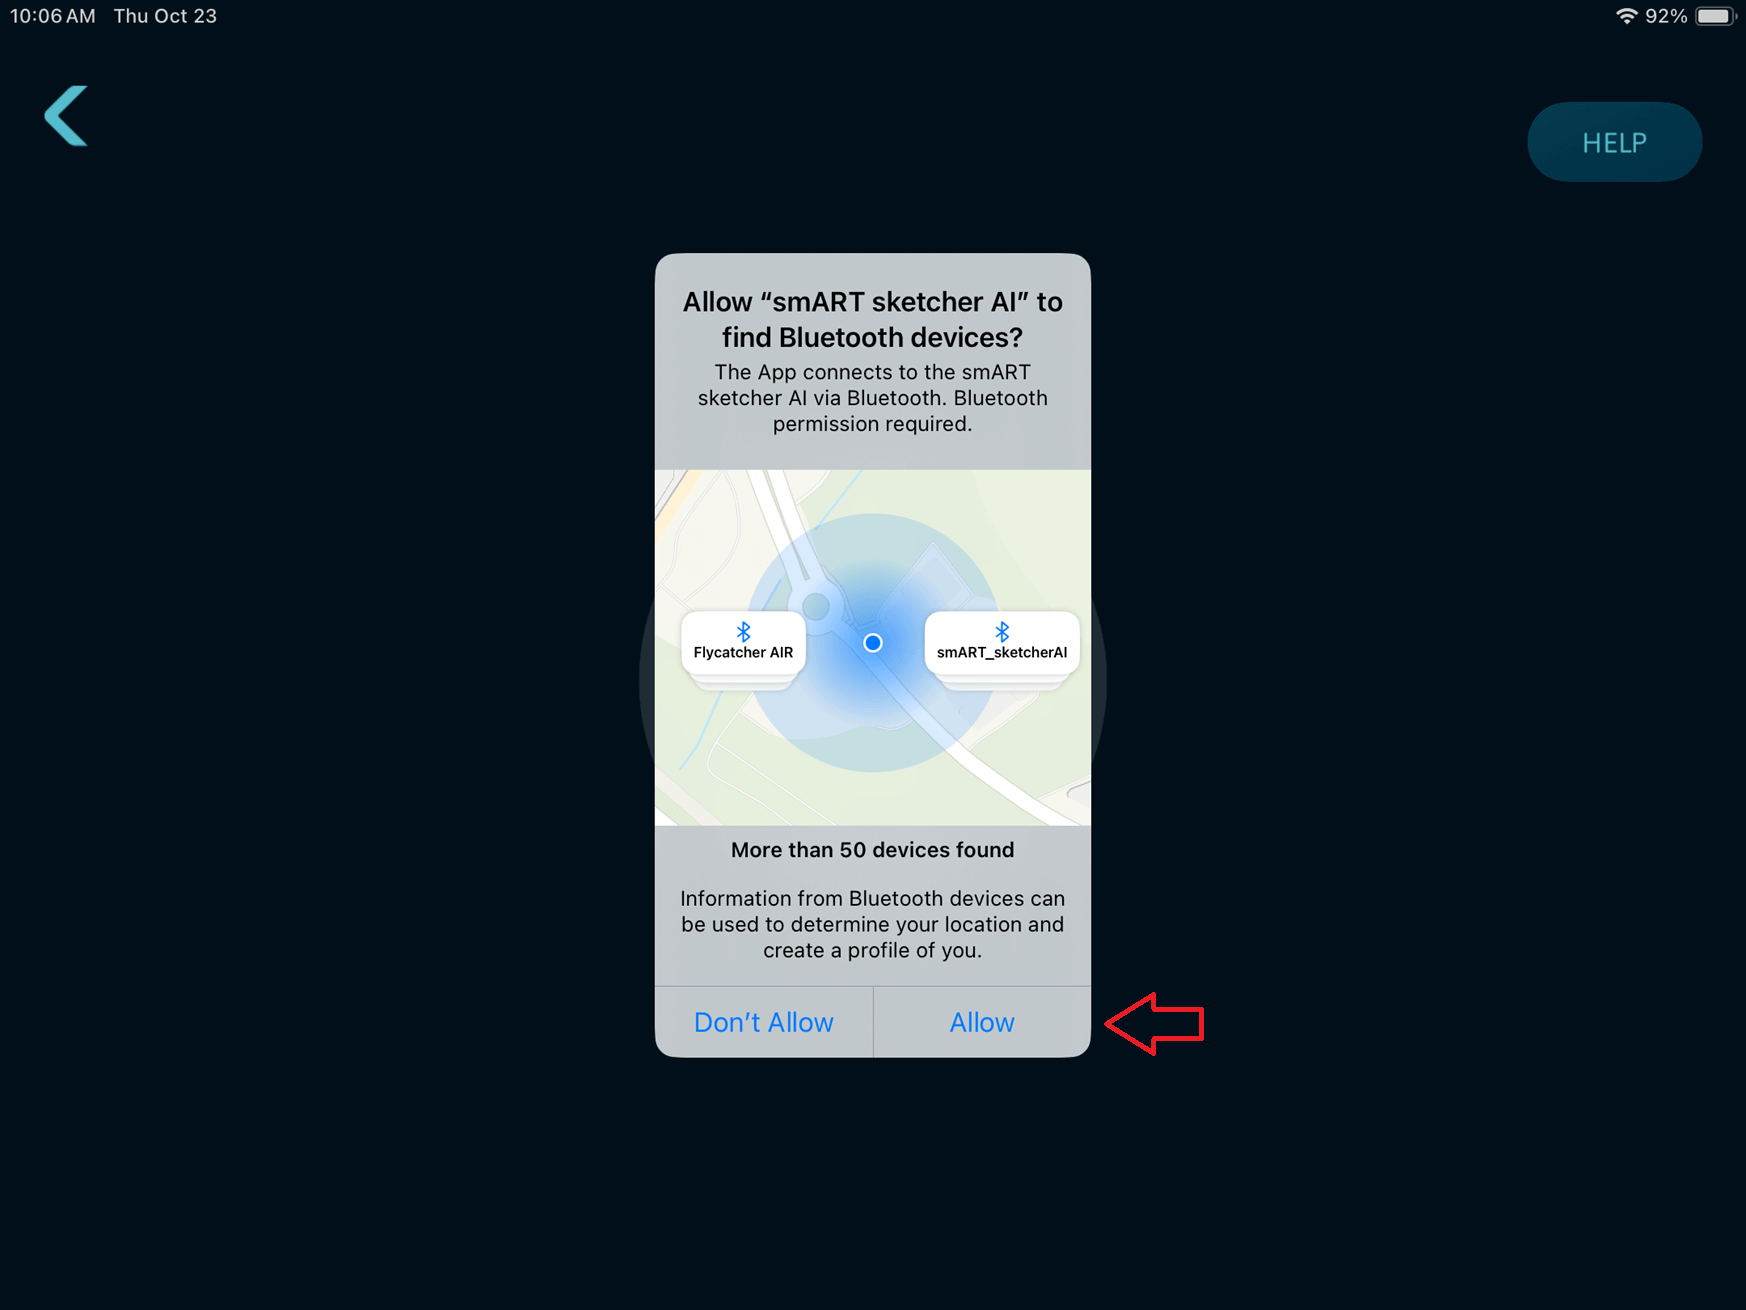
3. The iOS system message to get permission will show. Tap the ALLOW button to authorize the app access to find Bluetooth devices.
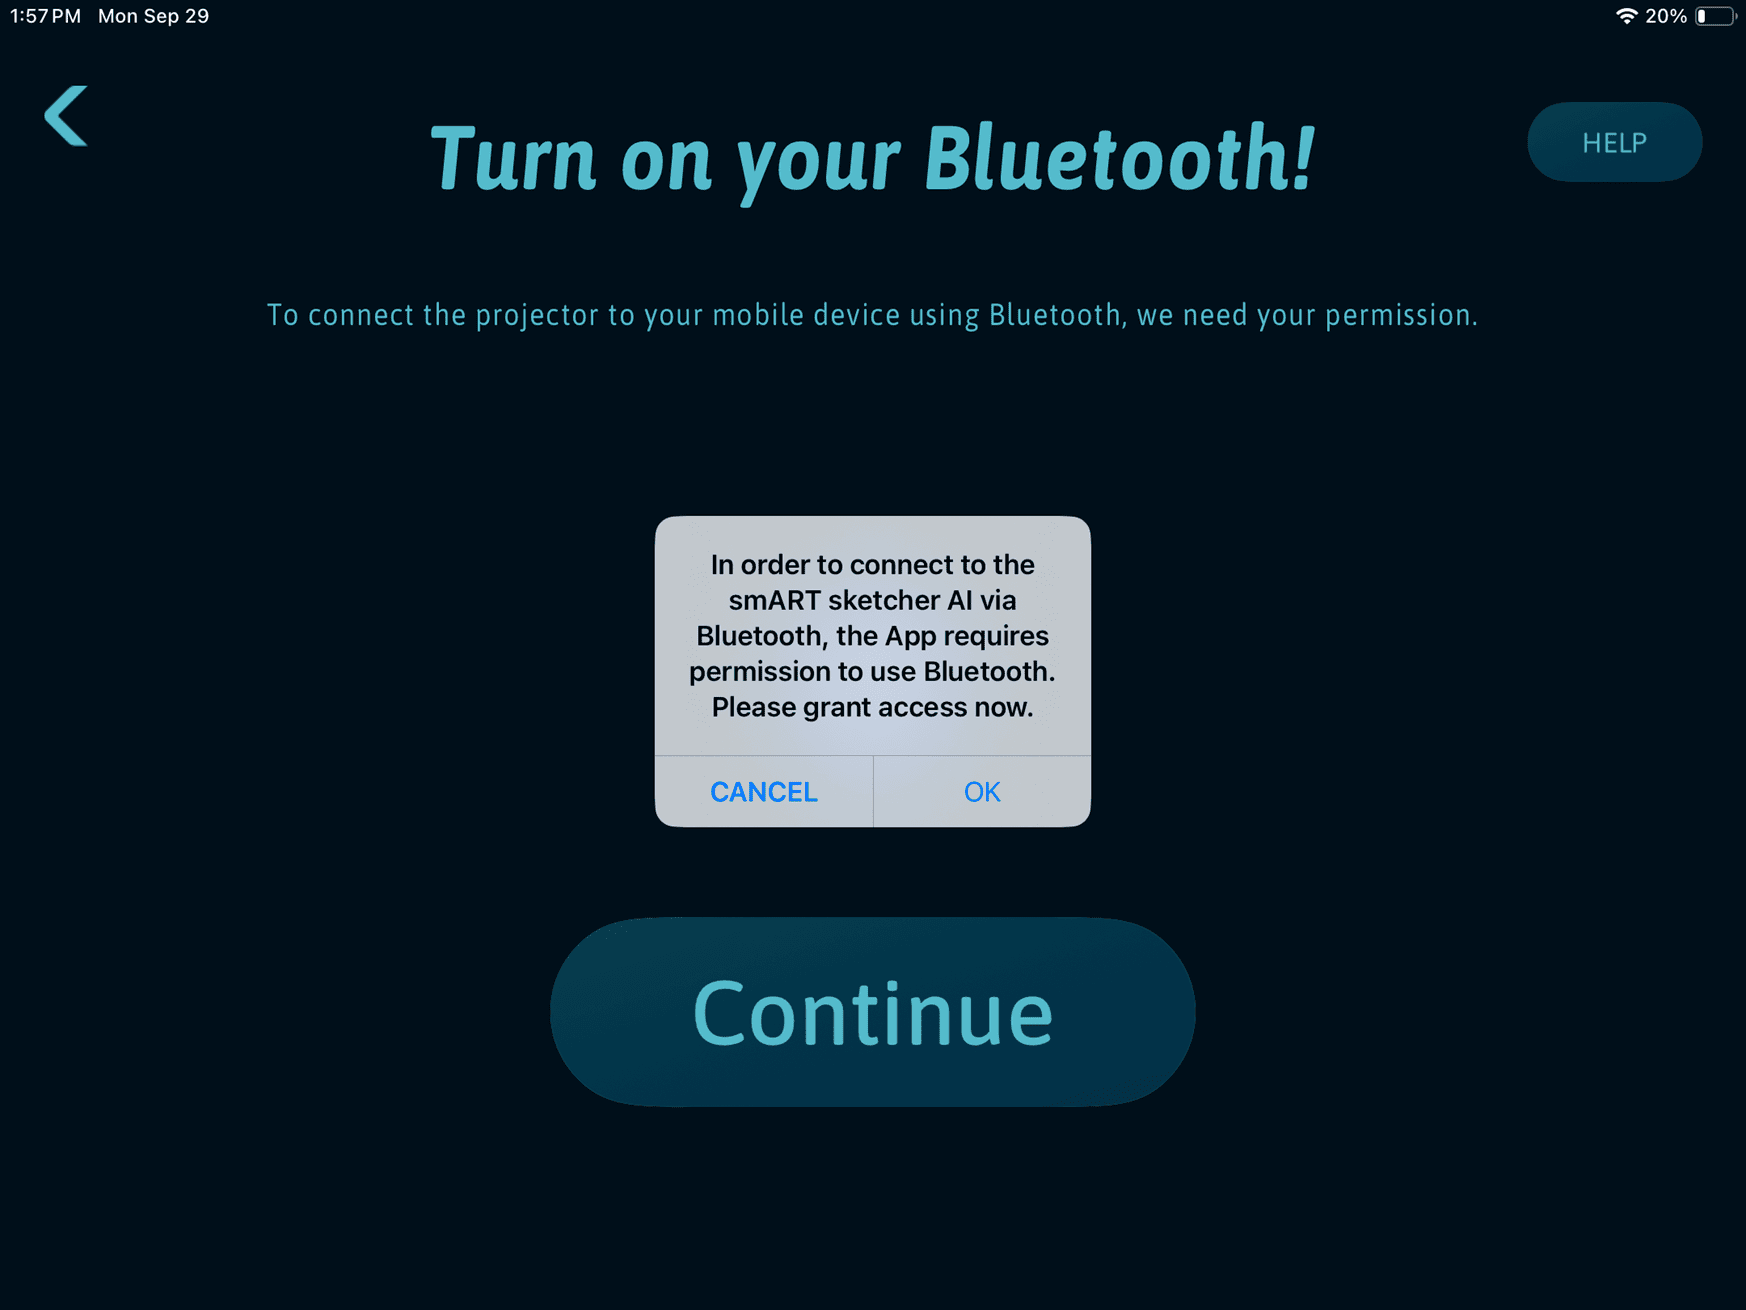
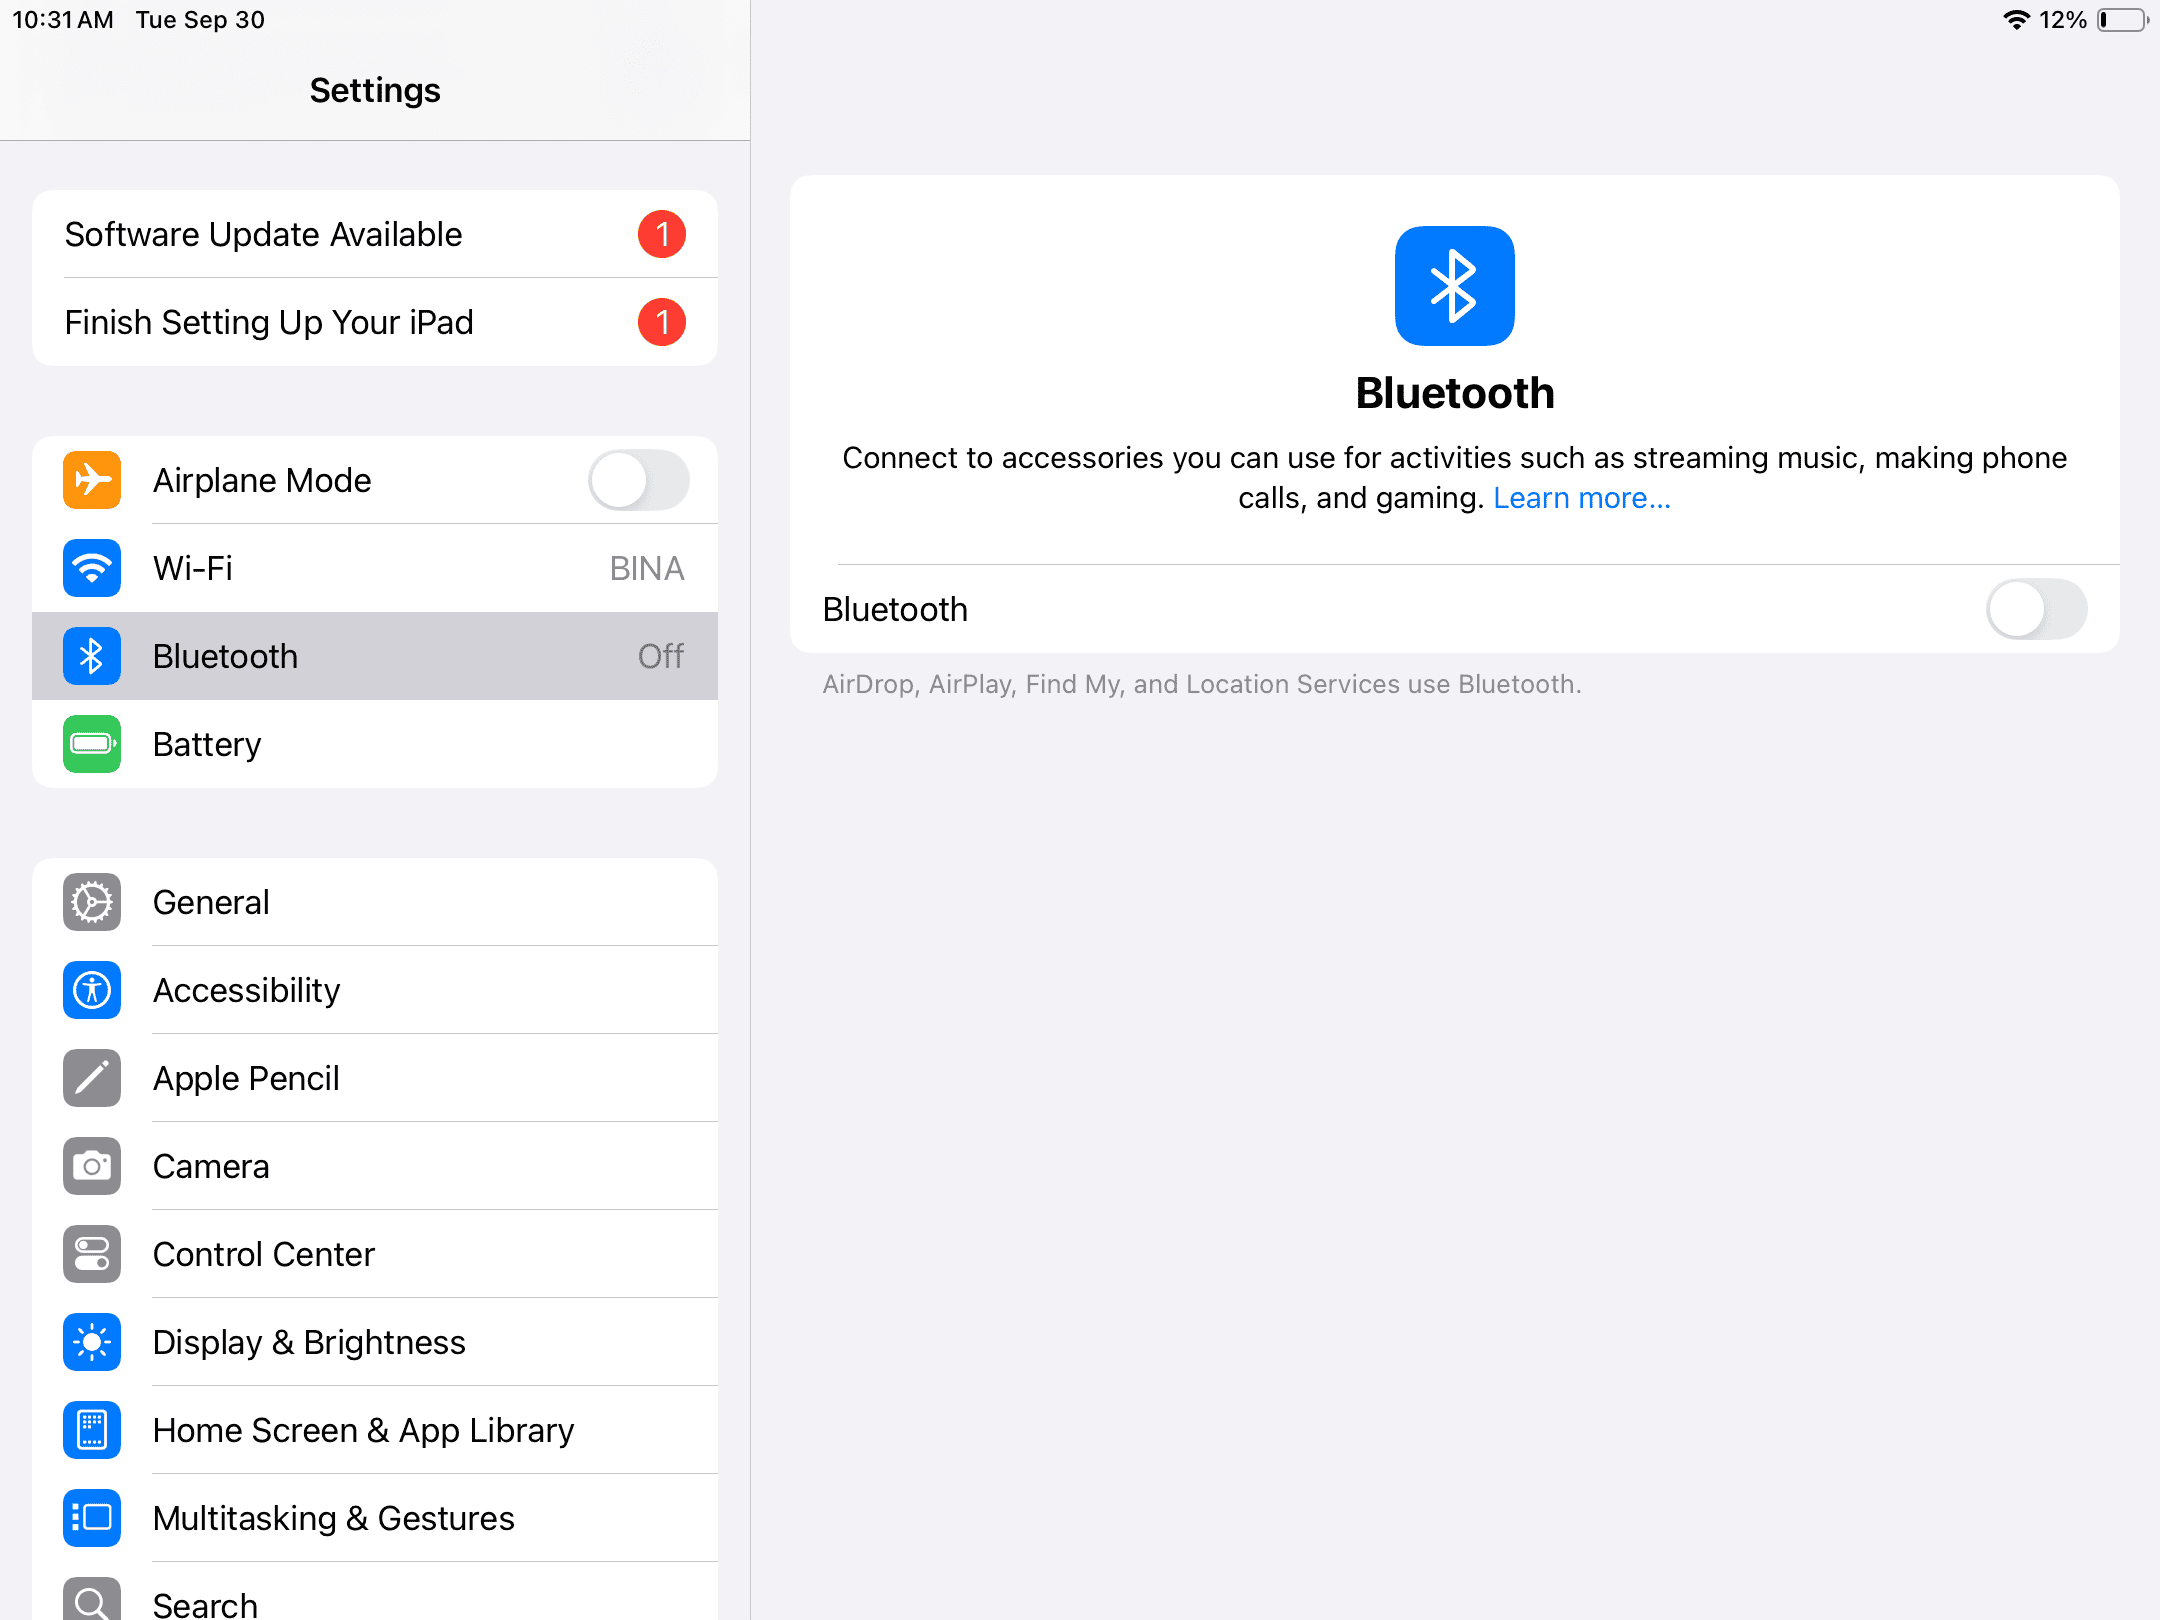
If your iOS device Bluetooth is turned off in Settings, the following system dialog will be shown. Tap the Settings button to go the iOS Settings screen.
In the Settings screen, turn on Bluetooth.
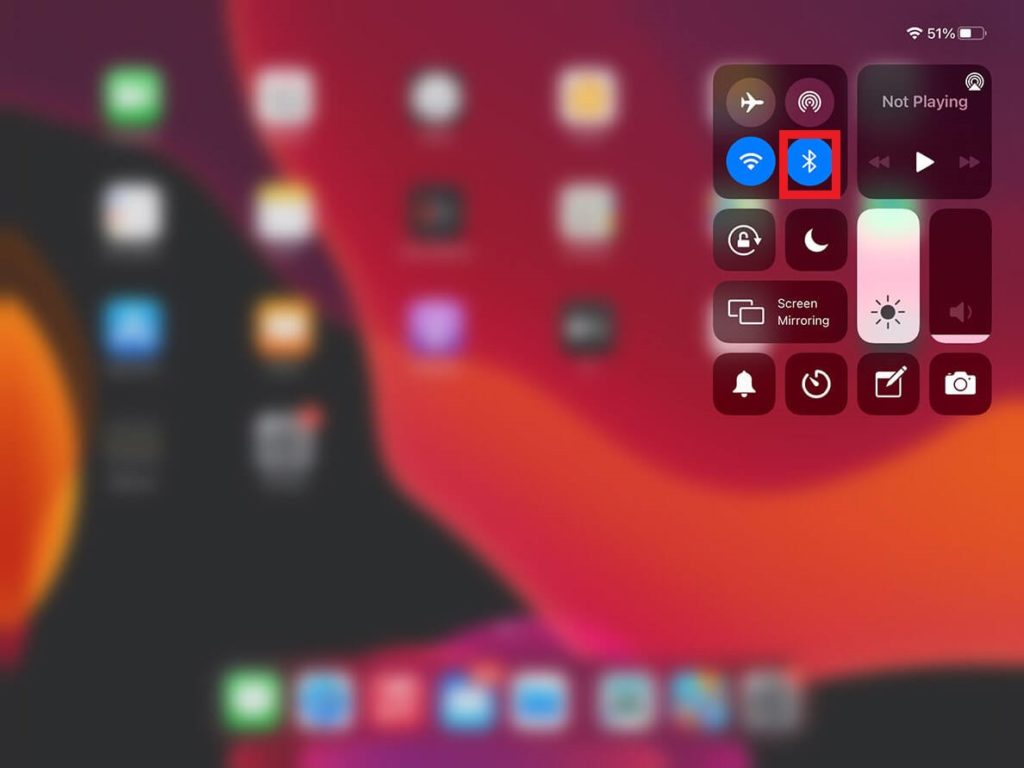
If you reach the Bluetooth screen in the App and tapping the Continue button does nothing, it might be that your device Bluetooth is turned on in Settings, but it is disabled in the Control Center.
Swipe up from the bottom of the screen to launch the Control Center. Make sure Bluetooth is enabled.
4. Bluetooth scanning will start to detect your smART sketcher® AI.
I’ve accidentally tapped the “Don’t Allow” button when asked to allow Bluetooth usage to the app. What should i do?
If you denied the App Bluetooth usage, the iOS system will not prompt you again to allow usage. Instead, you will need to manually enable Bluetooth permission for the smART sketcher® AI app.
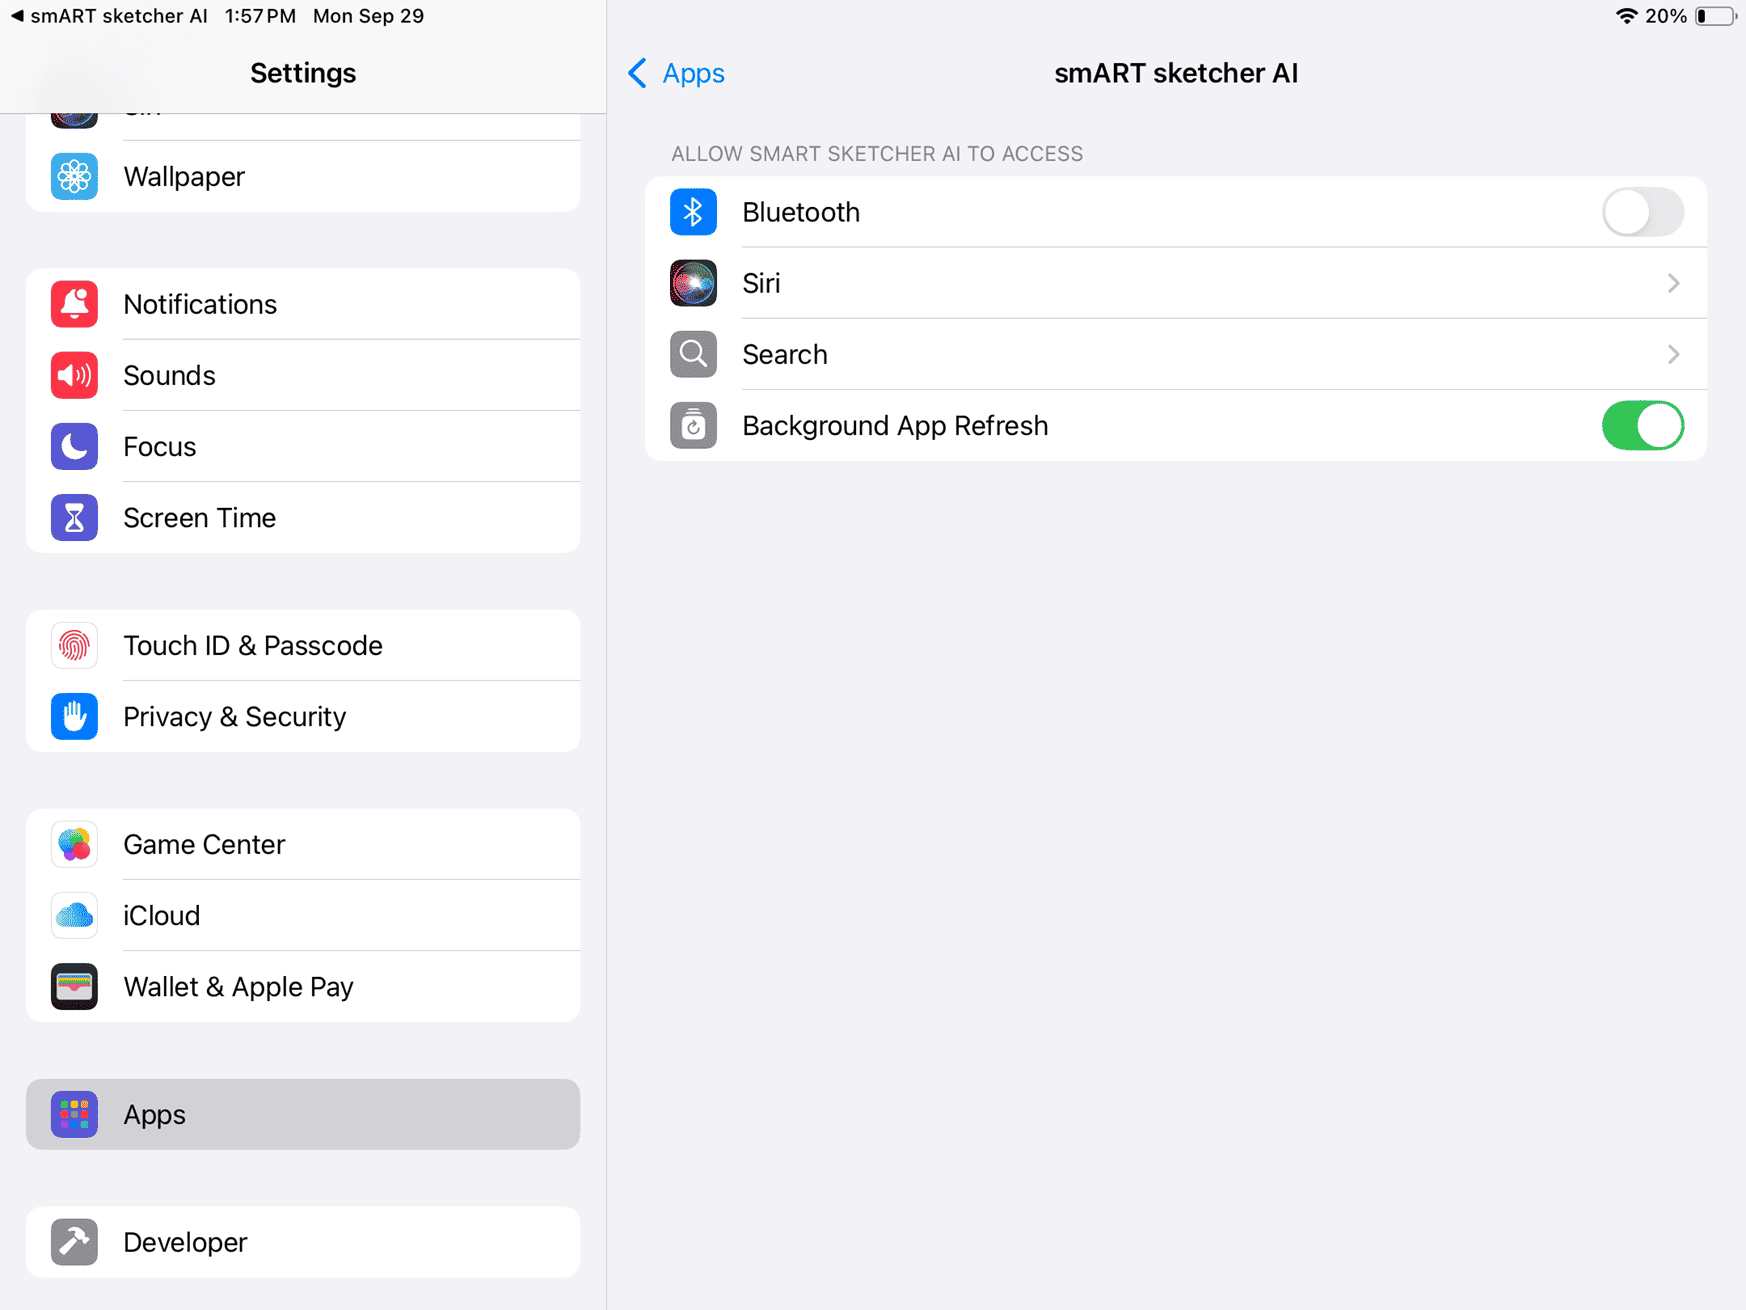
1. Open your iOS Settings app.
2. Navigate to the Apps section and locate the smART sketcher® AI App.
3. In the opened settings screen for the smART sketcher® AI App tap the Bluetooth toggle to allow the smART sketcher® AI App Bluetooth usage.
The Flycatcher account creation is a one time setup. Flycatcher is the corporate name for smART sketcher® AI. Once an account is created, the App will remember the account details. Your Flycatcher account can then be used for all present and future products from the company. If you already have a Flycatcher account, follow the steps in this Link to login.
IMPORTANT: In order to complete the account creation, you will need to confirm your account via an email that we will send to you. Make sure to provide a valid email address that you can access. Also, keep in mind that some email service providers (i.e. governmental, educational, organizational, etc.) will block incoming emails, so don’t use these for your account.
1. Download the smART sketcher® AI App to your mobile device. It’s available on the Apple Store, and Google Play.
2. Open the App and tap the I have a smART sketcher AI button in the welcome screen.
3. Follow the assembly steps or tap SKIP to skip the assembly instructions.

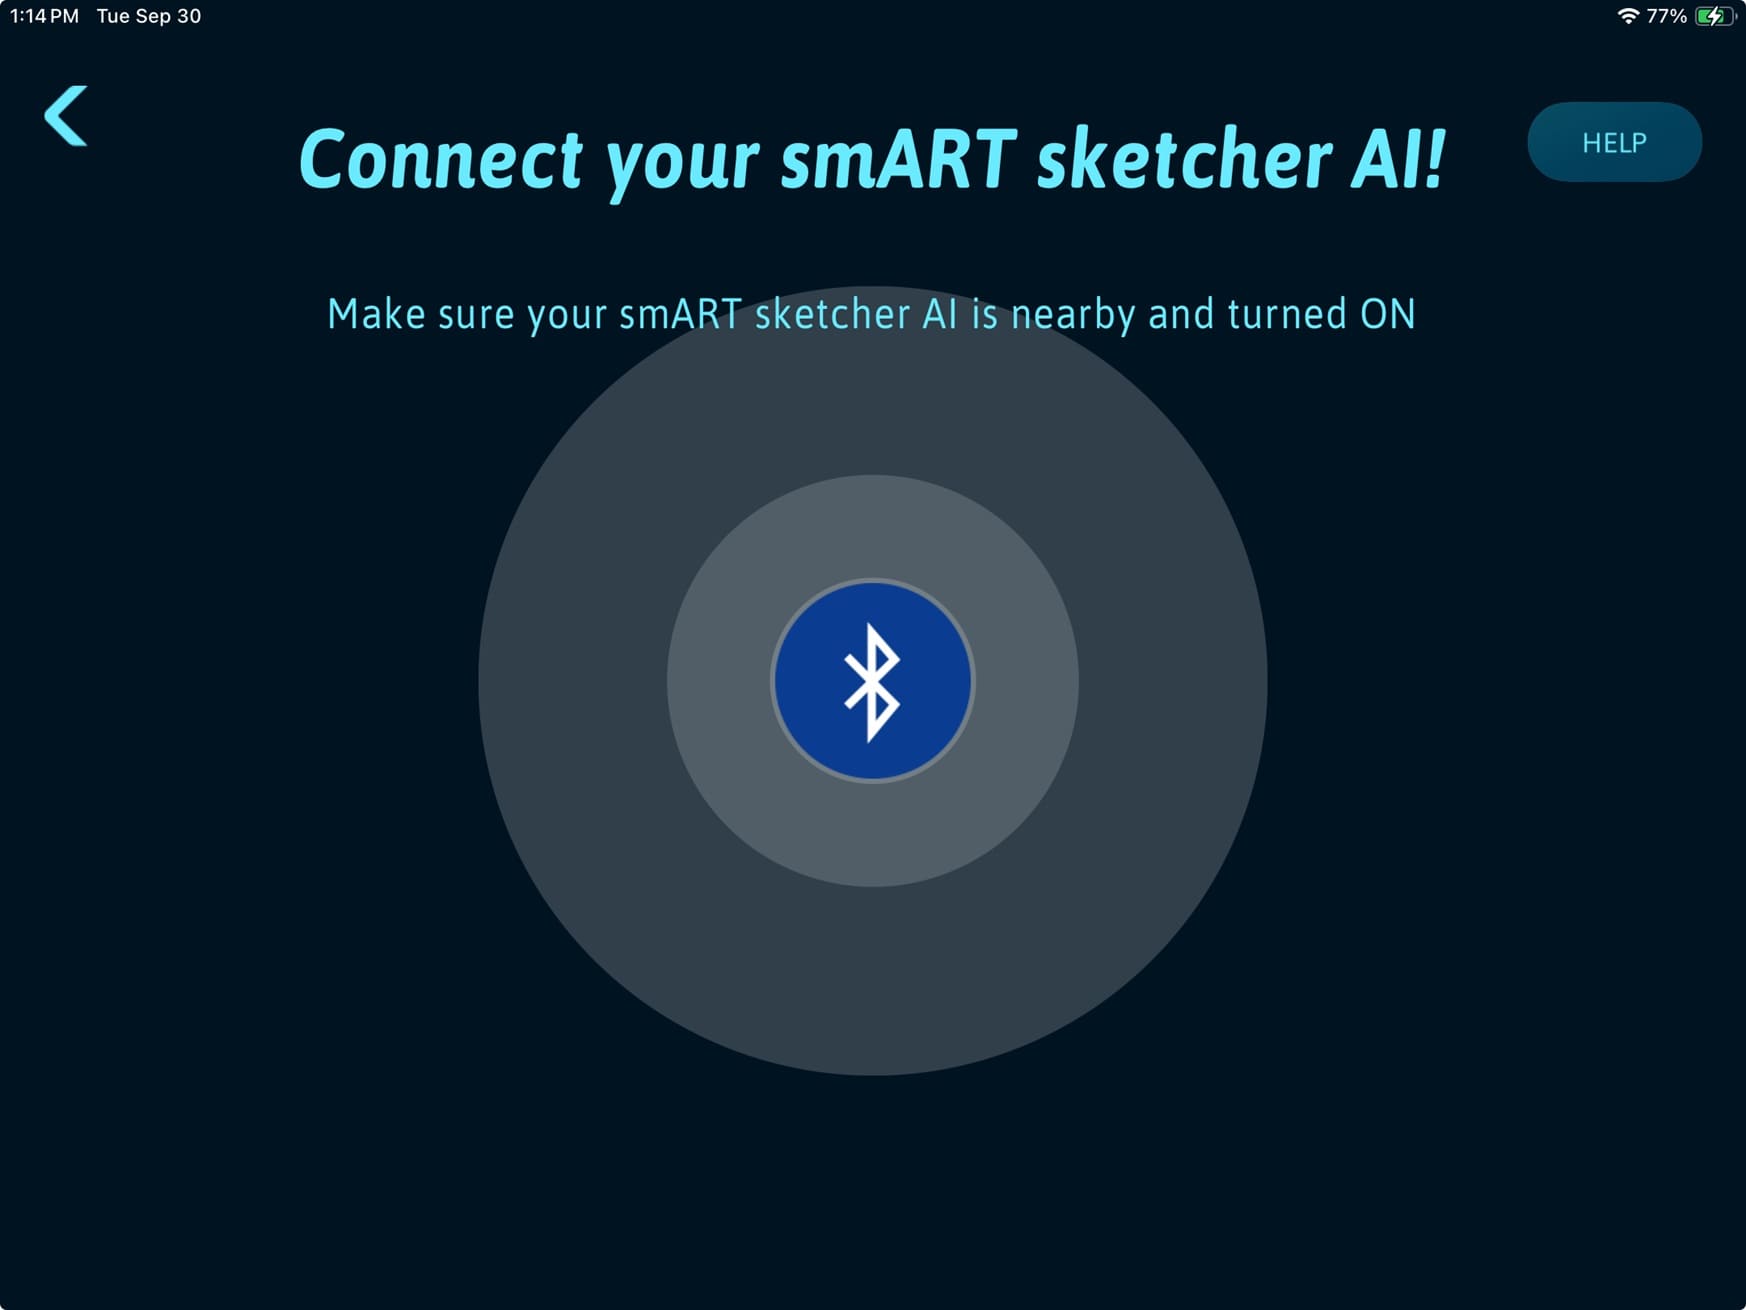
4. The App will search for a smART sketcher® AI. Make sure your smART sketcher® AI is nearby and turned ON.
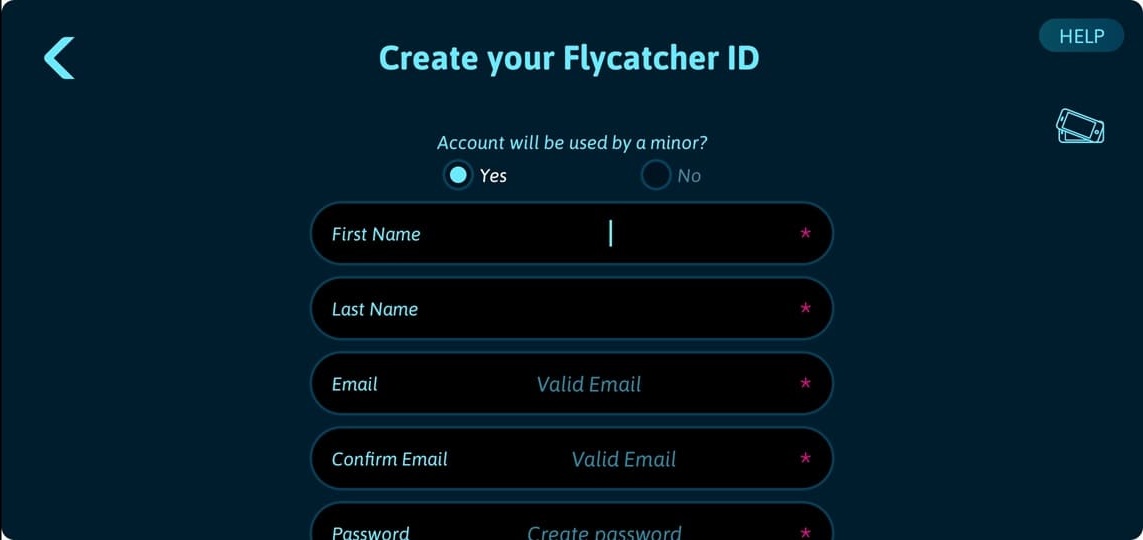
5. In the Account Creation screen, first select if the account will be used by a minor (under the age of 16) or not. Afterwards, enter your first and last name, your email address and select a password (you will need to enter your email and password twice for verification). The password length must be at least 10 characters and also include at least one lowercase and at least one uppercase letter. Make sure to use a valid email address as you will need to activate your account to complete the registration. Tap Next to continue.
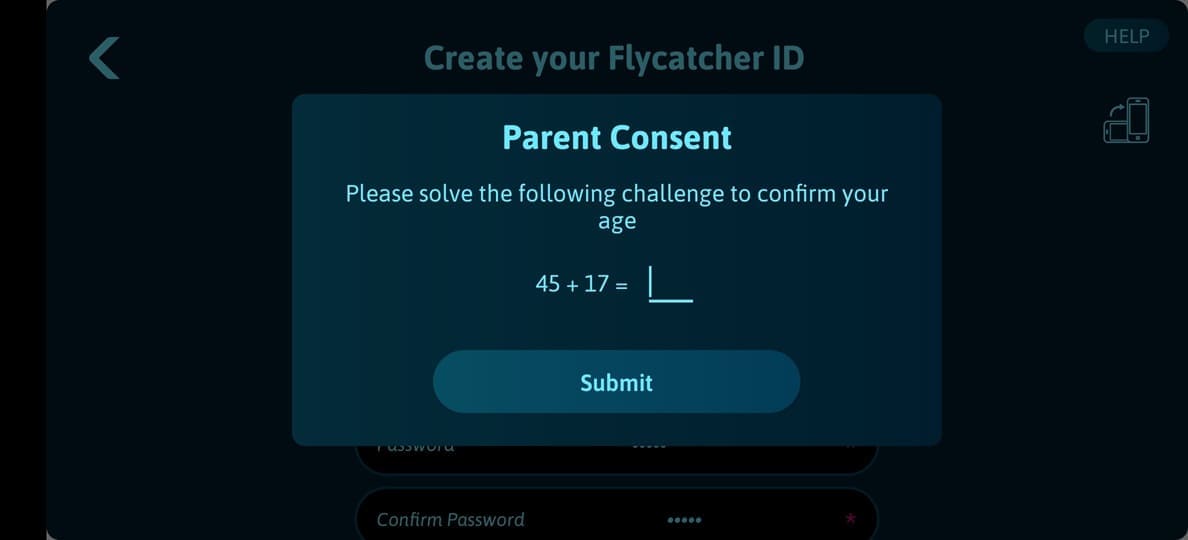
6. In the Parent consent dialog, answer the mathematical challenge to verify your agreement.
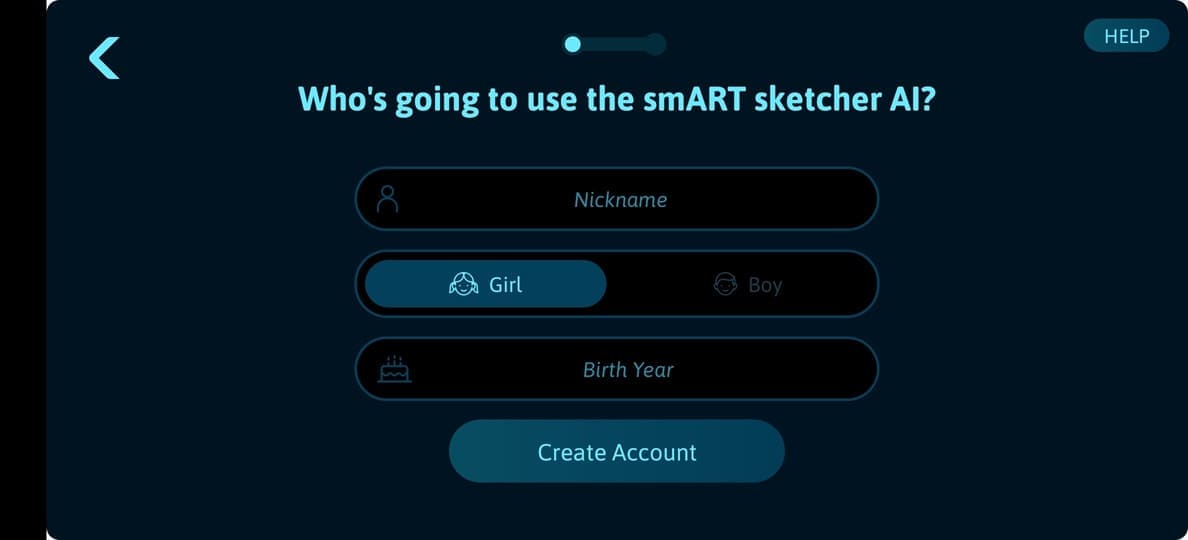
7. Fill in the details for the person who is going to use the App. These include a nickname, gender and birth year. Tap the Create Account button to continue.
8. In the next screen you will confirm your new account. We sent an account confirmation email to the email address you provided. Open the email and tap the confirm account button. Once done, tap the Continue button in the App.
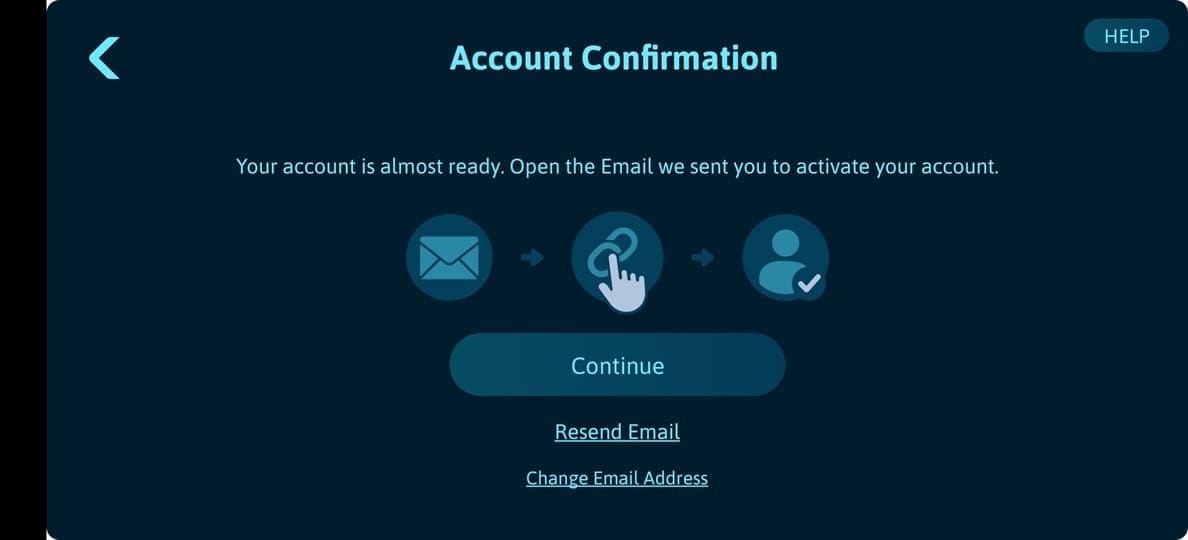
9. In case the account wasn’t confirmed yet, you will see an error message. Make sure to open the confirmation email we sent you and confirm the account. If you didn’t receive an email (check it is not in your spam or trash folder), tap the Resend Email link.
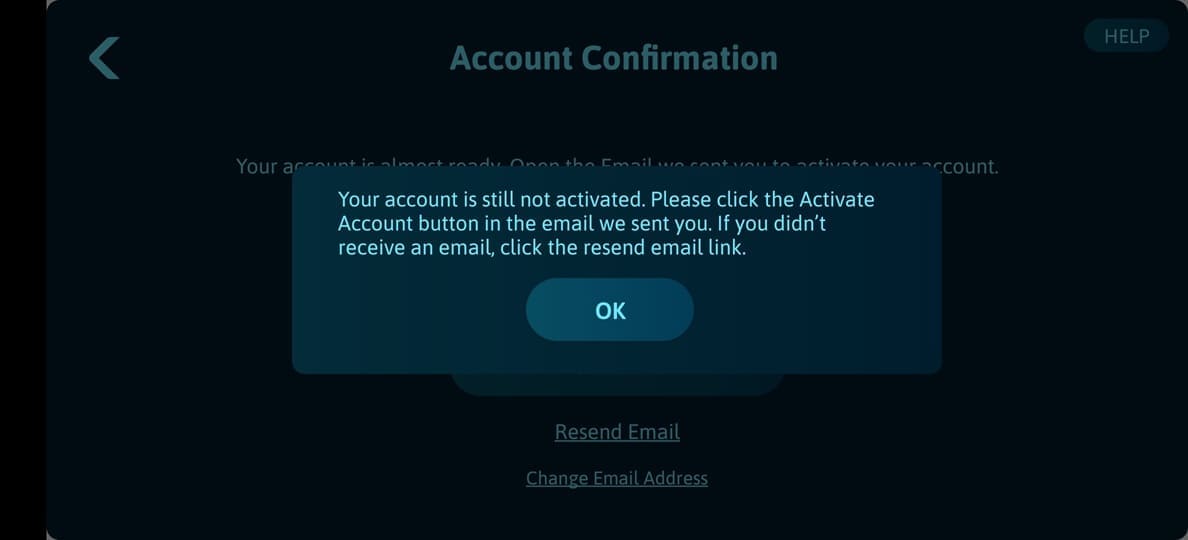
10. That’s it! Your account is ready.
Next time when you open the App, tap the Start Drawing... button – the App will automatically sign-in using your created account.

If you already have a Flycatcher account, you can sign in to the App with it.
1. Open the smART sketcher® AI App.
2. Tap the Sign in with Flycatcher ID link in the bottom of the welcome screen.

3. The App will search for a smART sketcher® AI. Make sure your smART sketcher® AI is nearby and turned ON.
4. In the Sign In to your account screen, fill-in your Flycatcher account email address and password.
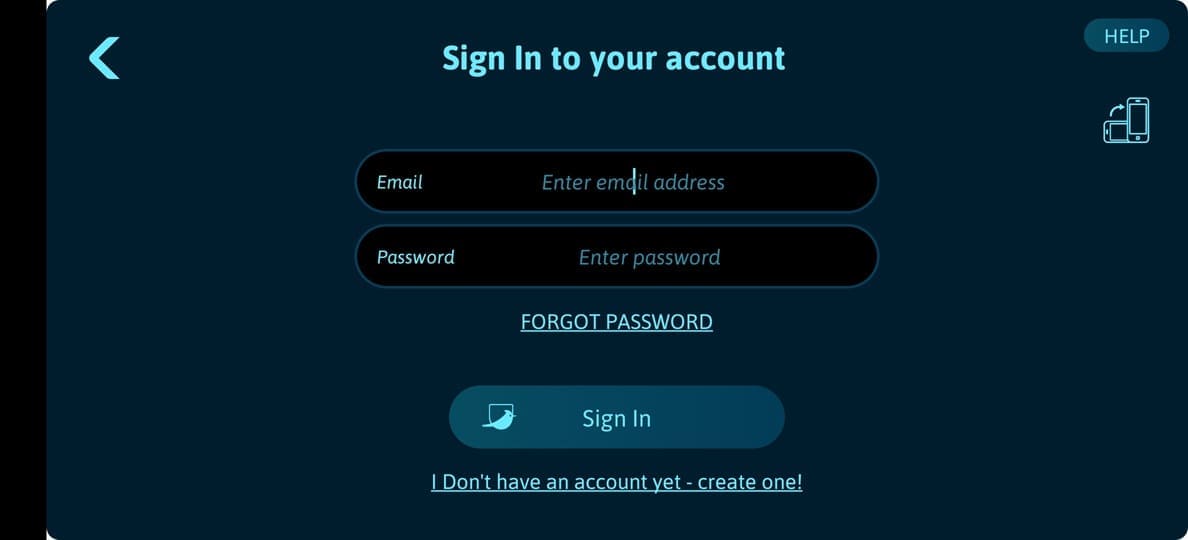
5. Tap the Sign In button.
6. Tada! You are now signed to the App with your Flycatcher account ID.
If you forgot your account password, you can initiate a password recovery from within the App. The password recovery process includes 3 steps:
- Initiating the password recovery process by entering the Email address you used for registration.
- You will receive an Email with a recovery code that you need to enter in the App. Notice: the recovery code is valid for 30 minutes, after that it will expire.
- Once the recovery code is verified successfully by the App you will be prompted to enter a new password for your account.
To initiate a password recovery:
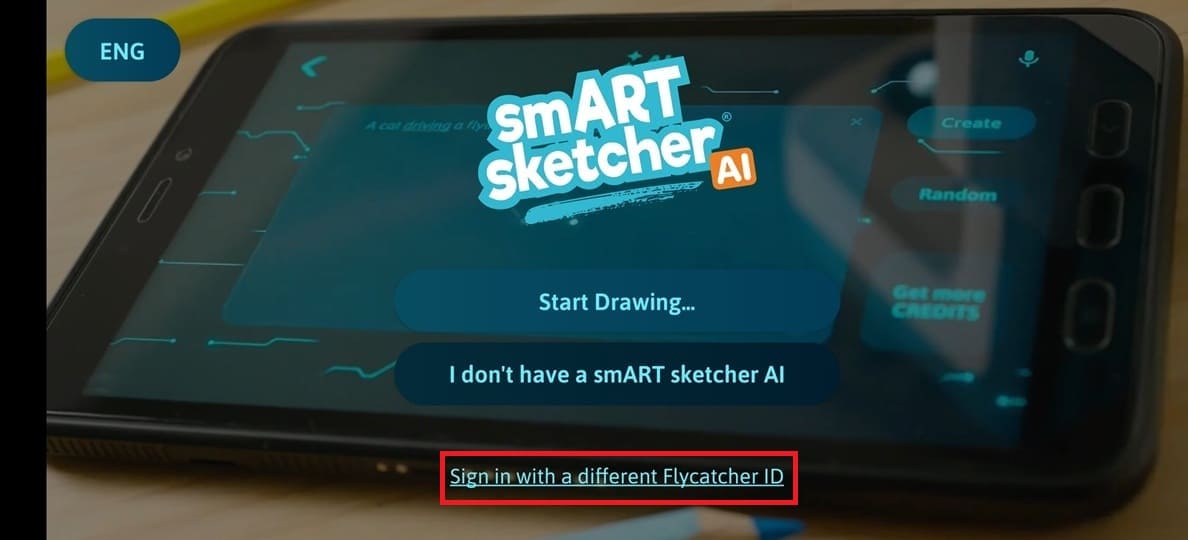
1. Open the smART sketcher® AI App.
2. Tap the Sign in with Flycatcher ID or Sign in with a different Flycatcher ID link in the bottom of the welcome screen.
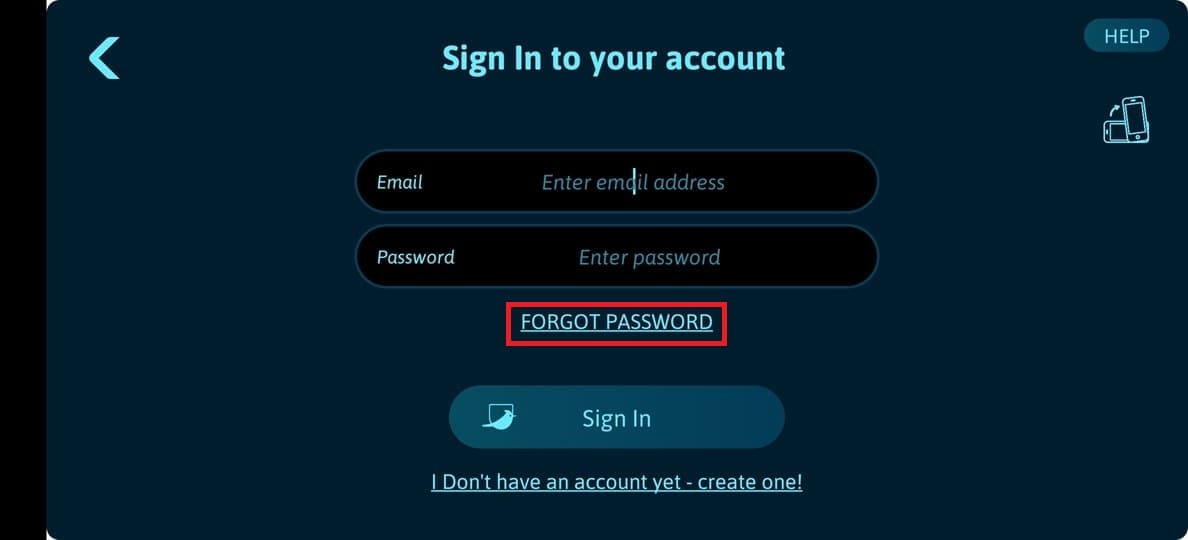
3. In the Sign in to your account screen, tap the FORGOT PASSWORD link.
4. Enter the Email address that was used for your account registration. Tap the Send me verification email button and we will send you an Email with a verification code.

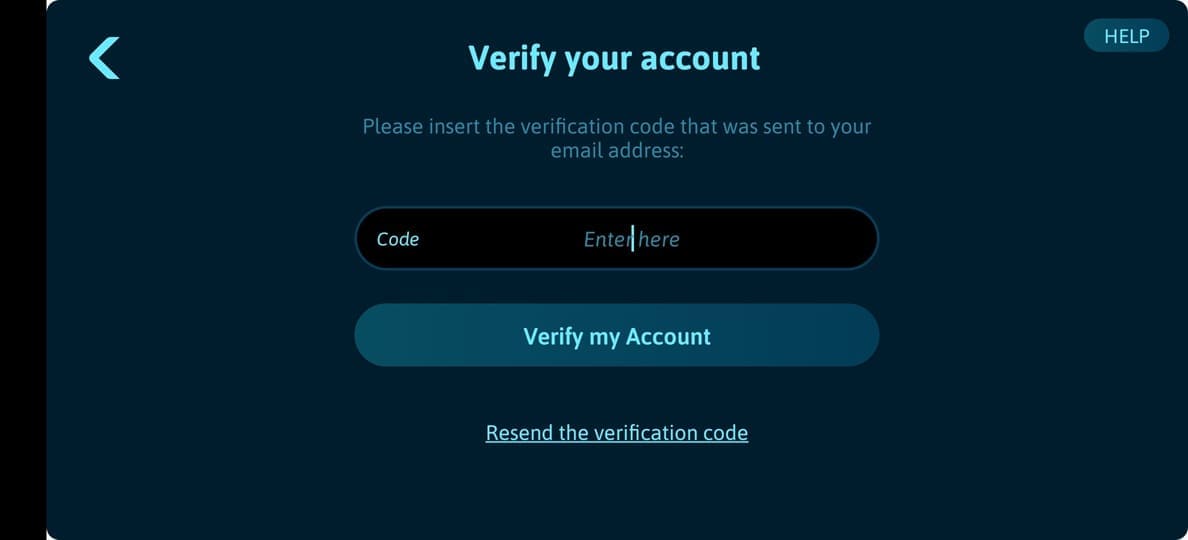
5. Enter the verification code you received by Email in the Code field and tap the Verify my account button. If a valid verification code was entered you will be promoted to select a new password. In case you didn’t receive an Email with the verification code (verify it’s not in your email junk folder), tap on the Resend the verification code link and we will resend the code again.
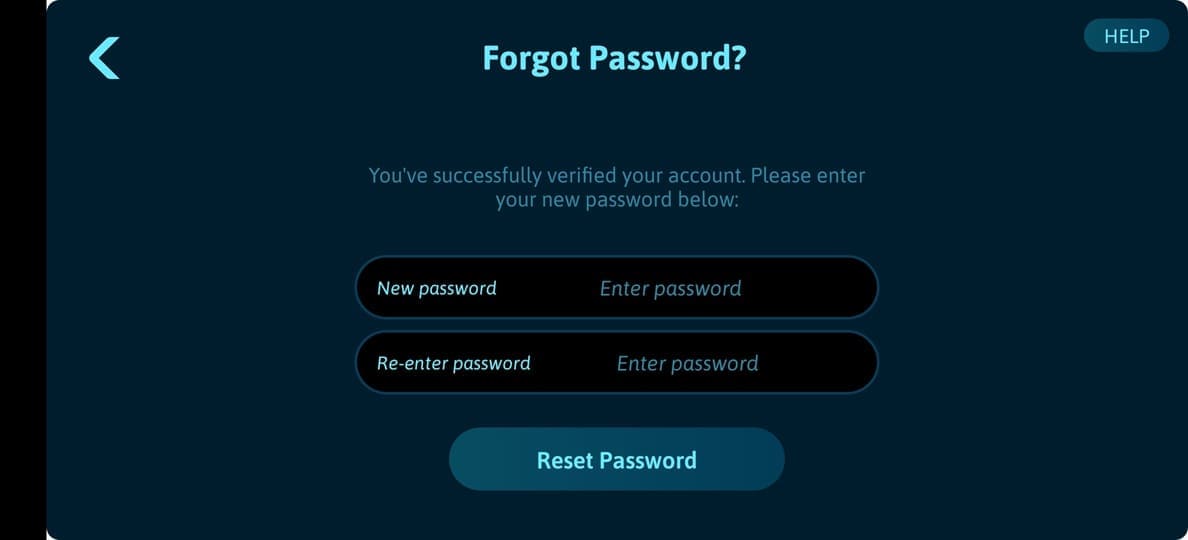
6. Enter your new password in the Password fields (the password length must be at least 10 characters and also include at least one lowercase and at least one uppercase letter). Tap the Reset Password button to complete the password recovery process.
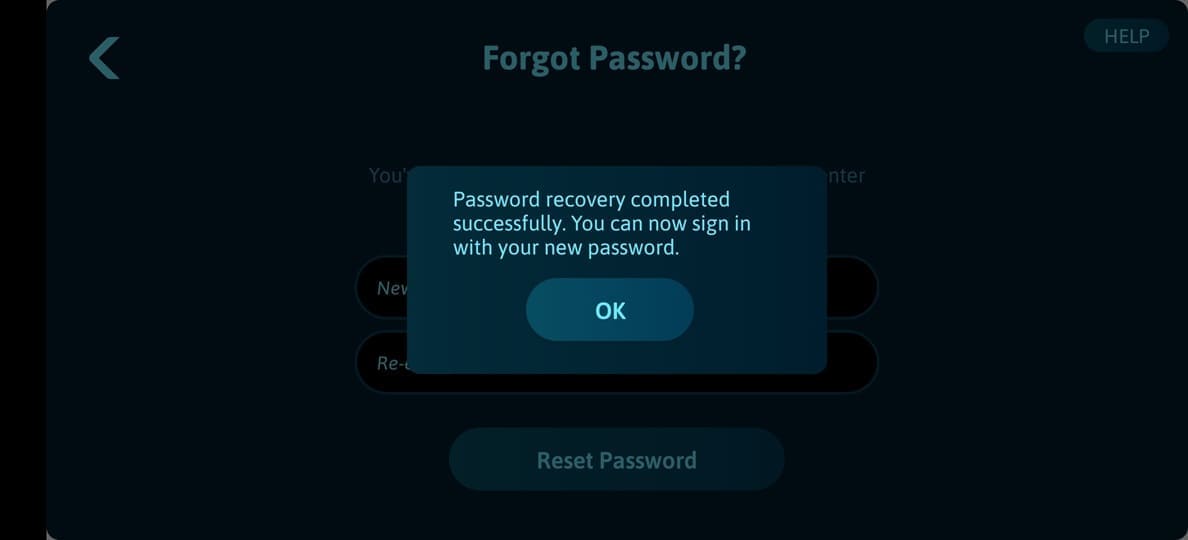
7. The password recovery process completed successfully. A tap on the OK button will redirect you to the Login page. Enter your account Email address and your new password to login into your account.
You can change your account password from within the App. As a safety measure you are requested to enter your current password before you can create a new password.
Please note that you are changing your Flycatcher account password. If you have other Flycatcher Apps; the account password change will also apply to these Apps as well.
1. Open the App and tap the Start Drawing... button in the welcome screen.
2. The App will search for a smART sketcher® AI. Make sure your smART sketcher® AI is nearby and turned ON.
3. In the Main screen, locate and tap the Settings button to access the Settings screen.
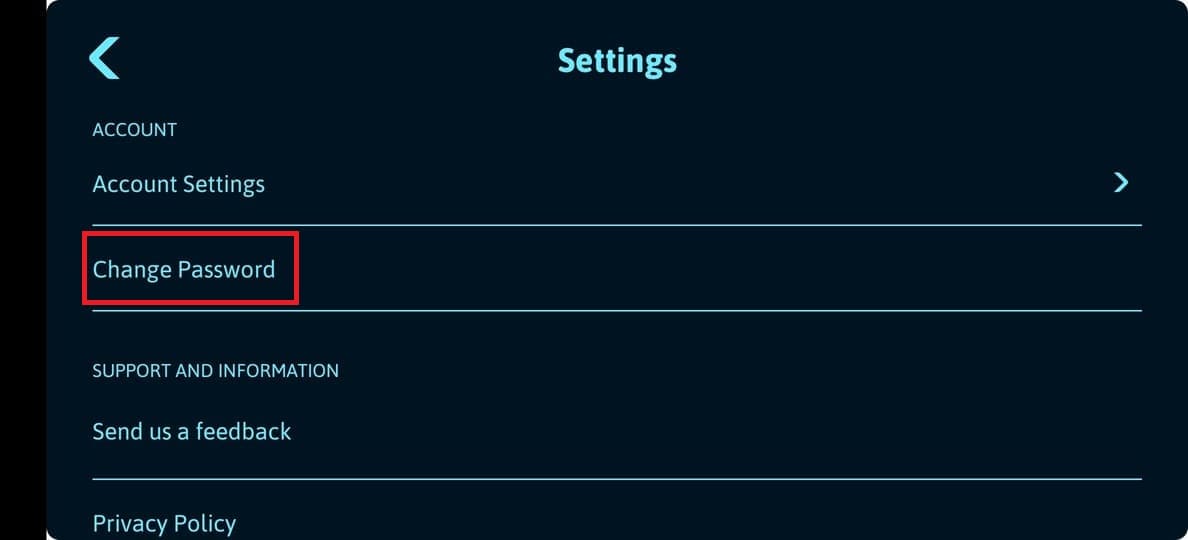
4. Scroll down to the Account section and tap on Change Password.
5. In the Change Your Password dialog, please enter your current password and the new password you want to create (you will be requested to enter the new password twice to prevent any typo mistakes). Tap the Save button to complete the change.
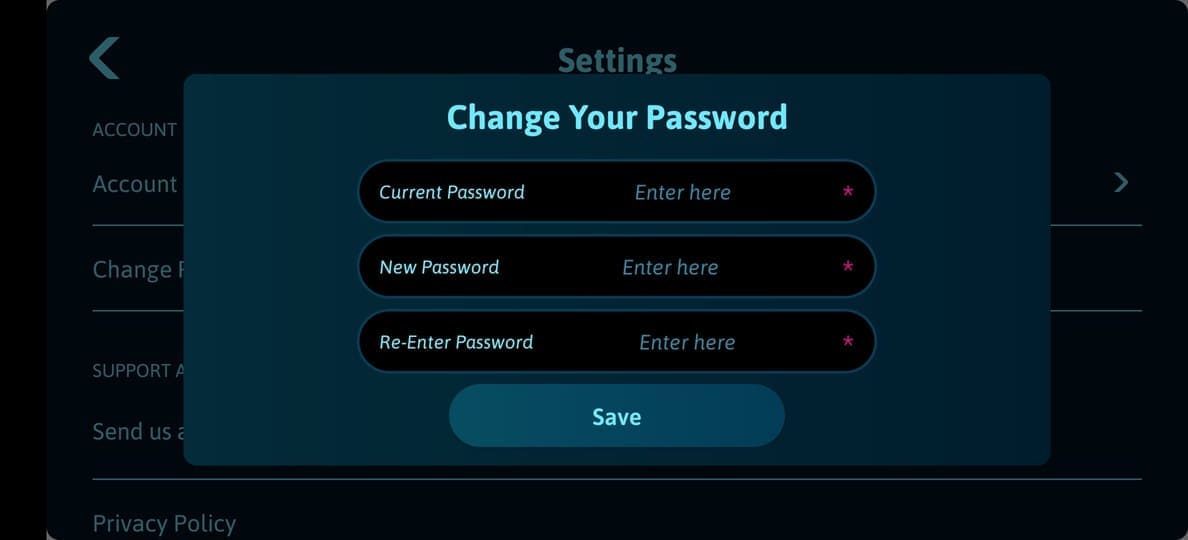
6. Your new password is now updated in our system.
You can delete your account from within the App. Please note that the App uses your Flycatcher account that is also synced to any other Flycatcher products you may have. Once you delete your Flycatcher account, your smART sketcher® AI App and any other Flycatcher product Apps (like the smART sketcher® projector or the smART Pixelator™) will stop working.
To delete your Flycatcher account:
1. Open the App and tap the Start Drawing... button in the welcome screen.
2. The App will search for a smART sketcher® AI. Make sure your smART sketcher® AI is nearby and turned ON.
3. In the Main screen, locate and tap the Settings button to access the Settings screen.
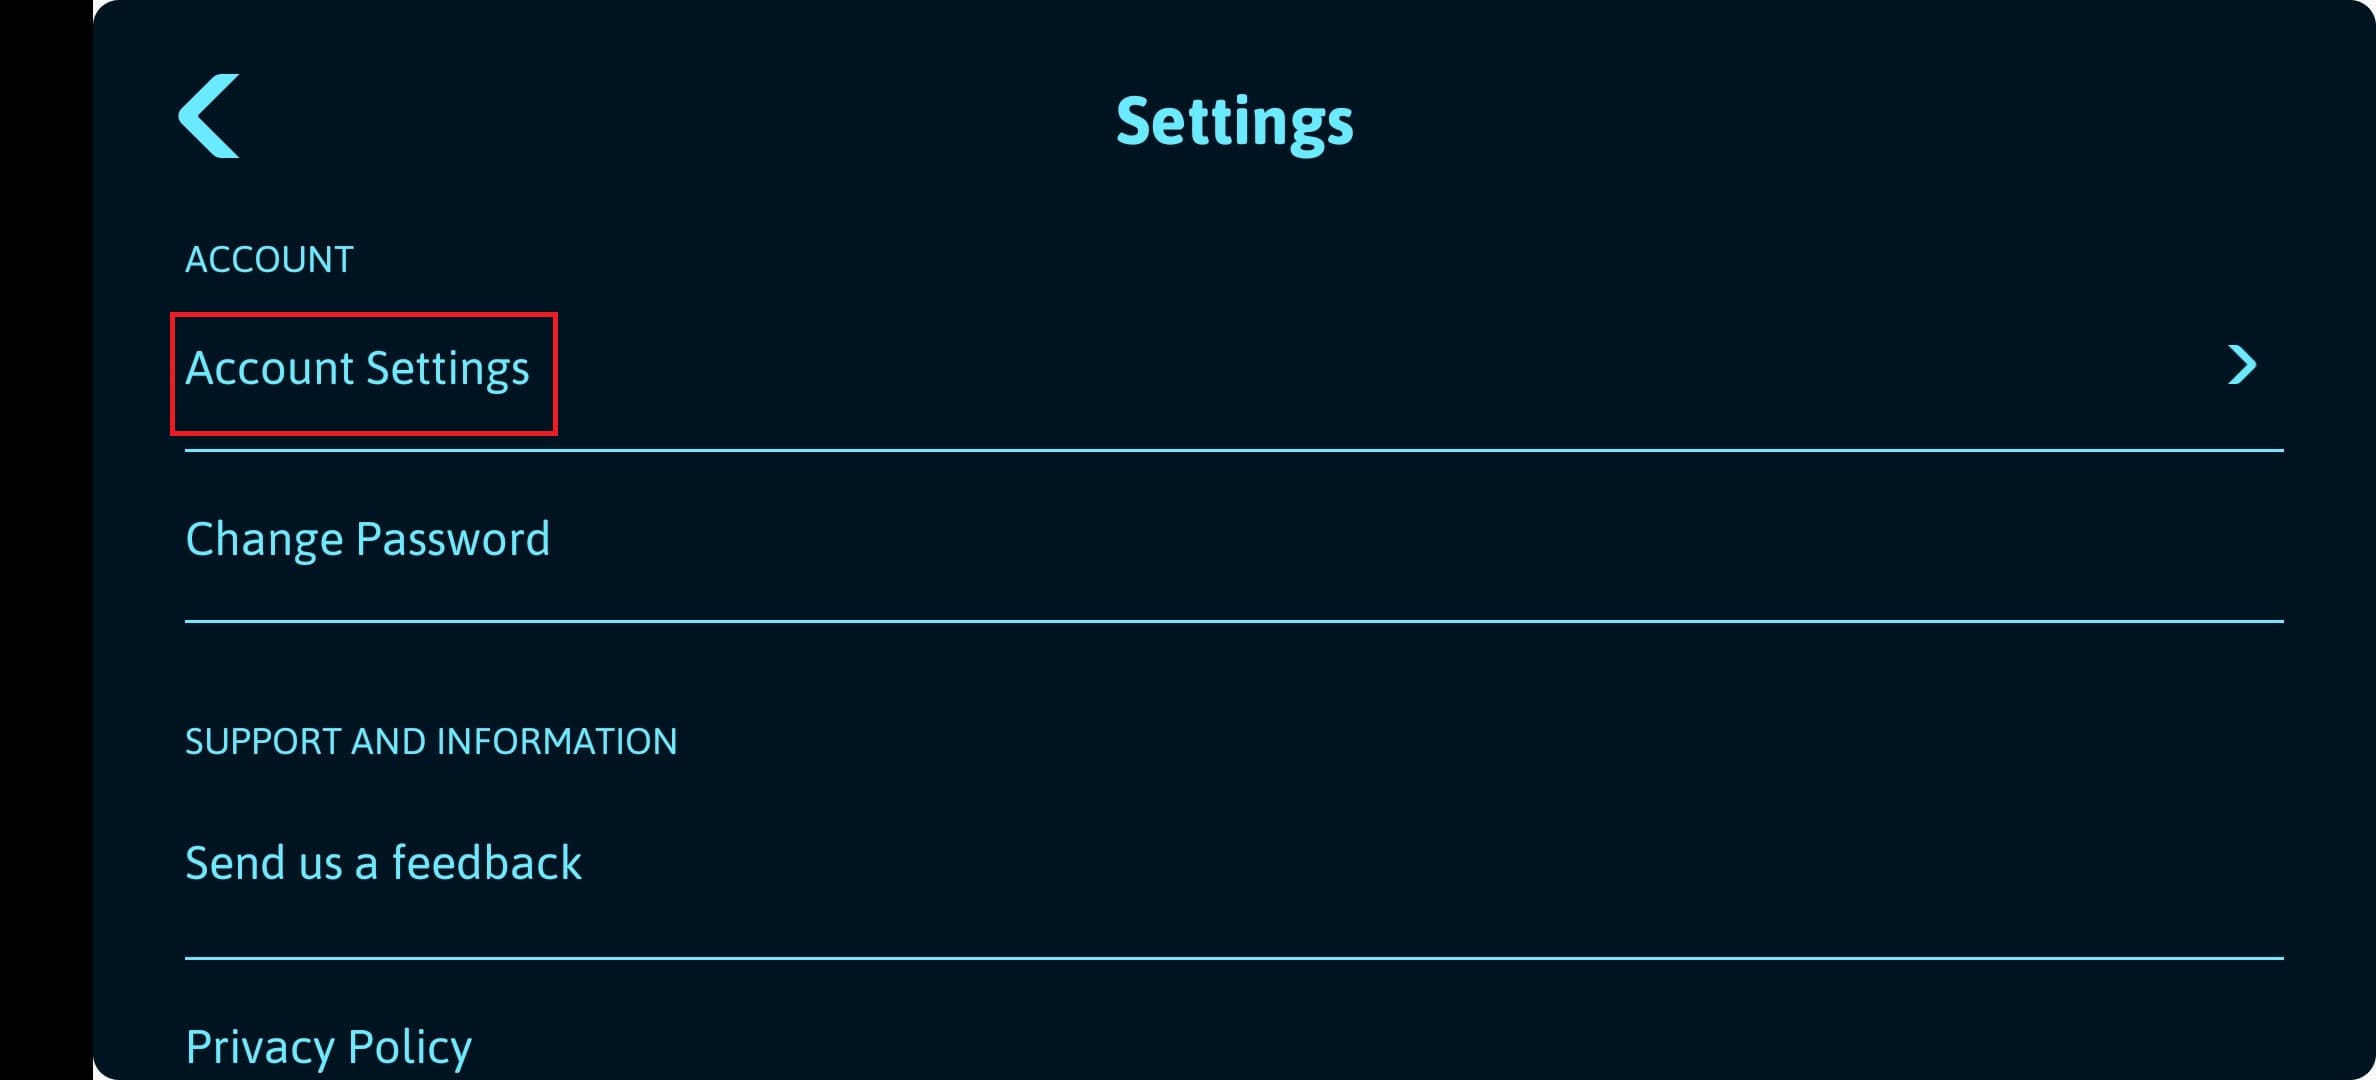
4. Scroll down to the Account section and tap on Account Settings.
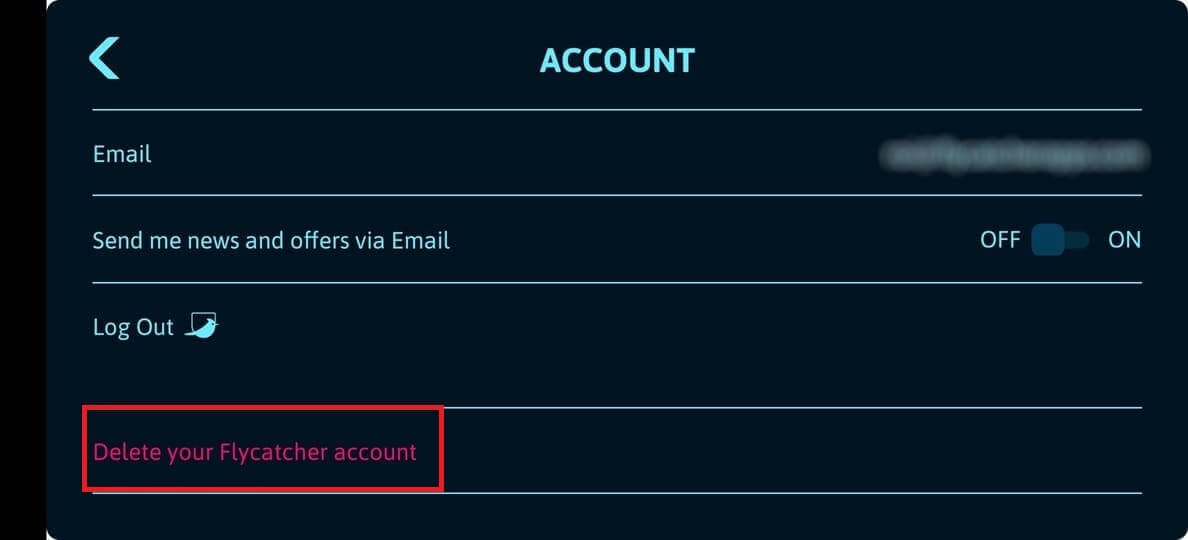
5. In the Account Settings sub-menu tap on Delete your Flycatcher account.
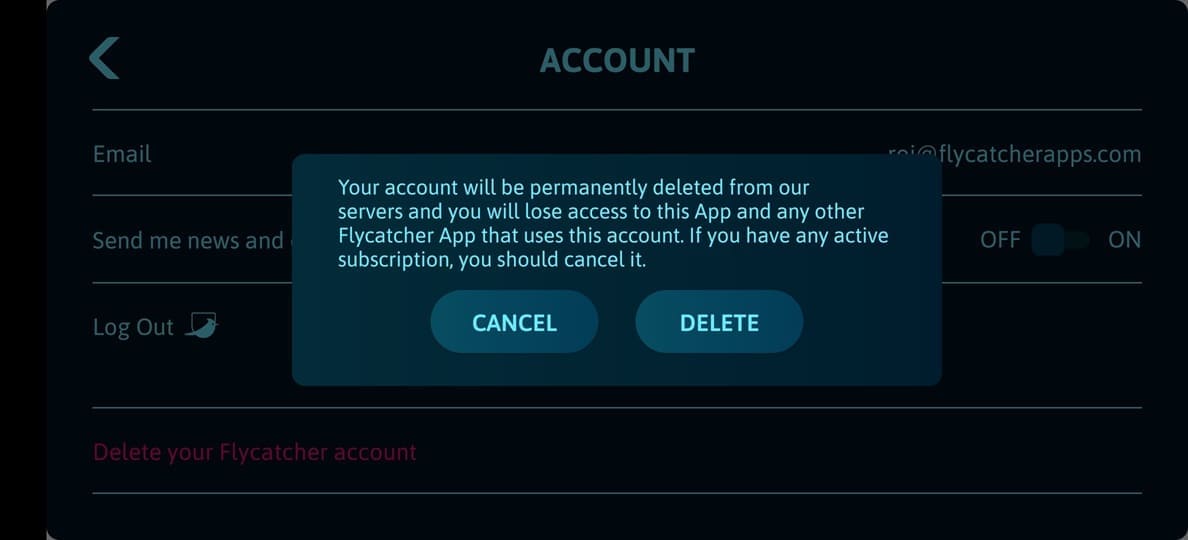
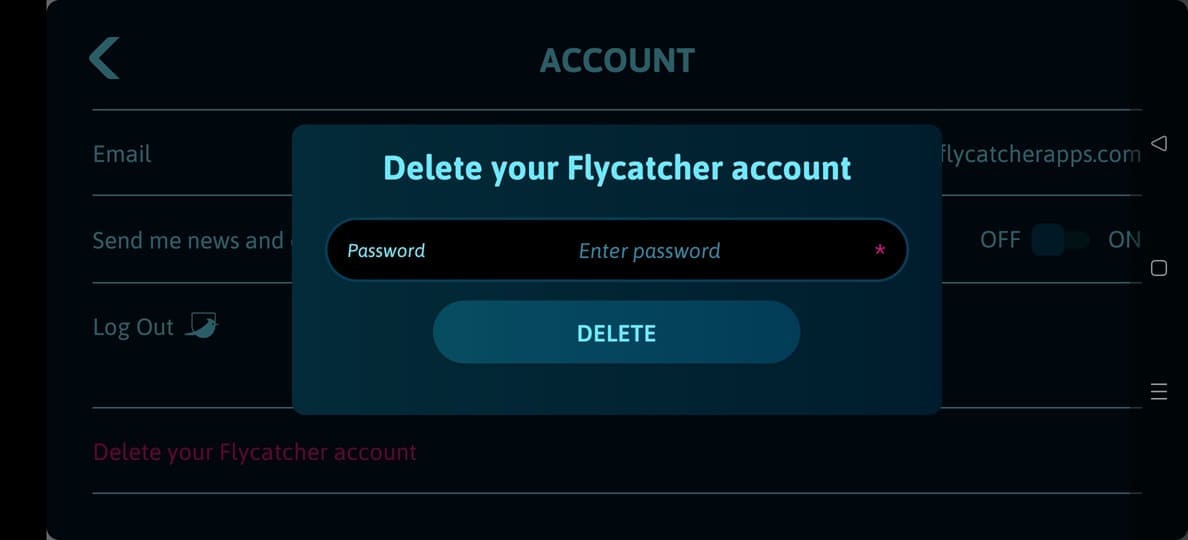
6. The below warning message will be shown to verify the delete account action. Tap the DELETE button to confirm your account deletion.
7. You will be prompted to enter your account password. Enter your password and tap DELETE. Your account will be deleted and you will be logged out from the App.
In order to create an account, your smart device (mobile or tablet) must be connected to the internet (via Wi-Fi or cellular network). So, please verify that you have an active internet connection before you start the account creation process.
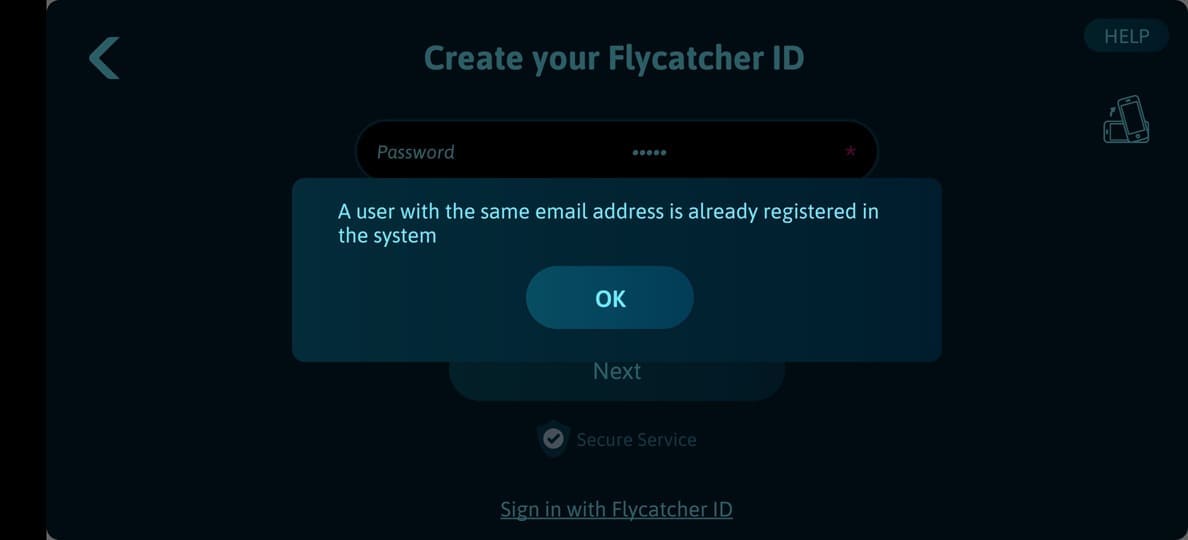
If you receive the following message: “A user with the same email address is already registered in the system.“, it means that an account with the same Email address is already registered in our system. As the Flycatcher account is shared with multiple Flycatcher products it is possible that you already created a Flycatcher account in one of our other Apps (the smART sketcher® Projector, the smART sketcher® GO! or the smART pixelator™ Apps for example). In this case, no need to create another account; you can login with your Flycatcher account credentials also to the smART sketcher AI App. See more details in this Link.
If you forgot your Flycatcher account credentials, use this Link to learn how to initiate a password recovery.
Sure. If you already have a Flycatcher account, you can sign-in to the smART sketcher® AI App with it from multiple devices.
Important: although you can sign-in and use the same Flycatcher account on multiple devices, some features will not be available: the subscription plan is bound to your mobile device Apple/Google account and thus won't be available on all devices.
1. Open the smART sketcher® AI App.
2. Tap the Sign in with Flycatcher ID link in the bottom of the welcome screen.
3. The App will search for a smART sketcher® AI. Make sure your smART sketcher® AI is nearby and turned ON.
4. In the Sign In to your account screen, fill-in your Flycatcher account email address and password.
5. Tap the Sign In button.
6. Tada! You are now signed to the smART sketcher® AI App with your Flycatcher account ID.
Yes. The smART sketcher® AI App has multi-language support. We currently support 6 languages and we will be adding more languages soon. Please note that although the app interface supports only 6 languages, the prompt input in the AI prompt screen can be in any language.
The languages we currently support:
- Danish
- English
- French
- German
- Hebrew
- Polish
To select a different language:
1. Open the smART sketcher® App.
2. Tap the language selection button at the top left corner of the Welcome screen – initially it will show: ENG.
3. Select your desired language from the list and tap the Done button.
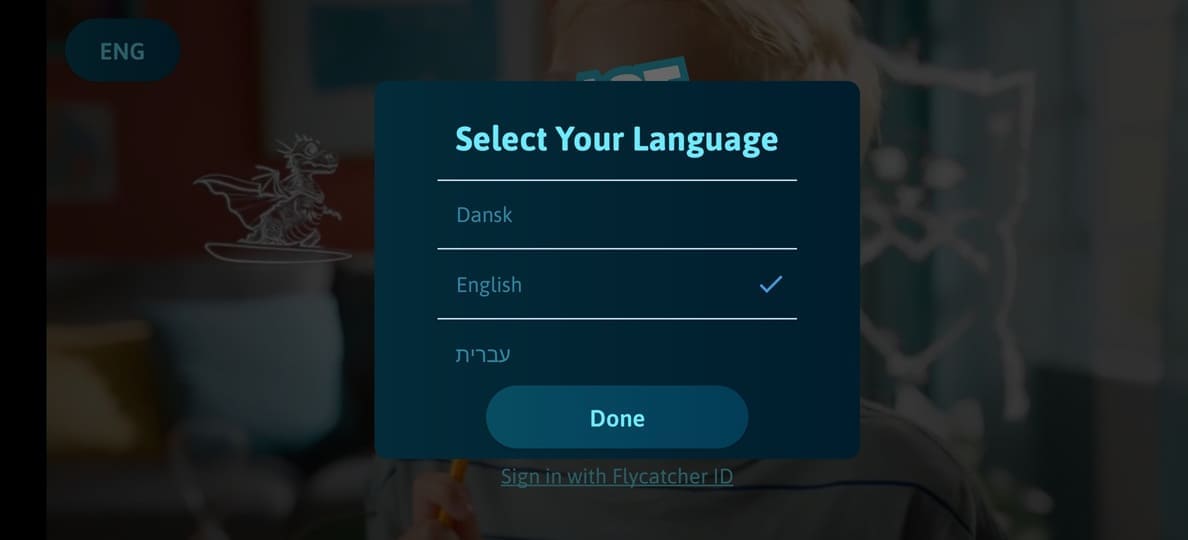
4. The App language will change to the selected language.
To ensure the best possible creative experience, we highly recommend keeping your device updated to the latest firmware version. Regular updates provide important bug fixes, system enhancements, and ensure your smart device runs smoothly.
Updating your device is simple. The process is performed wirelessly (Over-The-Air) via a Bluetooth connection using the official smART sketcher® AI app.
Important Update Guidelines
Before beginning the update, please read through these essential instructions to ensure a successful installation:
- Adult Operation Required: The firmware update process should only be initiated and completed by an adult.
- Quick Installation: The entire update process is fast, typically taking about 2 minutes to complete.
- Keep Devices Close: Ensure your mobile device remains right next to the smART sketcher® AI device throughout the entire process to maintain a stable Bluetooth connection.
- Stay in the App: Do not minimize the app, switch to other applications, or lock your screen. You must remain on the firmware update screen until the process is 100% finished.
1. Make sure your smART sketcher® AI is connected to the App using Bluetooth. (See instructions on how to connect the App for further details.)
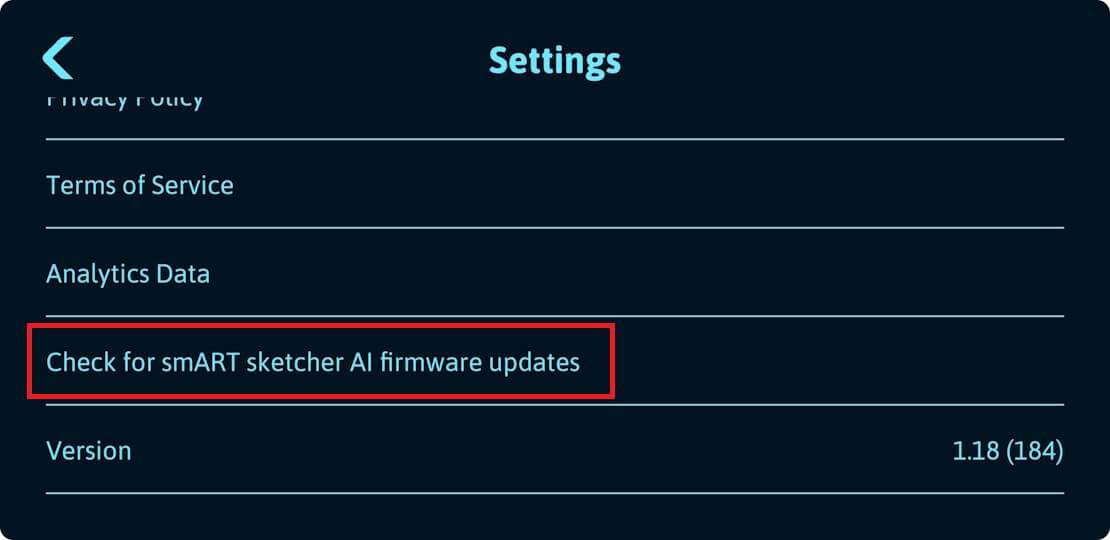
2. On the main screen, tap the Settings button to launch the settings screen.
3. In the settings screen, scroll down to the bottom. Tap the Check for smART sketcher AI firmware updates.
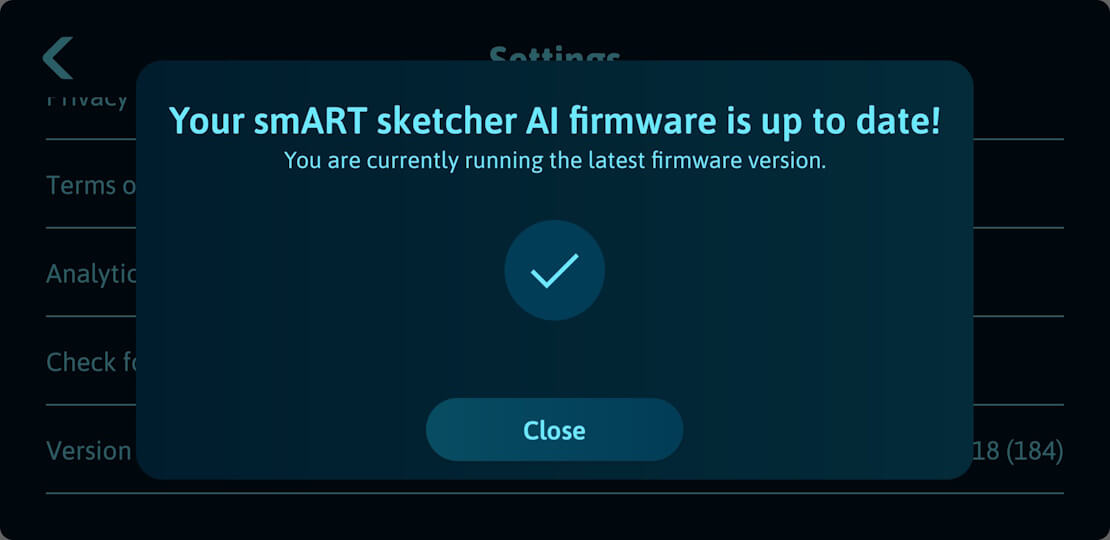
4. In case your smART sketcher AI firmware is already updated to the latest firmware you will see the below screen. Tap the Close button to return back to the settings screen.
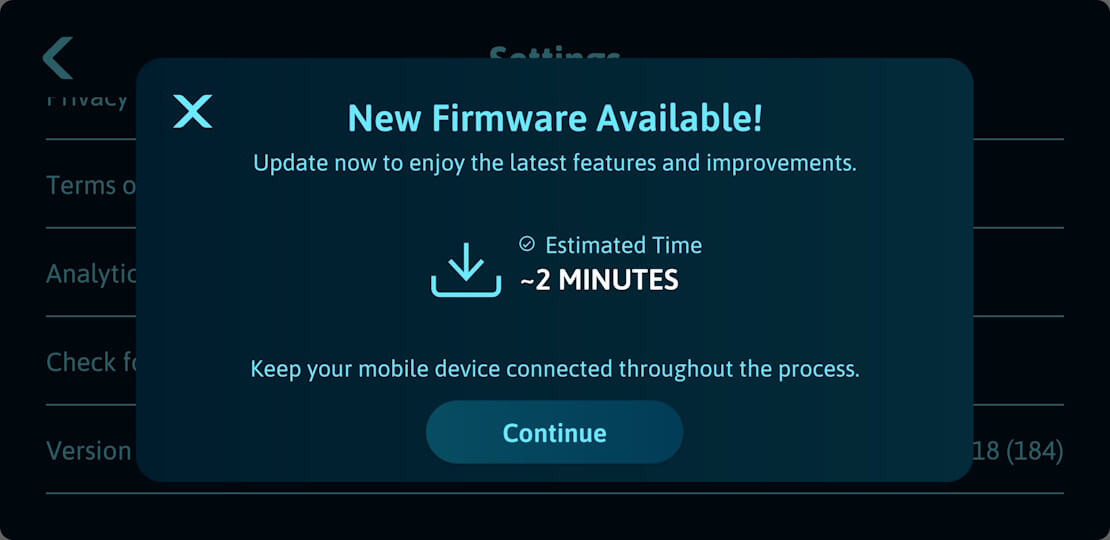
5. If a new firmware version was found for your smART sketcher AI device, the following screen will be shown. Tap the Continue button.
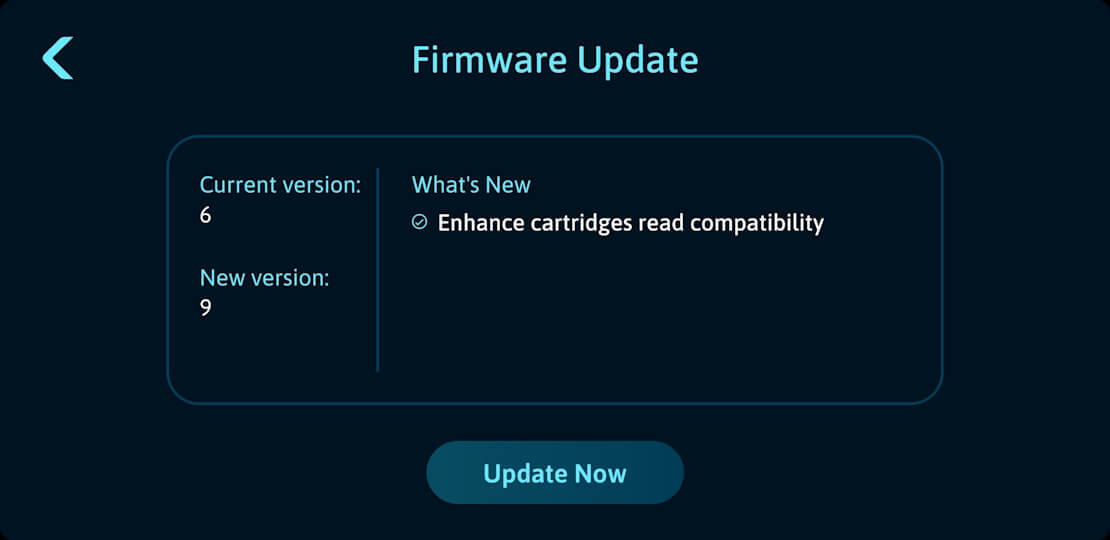
6. The Firmware Update screen will show your smART sketcher AI current firmware, new version and a list of what's new. Once you are ready, tap the Update Now button to start the firmware update process.
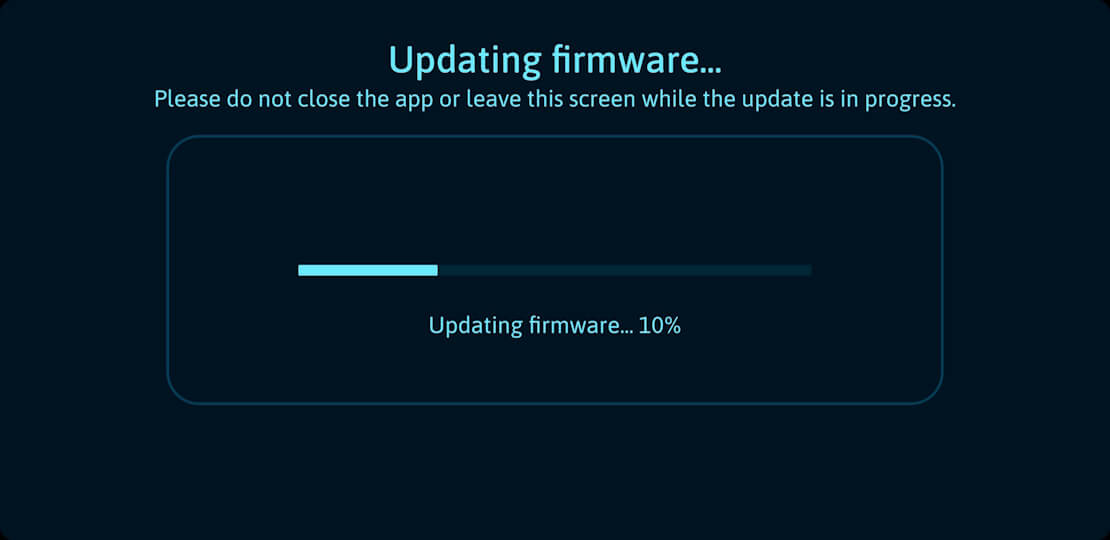
7. The app will download the new firmware package and will start the update process. Make sure your mobile device stays close to the smART sketcher AI and don't close the app or leave this screen. The smART sketcher AI will reboot once the firmware update completed.
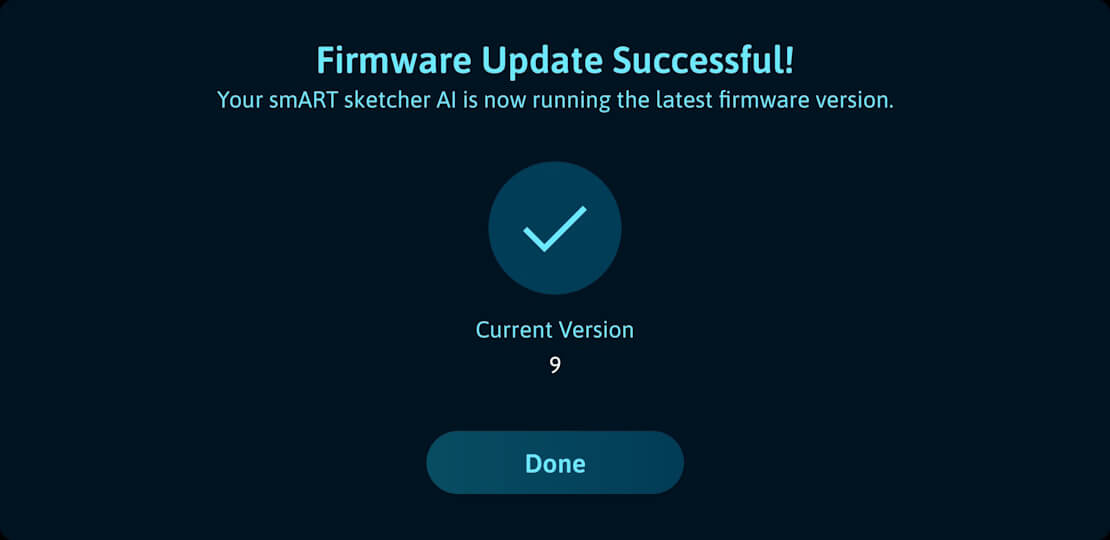
8. Once the firmware update completes successfully, the app will reconnect to your smART sketcher AI and you will see the following screen. Tap the Done button to return to the settings screen.
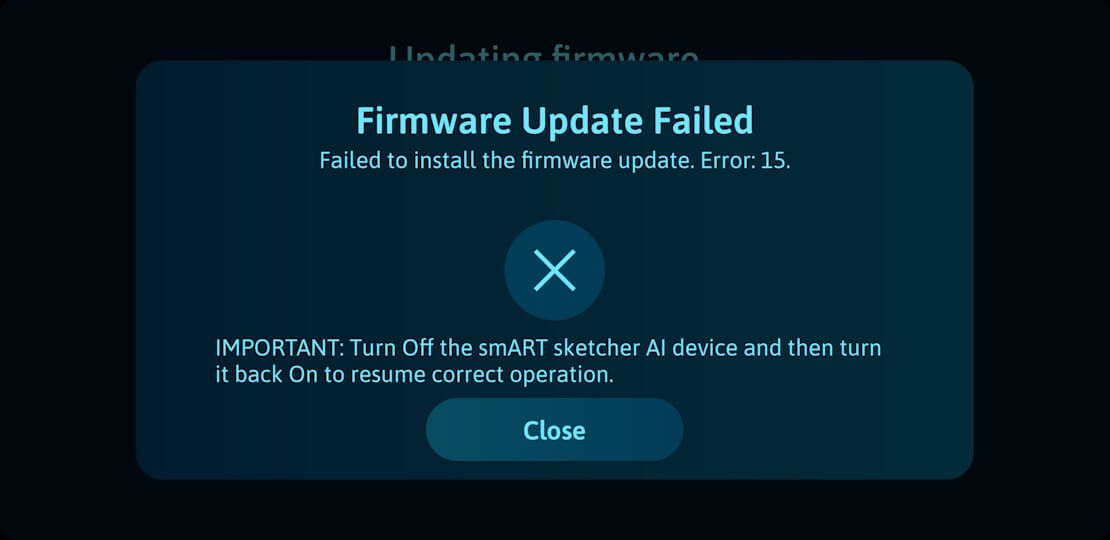
9. If the firmware update failed, you will see a message similar to the below. We recommend to turn Off your smART sketcher AI device, wait several seconds and then turn it back On (the smART sketcher AI will revert to the original firmware). Tap the Close button to return back to the settings screen.